| For the most part, inserting Flash movies into Dreamweaver is almost as easy as inserting an image. Flash files, of course, have some parameters that can be set by Dreamweaver. You can insert a Flash file by clicking the Flash button under the Common tab of the Insert panel. You can also choose Insert, Media, Flash. This will prompt a search for file dialog box where you search for the Flash file. If the Flash file is already saved within your local root folder, you can open the Assets panel by choosing Window, Assets. In the Assets panel, select the Flash category and drag the Flash file into the document. When the Flash move is inside the Dreamweaver document, note all the options available in the Properties Inspector, as pictured in Figure 14.6. Figure 14.6. There are several options for the Flash file in the Properties Inspector.
The Properties Inspector offers the option to play the movie to get a preview of what the Flash content will look like when it is inserted into the document. Also, an option is available for specifying the width and height. If these numbers appear bold, they are not the native size set by the author in Flash. Click on the H and the W to set it to its original size. Aside from all the traditional attributes of alignment, the Properties Inspector offers some additional attributes you can set for your Flash movies. Here's an overview of these options: Loop By default, Loop is checked, which will play the animation from the beginning after it reaches the end. AutoPlay This option plays the Flash movie as soon as possible. Quality This drop-down menu offers four options: High, Low, AutoLow, and AutoHigh. High quality turns antialiasing on to smooth the lines in the animation. Low turns off antialiasing, offering a more jagged look, but the animation will play more smoothly, especially on older machines. AutoHigh, plays in the high quality of antialiasied lines until the performance of the system deteriorates. AutoLow is the opposite of AutoHigh. It will begin the animation in low quality, and switch to high quality when the system performance is adequate. Scale This option determines how the movie will fit into the dimensions specified by the width and height options. There are three choices in the drop-down menu. ShowAll: this option plays the entire movie in the specified dimensions, but will maintain the aspect ratio of the document's original dimensions established in Flash. ExactFit: this option scales the Flash movie to fit the exact dimensions specified by the width and height options in the Properties with total disregard for the Flash movie original aspect ratio. NoBorder: This option fits the movie to the dimensions specified in the Properties Inspector while maintaining the movie original aspect ratio. Some of the movie can be cropped when using this setting. When scaling a Flash movie, make sure you do it in a way that isn't detrimental to the appearance of the movie. If all the content within the Flash movie is vector-based Flash artwork, you have a lot more freedom to scale in Dreamweaver. However, if bitmap graphics are within the Flash movie, scaling, it could distort the appearance of some graphics. It's a good idea to export the final Flash movie in the dimensions you want it to appear on the Web. When that file is brought into Dreamweaver, the developer should respect those sizes and try not to alter them, if possible. Additional Flash Parameters You can add additional attributes to the Flash file by clicking the Parameters button. This launches the Parameters dialog box as shown in Figure 14.7. Figure 14.7. The Parameters dialog box offers an area to place additional attributes to a Flash file.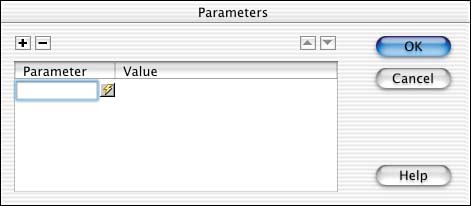
Two parameters you can add are salign and swliveconnect. Each of these attributes enables you to control the appearance of the Flash file when using other attributes in the Properties Inspector. You can use the salign attribute to determine how the Flash movie will position itself to the surrounding frame when the Scale attribute is set to ShowAll. You can also control how the movie gets cropped, by specifying the alignment with Top, Left, Right, and Bottom values. The swliveconnect attribute is used when your Flash movie is communicating to JavaScript through an FSCommand. |

