KDE Desktop
|
| < Day Day Up > |
|
One of KDE's aims is to provide users with a consistent integrated desktop, where all applications use GUI interfaces (see Figure 7-1). To this end, KDE provides its own window manager (KWM), file manager (Konqueror), program manager, and desktop panel (Kicker). You can run any other X Window System-compliant application, such as Mozilla, in KDE, as well as any GNOME application. In turn, you can also run any KDE application, including the Konqueror file manager. You can even run KDE applications in GNOME.

Figure 7-1: The KDE desktop
KDE Menus
When you start KDE, the KDE panel is displayed at the bottom of the screen. Located on the panel are icons for menus and programs, as well as buttons for different desktop screens. For the Bluecurve interface, the KDE panel is made to look exactly like the GNOME panel. On Red Hat, the button for the main menu shows a red fedora, just like the GNOME interface does (normally this is a K on a gear image with a small arrow at the top indicating it is a menu).
This is the button for the KDE main menu. Click this button to display the menu of applications you run (you can also open the main menu by pressing ALT-F1). From the KDE menu, you can access numerous submenus for different kinds of applications. The menu also includes certain key items such as Logout, to log out of KDE; Lock Screen, to lock your desktop; Control Center, to configure your KDE desktop; Run Command, to run programs from a command line; your Home directory, to quickly browse your home directory; and Help, which starts the KDE help tool.
The standard KDE applications installed with the KDE can be accessed through this menu. On Bluecurve, the main menu has most of the same entries as those found on Gnome. The entries have been standardized for both interfaces. You can find entries for categories such as Internet, System Settings, Graphics, and Office. On Red Hat, these menus list both GNOME and KDE applications you can use. The More menus, however, contain submenus where entries may differ between KDE and GNOME. For example, on KDE the More Office Applications submenu located in the Office menu displays entries for KOffice like KWord or KSpread. The More Internet Applications menu contains numerous KDE Internet application like KMail and the Konquerer Web browser. Most of the KDE system tools are located in the More System Tools menu, including KDiskFree and KSystemGuard. These More menus are not limited to KDE applications, and sometimes, KDE applications are included in the primary menu. Red Hat merely places those applications more likely to be used in the primary menus, and those less likely in the More menus.
| Tip | In the KDE Start Here window, the Preferences window holds different tools than the GNOME Preferences window, showing only a few specialized configuration tools. It is best to use the main menu's Preferences menu or the KDE Control Center to configure KDE (Control Center on the main menu). |
Quitting KDE
To quit KDE, you can select the Logout entry in the main menu, or you can right-click anywhere on the desktop and select the Logout entry from the pop-up menu. If you leave any KDE or X11 applications or windows open when you quit, they are automatically restored when you start up again. If you just want to lock your desktop, you can select the Lock screen entry on the main menu and your screen saver will appear. To access a locked desktop, click on the screen and a box appears prompting you for your login password. When you enter the password, your desktop reappears.
| Note | You can display a menu for desktop operations by selecting Enable Desktop Menu from the Desktop pop-up menu displayed when you right-click on the desktop. You can use the Create New menus to create new shortcuts called desktop files for applications and devices, as well as for accessing open windows or changing to different virtual desktops. |
KDE Desktop Operations
A row of icons are displayed along the left side. These include a home directory folder icon labeled Trash, a Start Here icon, and floppy and CD-ROM icons, as well as the Start Here folder for accessing configuration tools. The Trash icon operates like the Recycle Bin in Windows or the trash can on the Mac. Drag items to it to hold them for deletion.. You can use the floppy and CD-ROM icons to mount, unmount, and display the contents of CD-ROMs and floppy disks.
| Tip | You can run the Desktop Settings Wizard on the Preferences menu to easily change your desktop settings. |
The KDE panel displayed across the bottom of the screen initially shows small buttons for the KDE main menu, the Web browser, office tools, a clock, and buttons for virtual desktops, among others. The desktop supports drag-and-drop operations. For example, to print a document, drag it to the Printer icon. You can place any directories on the desktop by simply dragging them from a file manager window to the desktop. The desktop also supports copy-and-paste operations, holding text you copied from one application in a desktop clipboard that you can then use to paste to another application. You can even copy and paste from a Konsole window. For example, you can copy a Web address from a Web page and then paste it into an e-mail message or a word processing document. This feature is supported by the Klipper utility located on the panel.
You can create new directories on the desktop by right-clicking anywhere on the desktop and selecting Create New and then Directory from the pop-up menu. All items that appear on the desktop are located in the Desktop directory in your home directory. There you can find the Trash directory, along with any others you place on the desktop.
Configuring Your Desktop
To configure your desktop, right-click the desktop and select the Configure Desktop entry. This displays a window with entries for Appearance, Behavior, Multiple Desktops, Paths, Background, and Screensaver. All these features can be configured also using the KDE Control Center's "Appearance & Themes" panels.
-
Appearance lets you set the Font and color for text.
-
Behavior lets you enable the display of certain features, like a displaying a desktop menu across the top of the screen, or showing icons on the desktop. You can also select the operations for a mouse click on the desktop. The right-click currently displays the desktop menu. You can also specify which devices to display on the desktop.
-
The Multiple Desktop panel lets you select the number of virtual desktops to display.
-
Paths lets you choose where you want your KDE user directories, like the Trash directory or the Desktop directory, even where you want your documents placed.
-
Background lets you choose a background color or image for each virtual desktop.
-
Screensaver lets you select a screen saver along with its timing. Numerous screen savers are already configured.
For your desktop, you can also select a variety of different themes. A theme changes the look and feel of your desktop, affecting the appearance of GUI elements, such as scroll bars, buttons, and icons. For example, you use the Mac OS theme to make your K Desktop look like a Macintosh. You can use the Theme Manager in the KDE Control Center (Appearance & Themes) to select a theme, and install new ones. Several are already installed for you, including Bluecurve (the current theme), Default (the KDE theme), and Nostalgy, which appears a bit like other popular GUIs. Additional themes for the K Desktop can be downloaded from the themes.freshmeat.net Web site. This site displays themes for all window managers. Be sure to select the KDE entry for KDE themes.
Desktop Files
On the KDE 3.0 desktop, special files called desktop files are used to manage a variety of tasks, including device management, Internet connections, program management, and document types. You create a desktop file by right-clicking the desktop and then selecting Create New. From this menu, you choose the type of desktop file you want to create.
The Directory entry lets you create a link to a directory on your system. The Hard Disk, CD-ROM, and Floppy Device entries each create a desktop file that can mount CD-ROMs, hard disks, or floppy disks on your system. The Text File and HTML File entries are used to reference text files and Web pages on your system. The Link To Application entry is for launching applications. The Link To Location (URL) entry holds a URL address that you can use to access a Web or FTP site.
URL Desktop Files
To create a URL desktop file, right-click the desktop and select the Create New menu, and then the Link To Location (URL) entry. A window appears that displays a box that prompts you to enter a name for the file and the URL address. You can later edit the desktop file by right-clicking it and selecting Properties. A desktop dialog box for URL access is then displayed. This dialog box has four tabbed panels: General, Permissions, URL, and Meta Info (see Figure 7-2). On the General panel is the name of your desktop file. It will have as its name the name that you entered. An Icon button on this panel shows the icon that will be displayed for this desktop file on your desktop. The default is a Web icon. You can change it if you want by clicking the Icon button to open a window that lists icons you can choose from. Click OK when you are finished. The desktop file then appears on your desktop with that icon. On the URL panel, you will see a box labeled URL with a URL you entered already in it. You can change it if you want. For example, for online themes, the URL would be http://themes.freshmeat.net. Be sure to include the protocol, such as http:// or ftp://.
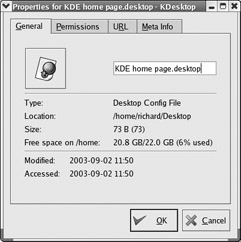
Figure 7-2: The desktop dialog box
On your desktop, you can click the URL icon anytime to access that Web site. An alternative and easier way to create a URL desktop file is simply to drag a URL from a Web page displayed on the file manager to your desktop. A desktop file is automatically generated with that URL. To change the default icon used, you can right-click the file and choose Properties to display the desktop dialog box.
KDE Windows
A KDE window has the same functionality you find in other window managers and desktops. You can resize the window by clicking and dragging any of its corners or sides. A click-and- drag operation on a side extends the window in that dimension, whereas a corner extends both height and width at the same time. Notice that the corners are slightly enhanced. The top of the window has a title bar showing the name of the window, the program name in the case of applications, and the current directory name for the file manager windows. The active window has the title bar highlighted. To move the window, click this title bar and drag it where you want. Right-clicking the window title bar displays a drop-down menu with entries for window operations, such as closing or resizing the window. Within the window, menus, icons, and toolbars for the particular application are displayed.
You can configure the appearance and operation of a window by selecting the Configure Window Behavior entry from the Window menu (right-click the title bar). Here you can set appearance (Window Decorations), button and key operations (Actions), the focus policy such as a mouse click on the window or just passing the mouse over it (Focus), how the window is displayed when moving it (Moving), and advanced features like moving a window directly to another virtual desktop, Active Desktop Borders. All these features can be configured also using the KDE Control Center's "Appearance & Themes" panels.
Opened windows are also shown as buttons on the KDE taskbar located on the panel. The taskbar shows the different programs you are running or windows you have open. This is essentially a docking mechanism that lets you change to a window or application just by clicking its button. When you minimize (iconify) a window, it is reduced to its taskbar button. You can then restore the window by clicking its taskbar button. To the right of the title bar are three small buttons for minimizing, maximizing, or closing the window. You can switch to a window at any time by clicking its taskbar button. From the keyboard, you can use the ALT-TAB key combination to display a list of current applications. Holding down the ALT key and sequentially pressing TAB moves you through the list.
| Tip | KDE supports numerous different themes, of which one is Red Hat's Bluecurve, each displaying window elements in different ways. The Red Hat Bluecurve window theme for KDE 3.0 is shown in these examples. |
Application windows may display a Help Notes button, shown next to the iconify button and displaying a question mark. Clicking this button changes your cursor to a question mark. You can then move the cursor to an item such as an icon on a toolbar, then click it to display a small help note explaining what the item does. For example, clicking a Forward button in the file manager taskbar will show a note explaining that this button performs a browser forward operation.
Virtual Desktops: The KDE Desktop Pager
KDE, like most Linux window managers, supports virtual desktops. In effect, this extends the desktop area on which you can work. You could have Mozilla running on one desktop and be using a text editor in another. KDE can support up to 16 virtual desktops, though the default is four. Your virtual desktops can be displayed and accessed using the KDE Desktop Pager located on the panel. The KDE Desktop Pager represents your virtual desktops as miniature screens showing small squares for each desktop. It is made to look exactly like the Bluecurve GNOME Workspace Switcher described in Chapter 6. By default, there are four squares, numbered 1, 2, 3, and 4. You can have up to 16. To move from one desktop to another, click the square for the destination desktop. Clicking 3 displays the third desktop, and clicking 1 moves you back to the first desktop. If you want to move a window to a different desktop, first open the window's menu by right-clicking the window's title bar. Then select the To Desktop entry, which lists the available desktops. Choose the one you want. You can also right-click the window's title bar to display the window's menu.
You can also configure KDE so that if you move the mouse over the edge of a desktop screen, it automatically moves to the adjoining desktop. You need to imagine the desktops arranged in a four-square configuration, with two top desktops next to each other and two desktops below them. You enable this feature by enabling the Active Desktop Borders feature in the Desktop | Window Behavior | Advanced panel in the KDE Control Center.
To change the number of virtual desktops, you use the KDE Control Center's Desktop entry. Either select the Configure Desktop entry in the Desktop pop-up menu (right-click anywhere on the desktop background) and choose Multiple Desktops, or select Control Center from the main menu and open the Desktop heading to select the Multiple Desktops entry. The visible bar controls the number of desktops. Slide this to the right to add more and to the left to reduce the number. You can change any of the desktop names by clicking a name and entering a new one. In the Appearance & Theme's Background entry, you can change the appearance for particular desktops such as color background and wallpaper (deselect Common background first).
KDE Panel: Kicker
The KDE panel (Kicker), located at the bottom of the screen, provides access to most KDE functions (see Figure 7-3). The panel includes icons for menus, directory windows, specific programs, and virtual desktops. At the left end of the panel is a button for the main menu (also know as the K menu), a red hat icon on Red Hat.
![]()
Figure 7-3: KDE panel
To add an application to the panel, right-click anywhere on the panel and select Add from the pop-up menu. The Add menu displays the kind of objects you can add, such as applets, applications, extensions, and special buttons. For KDE applications, select the applications entry. This lists all installed KDE applications. Click the application entry to add an application button to the panel. You can also drag applications from a file manager window or from the main menu to the panel directly and have them automatically placed in the panel. The panel displays only desktop files. When you drag and drop a file to the panel, a desktop file for it is automatically generated.
Kicker also support numerous applets and several extensions. Applets are designed to run as icons in the panel. These include a clock, a pager, and a system monitor. Extensions add components to your desktop. For example, the Kasbar extension sets up its own panel and list icons for each window you open. You can easily move from one window to another by clicking their corresponding icon in the Kasbar extension panel. Special buttons included buttons for KDE-specific operations like the KDE Window list, a Kterm terminal window, the KDE print manager, and KDE preferences.
To configure the panel position and behavior, right-click the panel and select the Configure Panel entry. This displays a customized control module window that collects the Panel configuration entries from the KDE Control Center. There are three configuration windows, Layout, Appearance, and Taskbar. These conform to the KDE Control center's Desktop | Panels, Appearance & Themes | Panels, and Desktop | Taskbar entries.
The Layout tool has three tabbed panels: Arrangement, Hiding, and Menus. The Arrangement panel enables you to specify the edges of the screen where you want your panel and taskbar displayed. You can also enlarge or reduce it in size. The Hiding panel lets you set the hiding mode, whether to enable auto-hiding or to manually hide and display the taskbar. The Menus panel lets you control the size of your menus as well as whether to display recently opened documents as menu items. You can also select certain default entries like Preferences and Bookmarks, as well as edit the K menu directly, adding or removing items. The Appearance tool lets you set button colors for buttons and background image for the taskbar. With the Taskbar tool, you can control windows and tasks displayed on the taskbar, as well as set the button actions.
|
| < Day Day Up > |
|
EAN: 2147483647
Pages: 328