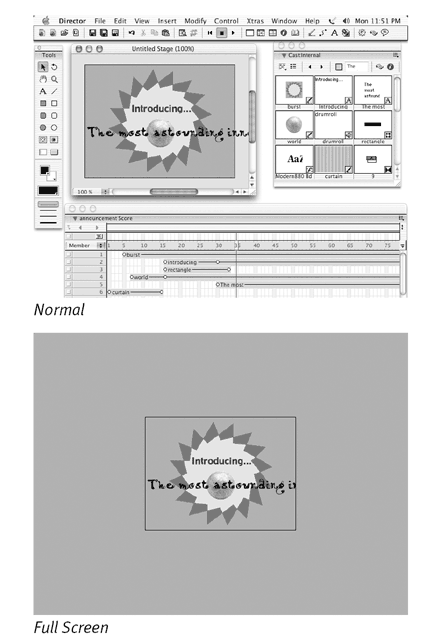
| One of the most important decisions you make in Director is determining the size of the Stage for a movie. For example, if the movie is going to be incorporated into a Web page, you may want to make the Stage relatively small to leave room for other elements in the browser window ( Figure 9.2 ). If the movie is going to be used for a kiosk, you'll want the Stage to be the same size as the screen it will be viewed on. Make your size decision carefully : Even though you can easily change the Stage size at any time, reworking the rest of your movie to fit the new size is not nearly as easy. Figure 9.2. A Shockwave movie incorporated into a Web page. The Stage size here is 300 by 240 pixels.  You can also decide where you want the Stage to be on the screen when your movie is played back. (The two most common choices are the center of the screen, or the upper left corner.) Note, however, that the Stage Location setting applies only to movies that will be played from a projector file (which means, for the most part, movies that are distributed on CD- or DVD-ROM). When you're making a Shockwave movie, you need to determine the location of the movie in the browser window, which you set as part of the publishing process. (See Chapter 17, "Making Movies for the Web.") You can set the background color for the Stage, but you're limited to one background color for the entire movie. If you want the background color to change during the movie, you can create a colored rectangle as a cast member and place it in channel 1 of the Score at the point where you want the new color to begin ( Figure 9.3 ). Figure 9.3. You can change the Stage color in the middle of a movie by using a colored rectangular cast member as a backdrop. 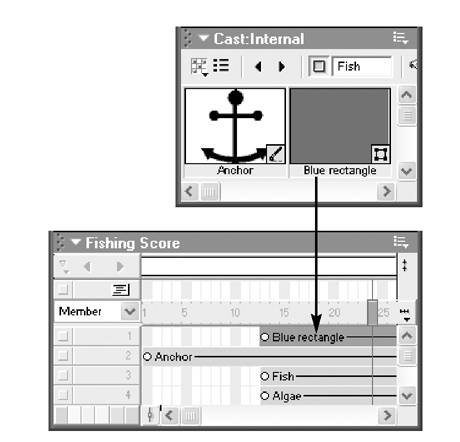 To change the size, location, and background color of the Stage: -
Select the Movie tab in the Property Inspector. If the Movie tab isn't available, click anywhere on the Stage or in the Score, and it will appear. -
Click the List View Mode button, if necessary, to place the Property Inspector in Graphical mode. -
Choose a size from the Stage Size pop-up menu, or type in your own values for the width and height ( Figure 9.4 ). Figure 9.4. Set the Stage size, location, and color on the Movie tab of the Property Inspector. 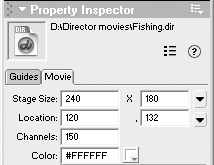 The Stage takes on the new size immediately. -
Choose a Stage location from the Location pop-up menu. Your choices are Centered, Upper Left, and Other. If you choose Other, specify coordinates by entering them in the adjoining boxes. The Stage jumps to the new location. -
Choose a background color from the Color menu (or type in your own color in hexadecimal format). The Stage immediately takes on the new color. The "offstage area" (the gray rectangle surrounding the Stage) is not affected.  Tips Tips -
The Stage size, location, and color settings are saved with each movie. Therefore, don't be surprised if your Stage changes size or jumps to another part of the screen when you open a previously saved movie. -
If you move the Stage manually by dragging it with the mouse, its new position is not saved with the movie. In order for a Stage location to take effect on playback, it must be explicitly entered in the Property Inspector. -
If you begin a new movie (by choosing File > New Movie, or by starting Director without double-clicking an existing movie file), the Stage will retain whatever characteristics it had in the last movie you were working on.
To view the Stage in Full Screen mode: Tips -
Despite its name , Full Screen mode doesn't change the size of the Stage to match the dimensions of your screen; it merely makes the Stage the only thing on the screen. -
The menu bar disappears in Full Screen mode, so how do you turn Full Screen mode off? Easyclick at the top of the screen where the menu bar should be, and it reappears. Choose View > Full Screen again to toggle your screen back to its normal state.
To show or hide the control panel at the bottom of the Stage: To set the title of the Stage: -
Select the Movie tab in the Property Inspector. -
Click the List View Mode button, if necessary, to place the Property Inspector in List view. -
In the Title field, type a name to appear in the title bar above the Stage ( Figure 9.6 ). Figure 9.6. The Title field appears only when the Property Inspector is in List view. 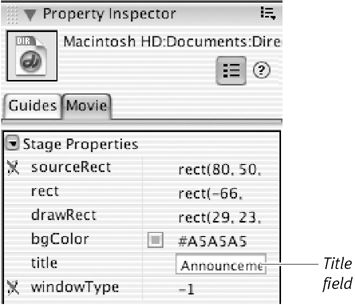 Tip -
If you don't enter a title, Director uses the name of the current movie file (or Untitled , if the movie hasn't yet been given a filename), followed by the word Stage .
|