63 Add Titles to Your AutoMovie
| < Day Day Up > |
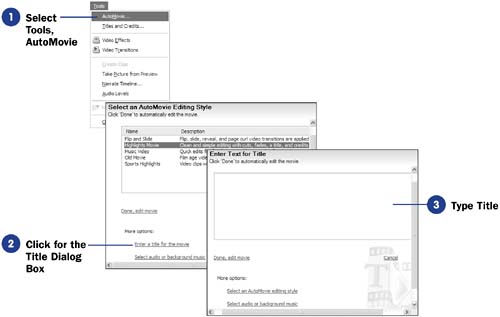
| Before You Begin See Also Your AutoMovie can have a title and ending credits. The text you enter is used for both an opening title and an ending title before the credits roll. The text fades in all at once before fading out at the beginning of your movie, then scrolls up from the bottom at the end. If you enter more than four lines of text, Movie Maker displays all the lines (up to seven total) for the movie title, but when the AutoMovie ends, Movie Maker plays only the first four lines and then displays a Directed By tagline .
 |


| < Day Day Up > |
EAN: 2147483647
Pages: 169