Flylib.com

Books Software


Section 88. Exploring Scripts in InDesign


#88. Exploring Scripts in InDesign

InDesign is a page layout application laden with powerful features and tools. But if there happens to be a task you wish InDesign could help with, look no further than scripts. Scripts in InDesign are plain text files that can be written in AppleScript for Mac, VBScript for Windows, or JavaScript for cross-platform support to extend InDesign's base functionality to accomplish particular tasks faster or more efficiently .

Scripting in Other CS2 Applications

The ability to extend an application through scripting is also available in all CS2 applications (including Bridge). But since applications such as Photoshop and Illustrator offer a user interface for building automated tasks through Actions, looking to scripts to automate these applications is usually reserved for more demanding workflow needs. But keep in mind that scripting is available in the entire suite of applications if you should ever need it.


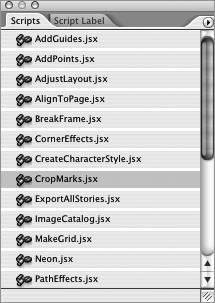
Fortunately, you don't have to learn to code to reap the benefits of InDesign scripts. You can install scripts into InDesign that others have been so kind to develop and start running them with a simple double-click. Many sample scripts are available to you on the CS2 install disc. If you own Adobe Creative Suite 2 Premium, look on the Resources and extras disc (not Disk 2) and follow this path : Technical Information/InDesign CS2/Scripting/Adobe Sample Scripts/JavaScript. To install these sample scripts into InDesign, select all the scripts and copy them into your InDesign's Scripts folder (Adobe InDesign/Presets/Scripts). You should also copy the Read Me PDF found in the Adobe Sample Scripts folder to learn what each script does. Then quit InDesign if you happen to have it running. Launch InDesign and choose Window > Automation > Scripts to open the Scripts palette. The sample scripts you installed should now be available to you from this palette ( Figure 88 ). To run a script, simply double-click it. Many of the scripts require you to have an object selected first, but they display a message window informing you of such.

Figure 88. Once you've loaded the sample scripts into InDesign, you'll have unleashed a whole new set of features and functionality that was lurking underneath the power of scripting.


Be sure to try each script to become familiar with its capabilities. For even more scripts, go to Adobe's Resource Center Studio Exchange at http://share.studio.adobe.com. Here you'll not only find scripts for InDesign and other CS2 applications, but other helpful tools such as templates and plug-ins. When I last checked, there were close to 200 scripts available for InDesign.


#89. Detecting Rollover Images in GoLive

One of the timesaving features in GoLive is its ability to detect rollover images by looking for commonly used suffixes to filenames such as "-out, -over, -down" when you add the main graphic to a page. For instance, if you created a graphic named "about.gif" and named the over and down states "about-over.gif" and "about-down.gif," GoLive will automatically associate the images to the main graphic in the Rollovers palette and produce the necessary code to string all the rollover states together, including efficient preloader code.

Keeping Rollovers Smart with ImageReady

ImageReady excels at helping you create button graphics with rollover states. What's more, GoLive and ImageReady work really well together. So instead of saving your optimized graphics in ImageReady, add your ImageReady file as a Photoshop Smart Object to your GoLive site with your rollover states assigned. When you add the Smart Object to a page in GoLive, your rollover states are still automatically detected , and you gain the flexibility to quickly make changes to the ImageReady file.


GoLive's Detect Rollover Images feature is on by default. So to take advantage of it, you just need to make sure GoLive is aware of your file naming conventions and that you save all your images in the same folder. To review GoLive detection settings, open the Rollovers palette (Window > Rollovers) and choose Rollover Detection Settings from the palette's menu. This actually brings up the Rollover settings in GoLive's Preferences dialog ( Figure 89a ). You can choose to follow any of the naming conventions shown or add your own naming scheme by clicking the New Item button . Click OK when you've finished reviewing the detection settings.

Figure 89a. Use the Rollovers Preferences to see which naming conventions GoLive is set to detect, or add your own.


Now create and save all your rollover graphics to a folder within your GoLive site, using a naming convention GoLive is aware of. Drag your main graphic of the rollover set into a GoLive page. A small rollover icon appears in the lower-left corner of your graphic, letting you know that GoLive has detected your rollover states. Go to the Rollovers palette, and you'll see that all your rollover states have been automatically created ( Figure 89b ). Switch to Preview mode to see your rollovers in action.

Figure 89b. Once you've added your main graphic, GoLive intelligently detects the other rollover images in the set and then builds the entire rollover interaction for you in the Rollovers palette.