Organize Your Content with Lists
|
HTML lists are a great way to organize content on your Web site. Whether you want to list the ingredients of your favorite recipe, create a page of links with their descriptions, or offer step-by- step instructions for washing a dog, you can use list elements to put your material in order. Another benefit that comes from working with lists is that it will give you some experience in nesting your elements.
Create Unordered Lists with <ul> and <li>
An unordered list is what you might know as a bulleted list. The items in the list are not organized by number or letter. Rather, each item has a small symbol (bullet) in front of it. In HTML, you can create unordered lists that have a solid disc, a circle, or a square.
Use <ul> and <li> to Create an Unordered List
You need two elements to create an unordered (bulleted) list:
-
<ul> </ul> The unordered list element creates the list.
-
<li> </li> You specify individual items on the list with the list item element.
Use your template to create a new HTML document. Save it in your HTML reference directory as ulist.htm. Then, in between the <body> </body> tags:
-
Type an opening unordered list tag: <ul>.
-
Next, add a set of list item tags: <li> </li>.
-
For each new list item, add another set of <li> </li> tags.
-
When the list is complete, type a closing </ul> tag.
The code for a simple unordered list might look something like what you see here:
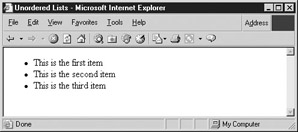
<html> <head> <title>Unordered Lists</title> <head> <body> <ul> <li>This is the first item</li> <li>This is the second item</li> <li>This is the third item</li> </ul> </body> </html>
When you display your page in a browser, it will produce a bulleted list, like the one in the illustration here:
The W3C is an international organization responsible for setting the standards concerning the Internet, World Wide Web, HTML, XHTML, and any other related technologies.
You’ll notice when you display the list that your browser supplies a solid disc as the bullet for each item. If you would prefer a circle or a square, you can specify it by using the type attribute. However, before you begin experimenting with different bullet types, you need to understand something about the type attribute and why the W3C doesn’t want you to use it.
Understand Deprecated Elements and Attributes
Over the years since HTML was developed, browser companies (specifically Netscape and Internet Explorer) have extended it to include what might be known as presentational elements. For example, Netscape introduced the <blink> element, which causes text to blink on and off. Internet Explorer introduced the <marquee> element, which makes text scroll across the screen like a movie marquee. Some of these proprietary elements were supported only by their respective browsers; others were eventually incorporated into the HTML standard. For example, frames are a Netscape innovation that ultimately became part of HTML. However, as more and more presentational elements were added, HTML moved farther and farther away from its original purpose—describing document content.
The W3C has been working for several years to eliminate any HTML markup that governs appearance. The reasons for this move, and the alternative method for addressing presentation (Cascading Style Sheets), will be introduced in Chapter 3, but it’s important to understand now that certain elements and attributes have been officially deprecated by the W3C. Deprecated is just a fancy way of saying that they don’t want you to use those elements and attributes anymore. Don’t worry, though. Nobody from the “Web Police” will knock on your door if you use these deprecated portions of HTML. However, the possibility exists that browsers may eventually stop supporting them. If your Web pages are built on those elements and attributes, you might find yourself having to redo them down the line.
Use the type Attribute to Specify Different Bullets (Deprecated)
The type attribute enables you to choose between a disc, circle, or square as the bullet for your list items. Even though this attribute has been deprecated in favor of Cascading Style Sheets, you’ll find it helpful to learn how to use it. Just as working with lists will help you understand the concept of nesting, using the type attribute will enable you to become acquainted with attributes and how they work.
There are two different ways you can use the type attribute in a list: globally (the entire list) or individual list items. To specify the bullets for an entire list, put the attribute inside the opening <ul> tag:
-
To specify a square: <ul type="square">
-
To specify a circle: <ul type="circle">
-
To specify a disc: <ul type="disc">
You also can control the type of bullet for each separate item by putting the attribute inside the <li> tag. For example, the following code will supply a different bullet for each item.
<ul> <li type="square">This supplies a square.</li> <li type="circle">This supplies a circle.</li> <li type="disc">This supplies a disc.</li> </ul>
Project 2: Create a Multilevel List
To create a list with multiple levels, you simply nest one or more unordered lists inside each other. Save ulist.htm with the new name ulist2.htm. Now make a multilevel list from it:
-
Change the <title> to read Multi-Level Unordered Lists.
-
In the first <ul> tag, just below the body tag, enter type="square".
-
Inside the first set of <li> tags, type <ul>.
-
Inside this new <ul> tag, enter type="circle".
-
Add a line that says <li>This is a sub point.</li>.
-
Add another line that reads: <li>This is a sub point.</li>.
-
Close out the sublist with </ul>.
-
Add a set of subpoints to the second main point. Use type="disc" to specify the disc bullet.
-
Add a set of subpoints to the third main point. Use type="square" to specify the square bullet.
Your list should look like this:
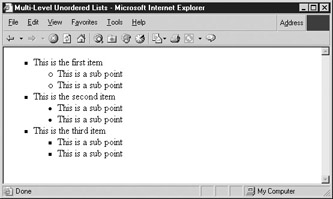
<html> <head> <title>Multi-Level Unordered Lists</title> <head> <body> <ul type="square"> <li>This is the first item <ul type="circle"> <li>This is a sub point</li> <li>This is a sub point</li> </ul> </li> <li>This is the second item <ul type="disc"> <li>This is a sub point</li> <li>This is a sub point</li> </ul> </li> <li>This is the third item <ul type="square"> <li>This is a sub point</li> <li>This is a sub point</li> </ul> </li> </ul> </body> </html>
If you want to add another level of sub points, you can do it by nesting another complete list inside each <li> </li> element where you want the next level. A multilevel list such as the one rendered here will resemble the following illustration:
| Caution | You can get away with putting your sublist below the list item to which it applies instead of inside the tags. Most browsers will still display it properly. However, it’s sloppy HTML and will not meet the more stringent standards of XHTML. |
Create Ordered Lists with <ol> and <li>
What if you want to display an outline with numbers and letters delineating the various points? Or perhaps you want to create a list of instructions in numbered sequence. Lists that arrange items in sequence by number or letter are called ordered lists in HTML and are quite similar in their structure to unordered lists. To create an ordered list, you need the following:
-
<ol> </ol> This is the ordered list element.
-
<li> </li> This is the list item element.
Use <ol> to Create a Numbered List
You can create a simple numbered list by enclosing a series of list items inside the ordered list element, as in the following sample page. Use your template to open a new HTML page and save it as olist.htm. Then type in this code:
<html> <head> <title>Ordered Lists</title> </head> <body> <ol> <li>Ordered lists display items with numbers.</li> <li>But HTML doesn't sort the items.</li> <li>It only numbers them.</li> <li>You have to do the arranging yourself.</li> </ol> </body> </html>
After you save your page, display it in your browser. You should see a numbered list like this:

When you display this in a browser, you will notice that the list is numbered in sequence. The actual format depends on the browser you use, but normally it is a simple list with Arabic numerals. One important difference with numbered lists is that if you nest the lists to create multiple levels, the browser uses the same numbering system throughout; it does not automatically change to a different style with each level. You must use the type attribute or Cascading Style Sheets to specify any changes you want.
Use the type Attribute to Specify Numbers or Letters (Deprecated)
Just as you can instruct the browser to use different types of bullets in an unordered list, you can tell the browser what types of letters or numbers to use. This is very useful if you want to produce an outline in HTML, as you have a nice range of choices available. You specify numbers or letters with the type attribute, just as you did for unordered lists.
-
<ol type="I"> Capitalized Roman numerals
-
<ol type="i"> Lowercase Roman numerals
-
<ol type="1"> Numbers (default)
-
<ol type="A"> Capital letters
-
<ol type="a"> Lowercase letters
As with unordered lists, if you place the type attribute inside the <ol> tag, you can specify your preferences for the entire list. If you place the attribute inside a <li> tag, it will change only that particular list item.
Use the start Attribute to Choose a Starting Number (Deprecated)
What if you want to begin a list at a point other than 1 or A? All you need to do is include the start attribute at the point where you want to change the number or letter. The browser will start the list at the number you choose and continue numbering from that point. For example, if you want to start a list at the number 23, you might do it this way:
<ol type="1" start="23">
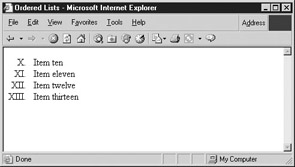
Create a new HTML document and save it as olist2.htm. Now, try typing the following code and displaying it in your browser to see what a list like this might look like if you did it with Roman numerals, starting at number 10:
<html> <head> <title>Ordered Lists</title> </head> <body> <ol type="I" start="10"> <li>Item ten</li> <li>Item eleven</li> <li>Item twelve</li> <li>Item thirteen</li> </ol> </body> </html>
When you display this in your browser, the list will begin with the Roman numeral “X,” as in the following:
| Caution | Beware of a little quirk with the start attribute. It makes no difference whether you are using numbers, letters, or Roman numerals in your list. To specify a starting point, you always do it with Arabic numbers (1, 2, 3), not the characters that will display in the outline. If you modify the preceding code to use the Roman numeral for 10, start=“X”, you’ll find the browser ignores the instruction entirely. |
Project 3: Create an Outline with <ol>
To present material in outline format in HTML takes a bit more thought and planning than it does with an average word processor, but it will produce satisfying results. The following sample HTML code will produce a 2-point Roman numeral outline with lettered subpoints. Save it as olist3.htm:
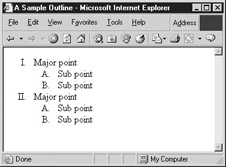
<html> <head> <title>A Sample Outline</title> </head> <body> <ol type="I"> <li>Major point <ol type="A"> <li>Sub point</li> <li>Sub point</li> </ol> </li> <li>Major point <ol type="A"> <li>Sub point</li> <li>Sub point</li> </ol> </li> </ol> </body> </html>
The following illustration shows how an outline would look on your Web browser:
| Tip | Make sure you have properly nested your tags. Your subpoint list should be placed in between the list item tag it relates to. If you overlap them or leave out a closing </ol> tag, your outline will not display the way you want it to. |
Create Definition Lists with <dl>, <dt>, and <dd>
Perhaps the most versatile type of list is the definition list. Originally developed as a means of creating glossaries in a document, this type of list lends itself most readily for use on Web sites. You will use a different set of elements to create this type of list:
-
<dl> </dl> The definition list element creates the list.
-
<dt> </dt> The definition term element identifies the term to be defined.
-
<dd> </dd> The definition description element sets off the definition.
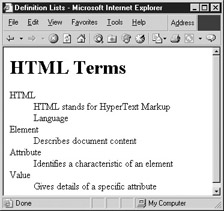
To see how a definition list works, try typing in the following code and displaying it in your browser. Save the file as dlist.htm. Notice that the code also includes some of the text formatting elements covered earlier in this chapter:
<html> <head> <title>Definition Lists</title> </head> <body> <h1>HTML Terms</h1> <dl> <dt>HTML</dt> <dd>HyperText Markup Language</dd> <dt>Element</dt> <dd>Describes document content.</dd> <dt>Attribute</dt> <dd>Identifies a characteristic of an element</dd> <dt>Value</dt> <dd> Gives details of a specific attribute</dd> </dl> </body> </html>
Displayed in a browser, a definition list will look similar to the one in the following illustration:
As you can see, this type of list can be very useful; you could use it to provide a page of links, with a special paragraph explaining each link. It also might be used to create a directory (often called a site map) of your Web site. The possible uses of the definition list are limited only by your imagination.
|
EAN: 2147483647
Pages: 126
- Chapter XII Web Design and E-Commerce
- Chapter XIII Shopping Agent Web Sites: A Comparative Shopping Environment
- Chapter XV Customer Trust in Online Commerce
- Chapter XVI Turning Web Surfers into Loyal Customers: Cognitive Lock-In Through Interface Design and Web Site Usability
- Chapter XVII Internet Markets and E-Loyalty