Designing HTML Help
| HTML Help files are built up from multiple source files.
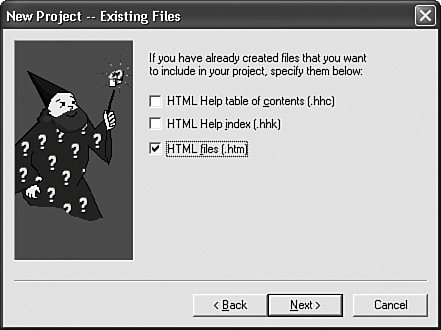
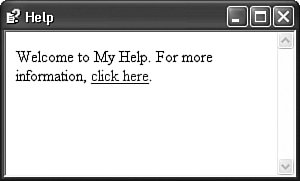
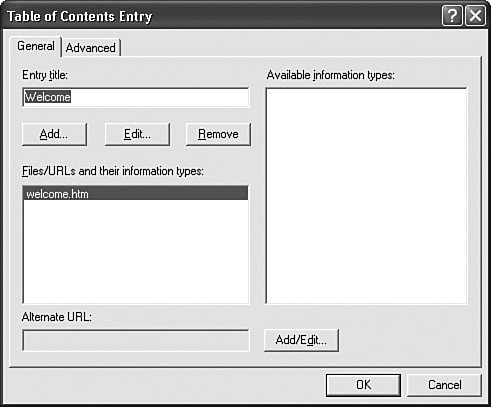
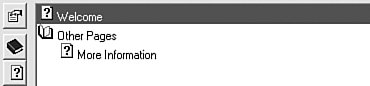
The primary content files can be built by hand using any standard HTML tool you wish, as long as the output format matches what is expected by the HTML Help Compiler (supplied by Microsoft). For the content files, it generally doesn't matter what tool you use, because standard HTML is sufficient. Any hyperlinks that you include in the content to other help pages in the same directory will become standard help links in the compiled help file. The non-content files require a very precise format; they are all based on HTML, except the Help Project file, which is an INI file. You will either need to design these files by hand using the expected format, or use a tool that can generate these files for you in the right format. Microsoft provides a free tool that helps you create the non-content files, and joins together the content files with them for final compilation. You can download HTML Help Workshop directly from Microsoft's web site. Go to the Microsoft Download Center: http://www.microsoft.com/downloads and search for "HTML Help Workshop." You will receive a few results, but the first one in the list (when sorted by popularity) should be the one you need. Figure 23-1 shows the main page of the HTML Help Workshop application with an active project file open. Figure 23-1. Giving help to those who really need it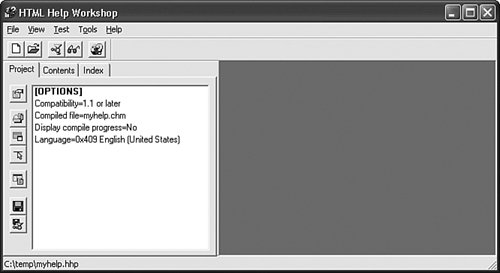 In the rest of this section, we'll use HTML Help Workshop to build a simple HTML Help file that contains two pages: a welcome page, and a "more information" page. You can find this sample help project in the HTMLHelpSample subdirectory of the book's installation directory. Content FilesOur mini-project includes two content files: welcome.htm and moreinfo.htm. Ever the technology maven, I crafted them in Notepad. Here's the content for welcome.htm. <html> <head><title>Welcome to My Help</title></head> <body> Welcome to My Help. For more information, <a href="moreinfo.htm">click here</a>. </body> </html> The moreinfo.htm file is a lot like it. <html> <head><title>My Help Additional Info</title></head> <body> Not much more to say. For a greeting, <a href="welcome.htm">click here</a>. </body> </html> You can add graphics files (like JPEG and GIF files) and link them in as you normally would in a web page. Be sure to store the graphic files in the same directory (or subdirectory) as the main file for easy access. Help Project FileLet's generate the remaining files through HTML Help Workshop. Start it up, and use the File Figure 23-2. Locate the files now, or you can do it later Add the two HTML files in the next step, and complete the wizard. The project file is created with references to your two files. The project is pretty empty; it doesn't even have a window title defined for the compiled help file. You can set the title and other general settings through the project options, accessed through the top-most button in the Toolbar that runs on the left side of the main window. You can also double-click on the [OPTIONS] item in the project details list. When the option window appears, enter "Simple Help" in the Title field, then click OK. Here is what the project file contains at this point. [OPTIONS] Compatibility=1.1 or later Compiled file=Simple.chm Default topic=welcome.htm Display compile progress=No Language=0x409 English (United States) Title=Simple Help [FILES] welcome.htm moreinfo.htm [INFOTYPES] The file will change as we add the other two non-content files, but not by much. Compiling the file right now (using the File Figure 23-3. A little help, very little Help Contents FileA table of contents will help the user peruse this massive online help experience. To add a contents file, click on the Contents tab on the left side of the main form, and respond to the prompt that you wish to create a new file, naming it Simple.hhc. The form changes to display a table-of-contents editor. Another way to create the contents file is by using the File Use the new Toolbar buttons running down the left side of the window to add and modify contents entries. First, use the top button (Contents properties) to edit the options for the table of contents. On the Table of Contents Properties form, uncheck the Use folders instead of books field, and click OK. The next two buttonsthe book button (insert a heading) and the page/question mark button (insert a page)are the main buttons used to add new entries to the contents. I clicked the insert a page button to get to the Table of Contents Entry form shown in Figure 23-4. Figure 23-4. Adding a help page As shown in the figure, I set the entry title (Welcome), and selected the "Welcome to My Help" (welcome.htm) file through the Add button. I did the same for the moreinfo.htm file, giving it a title of "More Information." I also added a heading entry using the insert a heading Toolbar button on the main form, naming it "Other Pages." I used the arrow Toolbar buttons to move the moreinfo.htm entry into this heading section. Then I took a well-deserved break and looked at my completed table of contents in Figure 23-5. Figure 23-5. The full table of contents If you compile and run the file, it now includes the table of contents in a separate panel, plus a Toolbar (see Figure 23-6). Figure 23-6. New improved TOC; same great content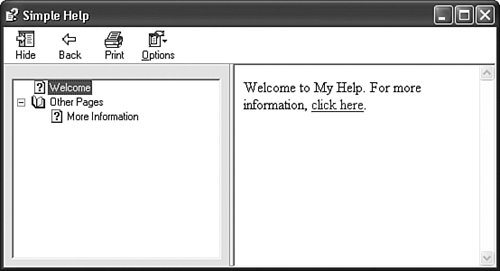 Help Keywords (Index) FileAn index file lets the user access specific pages by searching for a concept or subject from a list. There is a many-to-many relationship between these keywords and the help pages: one keyword can lead to one or more pages, and a single page can be the target of multiple keywords. Create an index by clicking on the Index tab on the left half of the main form, and respond to the prompt that you want to create a new index file, calling it Simple.hhk. As with the Contents editor, the Index editor includes a small vertical toolbar. Use the second button in the toolbar, the one with the key image, to create new keyword entries. I will add three keywords:
The Index Entry editor form works just like the Table of Contents Entry form, allowing you to specify the target pages for each keyword. Saving and compiling the project adds index features to the compiled help file. Formatting Help WindowsOn my system, running the compiled help file displayed the content in a little window in the upper-right corner of the screen. But my help content is important; I want it to appear much closer to the middle of the screen, and in a larger window. Fortunately, you can control the windows used to display the content. Return to the Project tab and click on the third toolbar button down on the left side of the window. This button, Add/modify window definitions, lets you define one or more windows to use for distinct help pages in your file. When prompted, add a New Window Type named SimpleWindow. The Window Types dialog that appears has many options for getting just the window you want, although you're probably being too picky if you need more than, say, 243 different window types. The Position tab is a lot of fun. It includes an Autosizer button that lets you drag a window to the desired size. Adjust the size to something reasonable, add a Title bar text of "Simple Help" back on the General tab, and click OK. Because this is the only defined window, it becomes the default, and will be used for the main help display the next time you compile and run the file. |
EAN: 2147483647
Pages: 247