| In Shake, color is typically described in an RGB range between 0 and 1. The color nodes are generally either mathematical corrections to color (for example, adding.5 to the red channel) or the rearranging of specific color channels. Many of the color-correction nodes can have identical results. For example, Mult and Brightness are the same command, except Brightness affects all three RGB channels at the same time, whereas Mult allows you to adjust each channel individually. Other functions such as Lookup and ColorX can also duplicate most of the other color nodes. Although ColorX is the most powerful and complicated node on the Color tab, it is also the slowest because it acts on each individual pixel. Shake's basic color correctors are split up into nodes that can be rearranged in any fashion you wish. The basic nodes are as follows: Add The Add function adds to the R, G, B, or A channel. It will also add color to black areas, including those beyond the image frame, in case you move the image later on.  Brightness This function is simply a multiplier on the RGB channels and is useful for brightening or darkening an image.  ContrastLum ContrastLum applies a contrast change to the image, with a smooth falloff on both the low and high ends.  Gamma A gamma correction affects only the midtones while retaining the black and white values of an image. Pixels with a value of 0 or 1 are unaffected. Only nonblack and nonwhite pixels are adjusted.  Mult This function multiplies the R, G, B, or A channel. Unlike Add, the Mult operator does not add color to black areas.  Lookup This performs an arbitrary lookup on the image. It is extremely flexible, allowing you to mimic most other color-correction nodes. It's also handy for adjusting color values using a curve.  Reorder The Reorder operator lets you shuffle channels. The argument to this command specifies the new order. A channel can be copied to several different channels. 
Using the Color Nodes It's time to try out a few of the color nodes. 1. | Open Shake.
| 2. | Choose File > Open Script.
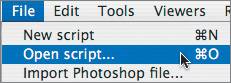 | 3. | Go to the Lesson05 folder and load the color1.shk script.
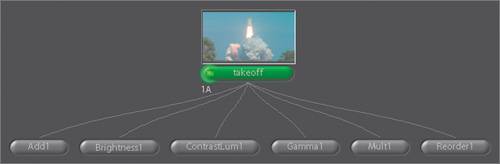
This script has a space shuttle image connected to some basic color-correction nodes.
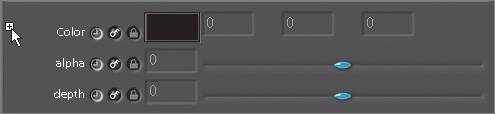
 | 4. | Double-click the Add1 node.
You'll see a + next to the Color parameter. This means that additional parameters can be viewed.
 | 5. | Click the + next to the Color parameter.
This reveals a row of radio buttons with another + at the far left.
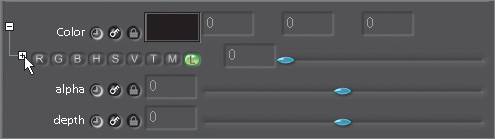 | 6. | Click the + next to the R radio button.
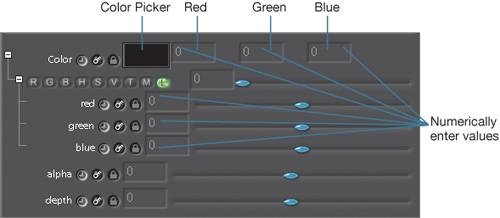 When tuning parameters within the color nodes, you can choose several methods: When tuning parameters within the color nodes, you can choose several methods:
- Enter numeric values in the RGB text fields.
- Drag the slider next to each text field.
- Click the color swatch and select a color from the Color Picker.
- Use keyboard shortcuts: If you press the keyboard character R (red), G (green), B (blue), H (hue), S (saturation), V (value), L (luminance), M (magenta), or T (temperature) and drag left and right in the Parameters workspace, you will modify that parameter.
 - To gang up the Red, Green, and Blue sliders, press V (value) and drag left and right.
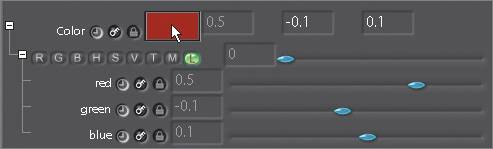
| 7. | Press the R key and drag to the right in the Parameters workspace.
This will add to the red channel.
| 8. | Once you have added red, press the H key and drag left and right.
This shifts the hue of the color. Modifying using this method modifies only the color that is added, multiplied, and so on. For example, dragging a color while pressing S (saturation), will decrease not the saturation of the image but rather the saturation of the color that you are adding to the image.
| 9. | View and edit each of the other color nodes attached to the takeoff node by double-clicking them. Go ahead and experiment by adjusting each node's parameters to see how it affects the image.
| 10. | Now double-click the Reorder1 node.
 The Reorder function allows you to easily move an image's channels around.
| 11. | To copy the red channel to all three channels while leaving the alpha alone, type rrra in the Channels parameter.
All three color channels come from the red channel.
| 12. | View each color channel, ending with the alpha channel in the Viewer, by clicking the View RGBA Channels button.
| 13. | To remove the alpha channel, type rgbn in the Channels parameter.
The alpha channel turns black.
| 14. | To copy the luminance into the alpha channel, type rgbl.
The letter l refers to luminance, which is the average luminance of the color channels.
| 15. | Press the C key in the Viewer to show the RGB channels.
|
These are just the basic color-correction tools in Shake; many more are located on the Color tab. |