11.3. Exporting a Saved Slideshow
| < Day Day Up > |
11.2. Exporting an Instant SlideshowBefore you send your "slideshow movie" to hapless relatives who will have to endure downloading it over a dial-up connection, make sure it's worth watching in the first place. 11.2.1. Step 1: Perfect the SlideshowAs you review your presentation, place the pictures into the proper sequence, remembering that you won't be there to verbally "set up" the slideshow and comment as it plays. Ask yourself, "If I knew nothing about this subject, would this show make sense to me?" During this exercise, you might decide that your presentation could use a few more descriptive images to better tell the story. If that's the case, go back through your master photo library and look for pictures of easily recognizable landmarks and signs. Put one or two at the beginning of the show to set the stage. For example, if your slideshow is about a vacation in Washington, D.C., then you might want to open with a picture of the Capitol, White House, or Lincoln Memorial. Tip: If you don't have any suitable opening shots in your library, or even if you do, another option is to begin your show with a few words of text, like opening credits. To do so, create a JPEG graphic containing the text in a program like AppleWorks, Photoshop, or GraphicConverter. (Make sure this graphic matches the pixel dimensions of your slideshow, as described in the following section.) Then drag the file right into your slideshow album, placing it first in the sequence. You've got yourself an opening title screen. 11.2.1.1 Which photos make the cutIf you're used to the slideshow feature described in Chapter 7, the method for specifying which photos are exported to your QuickTime movie might throw you.
When you're ready to convert your presentation to a QuickTime movie, choose Share
The Export Photos dialog box appears, as shown in Figure 11-2. Click the QuickTime tab, where you have some important decisions to make. 11.2.2. Step 2: Choose the Movie DimensionsSpecifying the width and height for your movie affects not only how big it is on the screen during playback, but also its file size, which may become an issue if you plan to email the movie to other people. iPhoto generally proposes 640 x 480 pixels. That's an ideal size: big enough for people to see some detail in the photo, but usually small enough to send, in compressed form, by email. 11.2.2.1 Proportion considerationsAll of these suggestions assume, by the way, that your photos' dimensions are in a 4:3 ratio, the way they come from most cameras (see page 149). That way, they'll fit nicely into the standard QuickTime playback window. But there's nothing to stop you from typing other numbers into the Width and Height boxes. If most of the shots are vertical, for example, you'll want to reverse the proposed dimensions so that they're 480 x 640, resulting in a taller, thinner playback window. In any case, it would be hard to imagine why you'd want to choose dimensions other than those in a 4:3 ratio unless:
11.2.2.2 Size considerationsAs you choose dimensions, however, bear in mind that they also determine the file size of the resulting QuickTime movie. That's not much of an issue if you plan to play the movie from a CD, DVD, or hard drive. (And in that case, you might want to generate your movie from a saved slideshow instead, as described below.) But if you plan to send the movie by email or post it on a Web page, watch out for ballooning file sizes that will slow dial-up sufferers to a crawl. For example, consider an 18-slide movie with an MP3 music soundtrack. At 640 x 480 pixels, this movie would take up 3.1 MB on your hard driveand at least that much in your recipients' email inboxes. Scaling it down to half that size in each dimension (320 x 240) would shave off about a third of that, resulting in a 2.4 MB file. But 2.4 MB is still a very big file to send as an email attachment to anyone who connects with a dial-up modem. You could, of course, reduce the dimensions even further, but the pictures would be so microscopic that the project wouldn't be worth doing. In that case, you might want to start whittling down the music rather than the photos (see the box on the next page). 11.2.2.3 Managing MusicIn the Music section of your QuickTime export dialog box, you have the option of including the soundtrack you originally selected for your movie (page 186) by turning on the box labeled, "Add currently selected music to movie." (If you want a different soundtrack, click Cancel, click the Play Slideshow triangle beneath the Source list, click the Music tab, choose a different song from your iTunes collection, and click Save Settings.) To save file size, you could turn off this box. That 320 x 240 movie would shrink to a mere 350 Ka fraction of the size of the presentation with the original soundtrack. Of course, you'd also wind up with a silent movie. Fortunately, there is a middle road. It involves some work in iTunes and a slight reduction in sound quality, but reducing the file size of the music track can result in substantial file shrinkage . See the box below for details. 11.2.3. Step 3: Seconds per PhotoHow many seconds do you want each picture to remain on the screen before the next one appears? You specify this number using the "Display image for ___ seconds" box in the QuickTime Export dialog box. When you first open the dialog box, iPhoto proposes whatever frame rate you used in your original slideshow. You're free to change it to other timings. (Although you can type a frame rate shorter than one second, iPhoto won't actually create the show with a rate any faster than one image per second. So much for artistic license.)
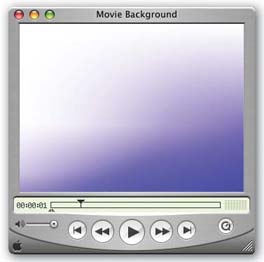
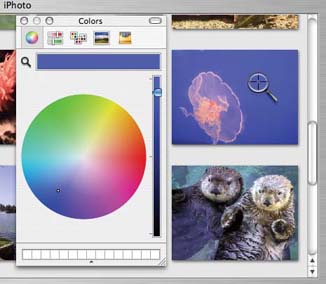
11.2.4. Step 4: Background ColorsThe color or image you choose in the Background section of the dialog box will appear as the first and last frames of the export. It will also fill in the margins of the frame when a vertically oriented or oddly proportioned picture appears. 11.2.4.1 Solid colorsTo specify a solid color, click the color swatch next to the Color button. The color picker described in the figure on page 234 appears. Generally speaking, white, light gray, or black makes the best background. Black is particularly good if you've bought QuickTime Player Pro (Chapter 11) and want to present your slideshow in full-screen mode, which turns the Mac into a virtual movie screen and makes the borders between your movie and the screen indistinguishable. 11.2.5. Background graphicsIf you click the Image button and then the Set button next to it, you can navigate your hard drive in search of a graphics file to use as the slideshow background. This is where a graphics program like AppleWorks, Photoshop, or Graphic Converter comes in handy. By designing a picture there (in dimensions that match your movie) and exporting it as a JPEG file, you have complete freedom to control the kind of "movie screen" your QuickTime slideshow will have (Figure 11-3).
11.2.6. Step 5: Export the MovieHaving specified the dimensions, frame rate, music, and background for your movie, there's nothing left but to click the Export button in the dialog box. You'll be asked to specify a name and folder location for the movie (leaving the proposed suffix. mov at the end of the name), and then click Save. After a moment of computing, iPhoto returns to its main screen. Press Whenever playback is stopped , you can even "walk" through the slides manually by pressing the right-arrow key twice (for the next photo) or the left-arrow key once (for the previous one).
Tip: Even Windows PC users can enjoy your QuickTime moviesif they visit www.apple.com/quicktime/download to download the free QuickTime Player program for Windows.
|
 Export.
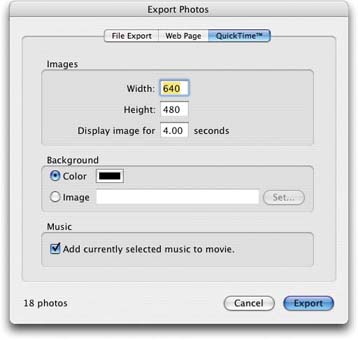

| < Day Day Up > |