Section 5.5. Creating Slide Masters and Layout Masters
5.5. Creating Slide Masters and Layout MastersUnlike earlier versions of the program, PowerPoint 2007 lets you create your own layout masters. Instead of making do with just twoan overall slide master and a title masterin PowerPoint 2007 you can either tweak one of the many layout masters PowerPoint gives you, or create your own from scratch. Creating your own layouts is handy when you want to position content on a bunch of slides in a very specific way. For example, say you want several of the slides in your slideshow to feature a long, skinny spreadsheet, underneath which you want to position three short columns of text. You can create your own layout, call it something like "Spreadsheet with Three Columns ," and then apply it to any number of slides, without repeating the whole editing process each time.
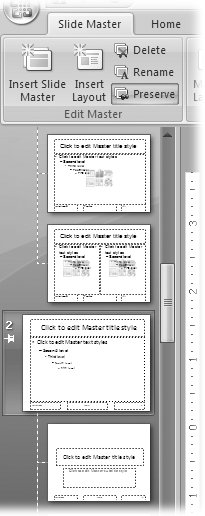
5.5.1. Creating a New Slide Master Out of the box, PowerPoint assigns each new slideshow a single slide master. To create another one, choose Slide Master Note: Another way to create a new slide master is to hit Ctrl+M or, in Thumbnail view, right-click any slide and thenfrom the context menu that appearschoose Insert Slide Master.
PowerPoint numbers the new slide master and displays an unbelievably tiny graphic that's supposed to look like a pushpin. This pushpin means that PowerPoint has preserved (that is, saved) your newly created slide masterwhich is a very good thing indeed because the program has a nasty habit of deleting slide masters that aren't preserved. (For more on preserving slide masters, check out page 160.) Now you can edit the slide master, as described earlier in this chapter. Sometimes, though, you don't need to create a new slide master from scratch. Maybe you have a presentation that you're happy with, but you want to add an additional layout for variety. The next section explains how to do that. 5.5.2. Creating a New Layout MasterPowerPoint 2007 starts you off with seven different layout masters per slide master: Title and Text, Blank Content, and so on. (Page 124 gives you the complete list.) But sometimes, those seven layouts aren't enough. Say you know you'll be adding a lot of slides containing three columns of text. In that case, you want to create your own layout master with three columns. To create an additional layout master:
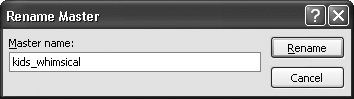
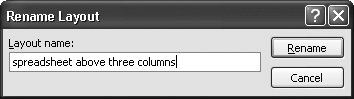
Note: PowerPoint assumes you want your new layout to display footers. If that's not the case, then head to the Slide Master tab and turn off the checkbox next to Footers. 5.5.3. Renaming Slide Masters and Layout MastersTechnically speaking, you don't have to name your slide masters and layout masters, since PowerPoint automatically gives them names the instant you create them. But because the names that PowerPoint comes up with are pretty lame (Custom Design 1, Custom Design 2, and so on), and because these names show up in the Themes gallery and Layout gallery for all the world to see, you really do want to get in the habit of naming your slide masters and layout masters. To name a slide master:
5.5.4. Preserving Slide Masters and Layout MastersIf you don't explicitly tell PowerPoint to preserve your slide masters and layout masters, then there's a good chance they'll disappear one day (more than likely when you're working against a tight deadline). That's because PowerPoint automatically deletes unpreserved slide masters that aren't being used to format any slides, a situation that usually occurs while you're experimenting to see which master looks best. (See the box on page 161 for more details.)
Bottom line: To keep from having to recreate and re-edit slide masters and layouts, get in the habit of preserving them. Here's how:
Note: Another way to preserve your slide master is to click the slide master to select it and then, from the Slide Master tab, choose Preserve. The problem with this option, though, is that choosing Slide Master  Preserve when PowerPoints already displaying the pushpin unpreserves your slide master. Preserve when PowerPoints already displaying the pushpin unpreserves your slide master. 5.5.5. Applying Multiple Slide MastersPowerPoint lets you apply multiple slide masters to your slideshow. You don't want to go crazy and apply a different slide master to every single slide because that would counteract the whole time-saving point of slide masters. Still, in some situationslike when you want to format the sections of a long presentation differentlythe ability to apply multiple slide masters comes in handy. To apply a new slide master to one or more slides:
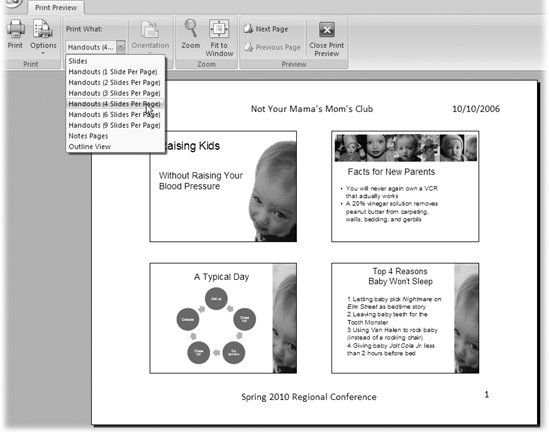
Tip: If you change your mind immediately after applying a slide master, then press Ctrl+Z or click Undo to tell PowerPoint to reverse your change. 5.5.6. Editing Handout MastersPowerPoint handouts are specially formatted pages that you can print and then hand out to your audience just before your presentation, or print and then transfer to 35mm slides. Handout masters let you control the look of your handouts. You can put anywhere from one slide to nine on a page, with optional space for note taking. You can also add snazzy backgrounds and graphics, although these options are of questionable value if you don't intend to print your handouts on a color printer. If you're like most people, you'll edit your handout master's header or footer or both (Figure 5-15) and leave it at that.
Note: Unlike slide masters, you can't create additional handout masters. PowerPoint starts you off with one handout master per slideshow, and that's all you getand really, that's all you'll ever need. To edit the handout master that PowerPoint assigns to each slideshow:
| ||||||||||||||||
|

 | Figure 5-17. You see this Page Setup dialog box when you choose Page Setup from either the Handout Master tab or the Notes Master tab. |
Handout Orientation. The option you choose here applies to the handout pagenot the slides that appear on the handout page. Your choices are Portrait (vertical) and Landscape (horizontal).
Slide Orientation. Tells PowerPoint to display your slides in Portrait or Landscape layout on the handouts.
Slides-per-page. Tells PowerPoint how many slides you want to display per handout page. You can choose one, two, three, four, six, nine, or outline.
Placeholders. Turning on the checkboxes next to the following options tells PowerPoint to add text boxes to your handouts: Header displays a text box at the top of each handout page, which you can fill with whatever text you like. Date displays the date when you print your handouts. Footer puts a text box at the bottom of each page. Page Number displays the page number when you print your handouts.
Themes, Colors, Fonts, and Effects. Just as you can change the overall look and feel of your slides, as you saw in Chapter 4, you can click one or more of these options to change the overall look and feel of your handouts (but not the slide thumbnails that appear on your handouts).
Custom background. Click this option to paint your handout's background with a color, gradient, or graphic image.
Type text into your footer and header placeholders, if you chose to add them.
Page 34 shows you how to add text to placeholders.
If you like, you can format the text in any of your text boxes by clicking the Home tab, or add images or other objects to your handout master by clicking the Insert tab.
See Chapter 9 if you need help working with images.
When you're finished editing your handout master, on the Handout Master tab, click Close Master View.
PowerPoint returns you to normal slide-editing mode, and the Handout Master and Drawing Tools Format tabs disappear.
5.5.7. Editing the Notes Master
The Notes master lets you control the way your speaker notes appear when you print them out or when you display them on a separate computer monitor that's positioned so only you can see it. (For more details on this monitor setup, see page 227.)
Because speaker notes are meant for your eyes only, you probably won't spend a lot of time or effort editing your Notes master. You may want increase the font size so you can read your notes from a distance, but that's about it. Eye-gouging colors, busy backgrounds, and hard-to-read fonts are no help when you're standing in front of a crowd and your mind's gone blank.
Note: As with handout masters, you can't create additional notes masters. You only get the one PowerPoint attaches to each slideshow.
To edit the Notes master PowerPoint assigns to every slideshow:
-
Choose View
Presentation Views Notes Master. The Notes Master tab appears, and a preview of your speaker notes appears in the editing workspace.
-
Edit the Notes master as you like. You can choose from among the following options:
-
Page Setup. This option displays the Page Setup dialog box shown back in Figure 5-17, which lets you specify the orientation of the note page, the orientation of the slide placeholder within the notes page, and the overall size of the printout.
-
Notes Page Orientation. The option you choose here applies to the notes pagenot the slides that appear on the notes page. Your choices are Portrait (vertical) and Landscape (horizontal).
-
Slide Orientation. Tells PowerPoint to display your speaker notes in Portrait or Landscape layout.
-
Placeholders. Turning on the checkboxes next to each of the following options tells PowerPoint to add editable text boxes to your handouts: Header displays an empty text box at the top of each handout page. Slide Image displays a thumbnail of the slide associated with each speaker note, which is handy for double-checking that the speaker note goes with the slide you think it goes with. Footer displays an empty text box at the bottom of each handout page. Date displays today's date when you print your handouts. Body displays the speaker note itself. Page Number displays the page number when you print your handouts.
Note: The PowerPoint design team was asleep at the switch when they decided to make the Body placeholder optional. You never want to turn off the checkbox next to Body. If you do, then the text of your speaker notewhich, presumably, is the whole reason you're editing the Notes masterdoesn't appear.
-
Themes, Colors, Fonts, and Effects. Just as you can change the overall look and feel of your slides, you can click one or more of these options to change the overall look and feel of your notes.
-
Custom Background. Click this option to paint your speaker notes' background with a color, gradient, or graphic image (page 129 shows you how).
-
-
Type text into your footer and header placeholders, if you chose to add them.
Just click in a text placeholder and start typing.
-
If you like, you can format the text in any of your text boxes using the tools on the Home tab, or add images or other objects to your Notes master by clicking the Insert tab (Chapter 9).
-
When you're finished editing your Notes master, on the Notes Master tab, click Close Master View.
PowerPoint returns you to normal slide-editing mode, and the Notes Master tab disappears.
Note: To see how your notes pages look with slide content filled in, choose View
Presentation Views Notes Page. Figure 5-18 shows an example. 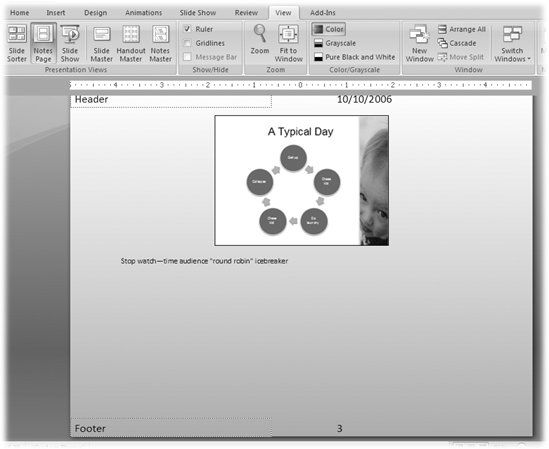 | Figure 5-18. Oddly enough, PowerPoint lets you delete the placeholder that displays your speaker notes (don't!). To get a more accurate preview of how your speaker notes will look when you print them out, select View |
| NOSTALGIA CORNER The Title Slide Master |
| Back in PowerPoint 2003, you explicitly had to insert a new Title layout master by zipping over to the Slide Master view toolbar and selecting Insert New Title Master. Not so in PowerPoint 2007: You get a Title layout master automatically, free from cost or obligation. In fact, the Slide Master view toolbar no longer exists. Now, when you switch to Slide Master view (View |