| One of the most common uses of JavaScript on Web pages is to create a rolloveran image that changes when the user moves the pointer over it. Rollovers combine the use of two images within the same space. When a visitor first arrives at a page that uses rollovers, those image combinations are displayed in their original states. As the pointer moves over the rollover image, a new image is swapped into its place. The new image is sometimes referred to as the on or over state of an image. As the user rolls the pointer off of the image, it can either swap back to the original image or remain changed. A rollover is a basic application of interactivityit gives the user a response to the act of moving the pointer over the image. This response is often a visual effect to the existing image, such as lighting up a button, highlighting a tab, or changing the apparent depth to make a navigational element appear active. The rollover response can also incorporate additional information into the new image such as a description or explanation of content. Website interactivity primarily concerns the user experience; it is what occurs between the visitor and the Website. Interaction requires an action and a responseit is a two-way communication process. Incorporating interactivity into your pagesdesignating the response that your site gives to visitor's actionscan bring more complexity and depth to the experience of visiting your site. Websites that encourage action or participation are likely to be more successful, functional, and memorableto have a greater impact upon the visitorthan those in which the user is stuck in a passive situation. You can create rollovers in Dreamweaver without ever looking at the HTML or JavaScript code. A rollover is a simple behavior that is included in the Common category of the Insert bar. When you use this method, Dreamweaver creates the behavior behind the scenes. | | 1. | Open poses.html from the Lesson_08_Interactivity/explorations folder. Click in the first empty cell of the table at the top of the Document window. From the Common category of the Insert bar, select the Rollover Image button from the Images menu.
 The Insert Rollover Image dialog box opens. The Insert Rollover Image dialog box opens.
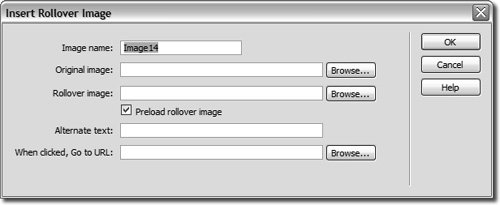 Dreamweaver steps you through the process of creating rollovers in this dialog box. If you haven't already placed the images that you want to create rollovers from on the page, you might prefer this method because it enables you to insert an image and define it as a rollover at the same time. In the next exercise, you will create rollovers for images that have already been placed on the page. Dreamweaver steps you through the process of creating rollovers in this dialog box. If you haven't already placed the images that you want to create rollovers from on the page, you might prefer this method because it enables you to insert an image and define it as a rollover at the same time. In the next exercise, you will create rollovers for images that have already been placed on the page.
Tip Alternatively, you can choose Insert > Interactive Images > Rollover Image to insert a rollover image using the same dialog box. | 2. | In the Image name text field, type home for the image name.
This field is used to name the image. If you don't name your rollover images, Dreamweaver will assign generic names automatically in a numeric order: Image1, Image2, and so on. When creating your Web pages, it is helpful if you make a standard practice of giving all rollovers specific and meaningful names that clearly indicate what they are for. When naming your images, don't use spaces or any special characters, and do not begin the name with a number; any of these actions can cause problems with scripting and your rollovers might not function properly as a result.
| 3. | Click the Browse button next to the Original image text field and select home.gif in the Lesson_08_Interactivity/explorations/images folder.
This image appears on the page before the user rolls over it.
| | | 4. | Click the Browse button next to the Rollover image text field and select home-on.gif from the Lesson_08_Interactivity/explorations/images folder for the rollover image.
When this page is viewed in a browser, the visitor initially sees the home.gif image. The home-on.gif image replaces the home.gif image when the user rolls over home.gif in the browser window.
Note When making rollover graphics, create both the original image and the image that will swap at the same dimensions. If both images are not the same size, the second rollover image may be resized to the size of the first image. Resizing distorts the second image because that image has only the space held by the first image available to it. | 5. | Type Home in the Alternate text text field. Click the Browse button next to the When clicked, Go to URL text field and find the file index.html in the Lesson_08_Interactivity folder. Leave the Preload rollover image box checked and then click OK.
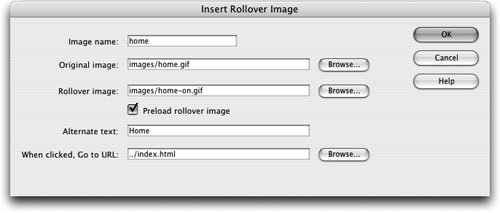 The Preload rollover image option is checked by default and it is highly recommended. This setting causes the secondary image to load when the document loads into the visitor's browser. If this setting is not checked, the image does not load until the visitor rolls over the primary image and the browser requests that rollover image from the server. Loading the image along with the rest of the page makes the rollovers happen more quickly, eliminating any lag caused by the download occurring at the time the user rolls over the image. The Preload rollover image option is checked by default and it is highly recommended. This setting causes the secondary image to load when the document loads into the visitor's browser. If this setting is not checked, the image does not load until the visitor rolls over the primary image and the browser requests that rollover image from the server. Loading the image along with the rest of the page makes the rollovers happen more quickly, eliminating any lag caused by the download occurring at the time the user rolls over the image.
The rollover now links to the file you chose. The file you chose in the When clicked, Go to URL text field now appears in the Link text field on the Property inspector when the image is selected.
When the rollover image is selected, the resulting behavior appears in the Behaviors panel, which you'll use in the next exercise.
| | | 6. | Save your file and test it in the browser.
|
You can close this file. Note When creating your graphics, make the file sizes as small as possible. Remember that with rollovers, you are downloading not one but two images for the same button. The file size of a rollover like the one you inserted in this exercise is increased because there are two images to download. The amount of increase depends upon the size of the images.
|