| One of the more exciting features of Studio 10 is the ability to create a music video automatically. This capability, called SmartMovie, is ideal for footage like the 30 minutes I shot during our visit to the Charleston Aquarium: footage with no plot, no highs, no lows, nothing to turn into an interesting story. Even condensed, it would be painful for the grandparents to watch. However, cut it up into short, tasty segments, add a zesty background music clip, and you've got a four-minute music video that will have viewers tapping their toes and clapping their hands. While this could take hours to accomplish manually, Studio does it all automatically. To automatically create a music video 1. | Drag the target video footage to the Video track.
Note that the video footage should be at least twice as long as the background music you'll be using. You can (and should) edit out scenes as desired before producing the music video.
| 2. | At the upper left of the Movie window, click the Open/Close Video Toolbox icon (Figure 9.48).
| 3. | On the left side of the Video toolbox, click the Create a Music Video Automatically icon (Figure 9.66).
Figure 9.66. Let's create a SmartMovie. Click here to start. 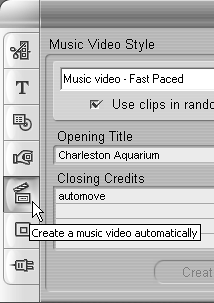
| 4. | From the Music Video Style list, choose the target style (Figure 9.67).
Figure 9.67. Pick your music video style here. 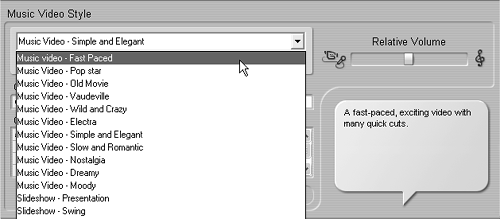
Note the description of the style in the callout box to the right of the drop-down box.
| 5. | Do one of the following:
- Select the Use Clips in Random Order checkbox (Figure 9.66).
Studio will use the clips in random order, promoting smoothness but losing continuity.
Studio will maintain narrative continuity, but this option will limit Studio's choice of clips, which could degrade the smoothness of the music video.
| 6. | Click the add music to your project link to add music to the music track (Figure 9.68).
Figure 9.68. Click here to add audio. 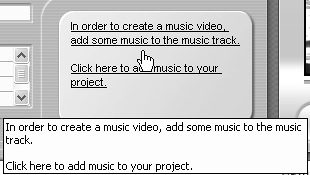
Studio opens the Add Music to Smart Movie window (Figure 9.69).
Figure 9.69. Choose your option and follow the prompts. 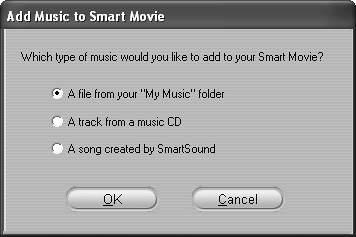
| 7. | Choose one of the three options in Figure 9.69 and follow the prompts to select a music file.
Note that you can choose multiple songs, which Studio inserts into the Music track. The cumulative length of the music you select whether one song or several determines the length of the SmartMovie.
| 8. | Enter the opening title and closing credits (Figure 9.70).
Figure 9.70. Add opening title and credits and click Create SmartMovie. 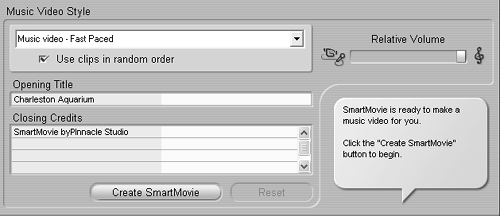
| 9. | Set the Relative Volume slider completely to the right to prioritize background music over the original audio from the video.
There may be situations where you want to maintain the original audio, but I can't think of any, since it will be completely chopped up and placed in random order by Studio while creating the music video.
| 10. | Click Create SmartMovie.
Studio loads the background audio file and then starts creating the SmartMovie (Figure 9.71). The techniques used are proprietary, but Pinnacle seems to be gravitating toward all the facial close-ups, using these as the primary video content and then matching the beat of the song to transition and effect timing.
Figure 9.71. Working! Working! 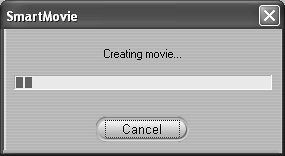
Studio produces the SmartMovie (Figure 9.72).
Figure 9.72. Your music video. Look at all those cuts. This would have taken hours by hand. 
|
 Tips Tips
If you don't like the resulting video, you can select another music video style, click Create SmartMovie, and try again. Or, you can click Reset and restore the Timeline and all assets to their pre-SmartMovie condition. You can edit any component of the completed SmartMovie as desired, though significant edits, like shifting clips on the Timeline, could result in a loss of synchronization.
|