preview your movie
| Let's play the movie to see how it's flowing so far. This gives us a chance to get familiar with the Monitor in Timeline view. 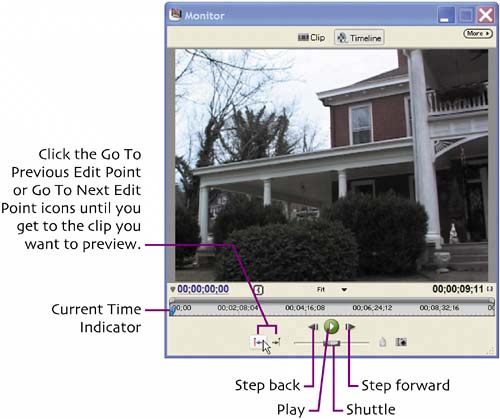 Use these buttons to control playback. After Premiere Elements plays the selected clip, it will play subsequent clips until you pause playback or it reaches the end of the project. Note that you can also use the spacebar on your keyboard to start and pause playbackdefinitely one of the most useful keyboard shortcuts in the program. |
Making a Movie in Premiere Elements. Visual QuickProject Guide
ISBN: 321321200
EAN: N/A
EAN: N/A
Year: 2005
Pages: 128
Pages: 128