Printing Worksheets
If your primary purpose in learning Excel is to be able to manipulate your own information, your worksheets might never need to leave your computer. But if you want to share your worksheets with others, you will probably need to print them on paper. You print an Excel worksheet the same way you print most Office documents, but you will need to know a few techniques to make your work look as good on paper as it does on the screen.
Previewing a Worksheet
Usually you ll want to preview a worksheet before you print it to make sure that single-page worksheets fit neatly on the page and that multi-page worksheets break in logical places. Follow these steps to get a bird s-eye view of a worksheet:
-
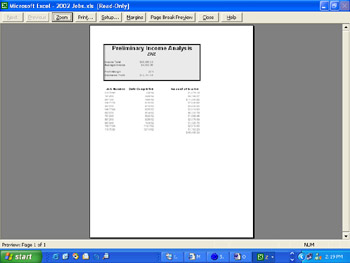
On the Standard toolbar, click the Print Preview button.
You might have to click the Toolbar Options button to see the Print Preview button. The print preview window displays a miniature version of the printed worksheet, as shown here:
-
Move the mouse pointer over the page.
The pointer changes to a small magnifying glass.
-
To examine part of the page in more detail, move the magnifying glass over that part, and click the left mouse button.
Excel zooms in on that portion of the page, magnifying it so that it is readable.
-
Click again to zoom out.
-
On the Print Preview toolbar, click the Close button to turn off print preview.
| |
By default, when Excel prints a worksheet, it does not print any header or footer text. If you want to add a header or footer, click the Setup button on the Print Preview toolbar to display the Page Setup dialog box, or click page Setup on the File menu. Click the Header/Footer tab, and make your selection in the Header or Footer drop-down list. If none of the options meet your needs, first click the Custom Header or Custom Footer button, and then enter your text in the appropriate boxes. To format the text, select it, click the Font button (the A) in the middle of the dialog box, and then make your selections in the Font dialog box. Click the other buttons in the middle of the Header or Footer dialog box to add a page number, date, time, filename, or tab name to your worksheet.
| |
Changing the Margins
To fine-tune your worksheet s position on a page, you can change the worksheet s margins and make other adjustments in the Page Setup dialog box. Follow these steps:
-
On the File menu, click Page Setup .
Excel displays the Page Setup dialog box. (In print preview, you can open this dialog box by clicking the Setup button on the Print Preview toolbar.) Notice that on the Page tab, you can set the orientation of your printed worksheet and control the scale at which it is printed.
-
Click the Margins tab.
Excel displays these options:
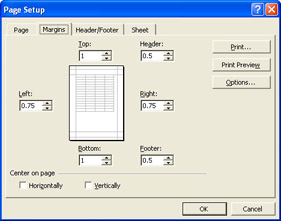
Page Setup dialog boxes can differ slightly from one another, depending on the type of printer used.
-
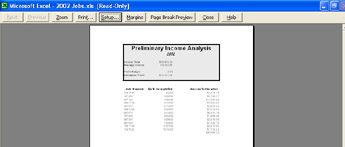
In the Center on page area, click Horizontally to center the worksheet horizontally on the page.
The preview box in the center of the dialog box shows you the effects of your changes.
-
Click OK to enter your selection. Here s the result:
-
When you re ready, click the Print button on the Print Preview toolbar, and then click OK in the Print dialog box to print the worksheet.
-
Save the workbook, and click Excel s Close button to exit Excel.
| |
To change the orientation of a printed worksheet, click Page Setup on the File menu. In the Orientation area of the Page tab, select Portrait (which prints the worksheet vertically) or Landscape (which prints the worksheet horizontally), and then click OK.
| |
EAN: N/A
Pages: 116
- ERP Systems Impact on Organizations
- Enterprise Application Integration: New Solutions for a Solved Problem or a Challenging Research Field?
- Distributed Data Warehouse for Geo-spatial Services
- Data Mining for Business Process Reengineering
- Intrinsic and Contextual Data Quality: The Effect of Media and Personal Involvement