Using More Advanced Formatting Techniques
As you saw in Chapter 2, a well-designed document uses formatting to provide visual cues about its structure. For example, a report might use large bold type for first-level headings and smaller bold type for second-level headings. Summary paragraphs might be indented and italic. In this topic, you ll explore some more formatting techniques as you combine the FAQ from Chapter 2 and the memo from this chapter to make a flyer.
Inserting a File into a Document
The easiest way to combine two or more documents is to insert one file into the other. Follow these steps to insert the memo into the FAQ to create a new flyer document:
-
Starting with a blank window, click the Open button on the Standard toolbar, and with the contents of the My Documents folder displayed, double-click the Frequently Asked Questions document you created in Chapter 2.
-
To safeguard the original FAQ file, click Save As on the File menu, and save a new copy of the file as Flyer .
-
Press Ctrl+Home to make sure the insertion point is at the top of the document.
-
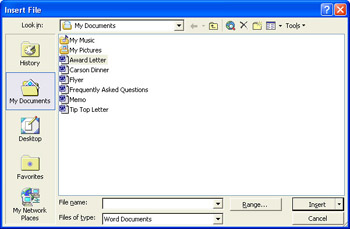
On the Insert menu, click File .
Word displays the Insert File dialog box shown in this graphic:
-
Select Memo from the list of documents, and click Insert to merge its file into Flyer.
-
Press Ctrl+Home to move to the top of the combined document, and select and delete the entire memo header (up to and including the line below the CC: line).
-
Delete the blank paragraph at the end of the original memo text, and then save the combined document.
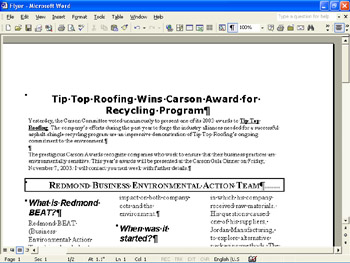
This graphic shows the results so far:
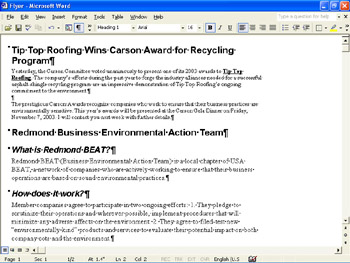
Notice that the Heading 1 style applied to the heading in the memo has adopted the Heading 1 style characteristics used in the FAQ. Also notice that the paragraphs of the memo have adopted the FAQ s formatting but with a smaller font size . You ll take care of this inconsistency in a minute, and you ll learn about controlling formatting with styles in more detail later in this chapter.
From now on, we won t tell you when to save the flyer, but you should do so at regular intervals to safeguard your work.
Making a Title Stand Out
As you already know, you apply character formatting when you want to change the appearance of individual characters . In this procedure you ll focus on the titles of the two articles in the new flyer. Follow these steps to experiment with some formatting options:
-
Move to the top of the document, and select the title of the memo, including its paragraph mark.
-
Click the Center button on the Formatting toolbar to center the title, and then change its font to Verdana .
-
Select the Redmond Business Environmental Action Team heading, including its paragraph mark, and center it.
-
With the text still selected, click Font on the Format menu.
Word displays the dialog box shown in this graphic:
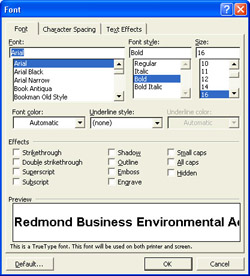
The dialog box reflects the current character formatting of the selected title. It also provides several options not available on the Formatting toolbar. You can see a preview of the formatting options you select in the Preview box before applying them.
-
Scroll the Font list, and click Times New Roman .
-
In the Effects area, select the Small caps check box, and then click OK .
Word formats the title so that the first letters of all the words are large capitals and the rest of the letters are small capitals. If you want, you can experiment with some of the other options in the Font dialog box before moving on to put a border around the FAQ title.
| |
As you create titles and headings for your Word documents, you might find that some of them would be more aesthetically pleasing if they broke to multiple lines or broke in a different spot. To manually break a title or heading (or any other line of text), click an insertion point where you want the break to occur and press Shift+Enter. Word inserts a line break, which it designates on the screen with a bent arrow symbol. Lines that you break manually are treated just like word-wrapped lines; they have the same line spacing, and they don t include any extra space above or below them.
| |
Adding a Border and Shading
Not only can you change the font and size of titles and headings, but you can draw attention to them by drawing lines above and below or to the left and right of them, surrounding them with different styles of borders, or applying color or shading in various ways. Let s see how this works by putting a box around the FAQ title:
-
With the title still selected, click Borders and Shading on the Format menu.
The dialog box shown in this graphic is displayed:

-
Click the Width box s down arrow, select the 1 ½ pt singleline option, and click the Box setting.
Word displays a preview of your selected settings on the right side of the dialog box.
-
Click the Shading tab, and in the Fill area, click a light color.
We left the box white for legibility.
-
Click OK , and then click away from the title to remove the highlighting.
The results are shown in this graphic:
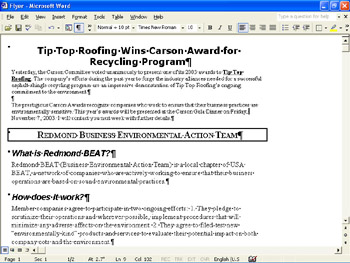
If you want, you can experiment with the other border and shading options.
| |
If you want to format a block of text with settings that you have already applied to another block of text, you can copy all the formatting in a simple three-step procedure. Select the text whose formatting you want to copy, click the Format Painter button on the Standard toolbar, and then select the text you want to format. Word duplicates the formatting for the new selection. To format more than one block of text, doubleclick the Format Painter button, and select each block in turn . When you are finished, click the Format Painter button again, or press Esc.
| |
| |
You can make information stand out by inserting fancy horizontal lines above and below it to separate it from the surrounding text. On the Borders tab of the Borders and Shading dialog box, click the Horizontal Line button to display the Horizontal Line dialog box, which has numerous line options. Click a design, and click OK to insert the line at the insertion point.
| |
Formatting Text as Multiple Columns
Newsletters and flyers often feature multi-column layouts like those of magazines and newspapers. These layouts give you more flexibility when it comes to the placement of elements on the page, and they are often more visually interesting than single-column layouts. With Word, setting up multiple columns for an entire document is very easy. You simply click the Columns button on the Standard toolbar and select the number of columns you want. And as you ll see as you follow these next steps, when you want only part of a document to have a multicolumn layout, you select that part of the document before clicking the Columns button:
-
Click to the left of What in What is Redmond BEAT?. Then hold down the Shift key, and click to the right of the period following the telephone number in the very last sentence of the document. (Don t select the paragraph mark.)
Word highlights the text between the two clicks.
-
Double-click the Standard toolbar s move handle to show all the buttons , and then click the Columns button.
Word drops down the grid of columns shown in this graphic:
-
Point to the first column, move the mouse pointer over to the third column, and click once.
Document sections:Using section breaks Word switches to Print Layout view, and inserts a section break before the selected text to preserve the formatting of the text preceding the selection. It also inserts another section break at the end of the selected text and reformats the selection so that it snakes across the first page in three columns.
-
Press Home to move the insertion point to the beginning of the selection, thereby releasing the selection.
The document now looks like the one shown in this graphic:
| |
When applying different formatting ”such as changing the number of columns or setting different margins ”to only part of a document, Word designates the beginning and end of that part with section breaks (which show up in some views as double dotted lines). You can manually insert section breaks by clicking Break on the Insert menu, selecting one of the options in the Section break types area, and clicking OK. You can have the new section start at the top of the next new column, the next new page, the next even page, the next odd page; or you can have it continue immediately after the preceding section. If you need to change the type of section break or the layout of a particular document section, click Page Setup on the File menu, and on the Layout or Margins tab, make any necessary changes. To delete a section break, select it and press Delete. Bear in mind that section breaks control the formatting of the preceding section of text. If you delete a section break, the preceding text becomes part of the next section and reflects its formatting.
| |
| |
To create a bulleted list, just select the paragraphs you want to be bulleted, and on the Formatting toolbar, click the Bullets button. You can also type an asterisk (*) and a space at the beginning of a new paragraph, and Word will convert the paragraph to a bulleted list as soon as you press Enter. By default, Word precedes each bulleted list item with a large, round dot. To change this symbol, select the bulleted paragraphs, click Bullets and Numbering on the Format menu, and select one of the seven standard symbols. You can modify the format of bulleted and numbered lists by selecting a format on their respective tabs, clicking the Customize button, making your changes, and then clicking OK. You can also click the Picture button to insert graphical bullets.
| |
Creating a List
Word has two built-in list formats: one for numbered lists (used when the order of the items in the list has to be sequential, as in the numbered steps in this course) and one for bulleted lists (used when the items are not sequential and their order is not important). Both types of lists work the same way.
The second paragraph of the FAQ contains two numbered items that would stand out better if they were formatted as a list. Follow these steps to apply the numbered list format to these items:
-
Use the scroll bar to move to the second paragraph of the FAQ.
-
Click to the left of the number 1, and press Enter .
-
Click to the left of the number 2, and press Enter .
Word recognizes that consecutive paragraphs starting with numbers comprise a numbered list, and responds by adding a 2 and a period in front of the new paragraph and giving both numbered paragraphs a hanging-indent format. This feature is called AutoFormat As You Type .
-
Delete the extra 2 , the period, and the space in the second numbered paragraph.
The numbered list appears as shown in this graphic:

If you want to create a numbered list from scratch, type 1, a period, and a space, and press Enter after typing your text. Word then automatically formats the next paragraph as the next item of the numbered list. To return to regular paragraphs, click the Numbering button on the Formatting toolbar to turn the list off. To turn off the auto numbering feature altogether, on the Tools menu, click AutoCorrect
Options, and then deselect the Automatic numbered lists check box on the AutoFormat As You Type tab.
You can also quickly convert existing text paragraphs to a numbered or bulleted list. Select the paragraphs and on the Formatting toolbar, click the Numbering or Bullets button. You can also select the text, click Bullets and Numbering on the Format menu, and then select the list option you want.
| |
By default, Word automatically formats certain elements of your documents, such as numbered lists. When it does so, Word displays the AutoCorrect Options button next to the item that has been formatted. To undo the automatic formatting, click the AutoCorrect Options button s down arrow, and then click the Undo command in the drop-down list. To temporarily turn off that type of automatic formatting, click the Stop command on the AutoCorrect Options button s list. If you want to turn off this feature indefinitely, click Control AutoCorrect Options in the AutoCorrect Options button s list. (You can also click AutoCorrect Options on the Tools menu, and then click the AutoFormat As You Type tab.) In the Apply as you type area, deselect the check boxes for the options you want to turn off. In the Replace as you type area, you can specify whether Word should turn straight quotes (" ") to smart quotes ( ), use superscript with ordinals (1st), use fraction characters ( ½ ), change placeholder symbol characters and formatting, and create hyperlinks for Internet and network paths. In the Automatically as you type area, you can control the treatment of lists, indented paragraphs, and styles.
| |
EAN: N/A
Pages: 116