Certification Objective 3.01: Installing a Single XP Server
|
| < Free Open Study > |
|
Once the hardware and software to support Citrix MetaFrame XP have been set up and configured, the next step is to complete the installation. Although Citrix provides a very simplistic installation routine, it is important to select the correct options during installation. Failure to do so could cause undesirable results or require a new installation altogether.
To start the installation process for Citrix MetaFrame XP, place the CD into the CD-ROM drive and allow the Autorun to start. Figure 3-1 displays the splash screen provided for the installation. If the Citrix splash screen does not appear automatically, or Autorun is disabled on your computer, you may manually execute the installation program using the following program: <cddrive>:\autoroot.exe.
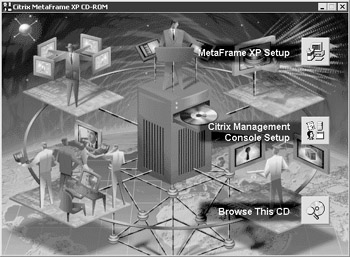
Figure 3-1: This splash screen is used to start the server installation process
Exercise 3-1: InstallinChapter 3g Citrix MetaFrame X:
This exercise will teach you how to properly install Citrix MetaFrame XP. Various options will be discussed throughout the course of this chapter. However, an installation using the default options will be used for this exercise. Options that are selectable during installation include:
-
Data store
-
Citrix farm name \ zone name
-
Interoperability with earlier versions
-
Administrative options
-
NFuse and client software setup
-
Select the MetaFrame XP Setup option from the Citrix splash screen. (See Figure 3-1.)
-
Select the button labeled I Agree to accept the End User License Agreement.
-
Select Next to continue onto the Welcome screen, as shown in Figure 3-2.
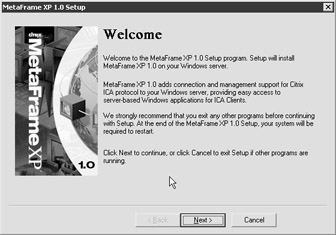
Figure 3-2: The Citrix Welcome screen -
Press Next to allow Citrix to configure the data store.
-
Choose to create a new Citrix farm or add this server to an existing farm. (See Figure 3-3.) Only add Citrix MetaFrame XP servers to an existing XP server farm. (Interoperability with earlier releases of MetaFrame is discussed later in this chapter.)
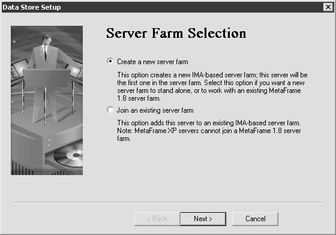
Figure 3-3: Server farm configuration -
Select the type of Citrix data store that will be used by this server. Advanced data store configuration options must be completed prior to this installation. This includes options such as installing and configuring SQL or Oracle for use as a data store. (See Figure 3-4.)
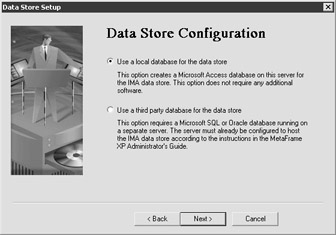
Figure 3-4: The Data Store Setup screen -
Select the zone in which this server will operate. (See Figure 3-5.) By default, the zone name is the TCP\IP network address. For example, a server with an address of 192.168.1.5 with a network mask of 255.255.255.0 would have a zone name of 192.168.1.0.
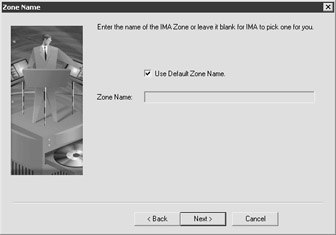
Figure 3-5: Installation option to specify zone name -
Select the name of the Citrix server farm. (See Figure 3-6.) If the option to add a server to an existing farm were selected in step 5, this option would require you to specify an existing farm that is reachable on the network.

Figure 3-6: Selecting the name of the Citrix server farm -
Press Next to confirm the name of the Citrix farm.
-
Select the interoperability mode allowing for either native mode (only MetaFrame XP servers) or mixed mode (XP and MetaFrame 1.8 servers). (See Figure 3-7.) This option can be changed after installation is completed.
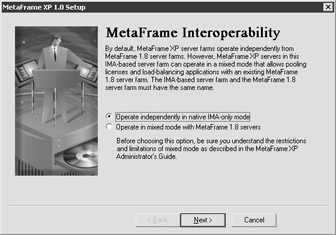
Figure 3-7: Option to support interoperability with Citrix MetaFrame 1.8 -
Select the User ID that will be granted administrative privileges within the Citrix MetaFrame farm. (See Figure 3-8.) This must be a user ID that is already created.
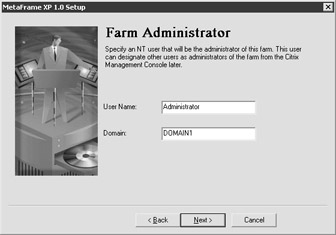
Figure 3-8: Citrix farm administrative user ID -
Select Next to accept network options. Additional protocols such as Internetwork Packet Exchange, or IPX, can only be selected if they are installed on this server. (See Figure 3-9.)
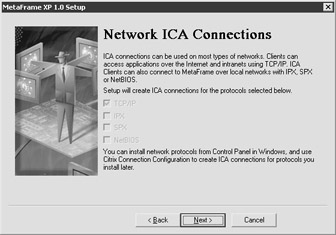
Figure 3-9: Configuring network options -
To add modems within Citrix MetaFrame, checkmark the Add Modems button and follow the prompts. (See Figure 3-10.) Once completed, select Next to continue.
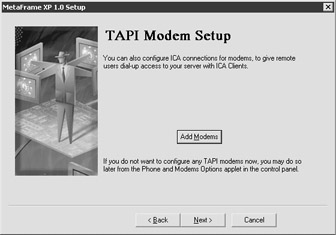
Figure 3-10: Configuring MetaFrame to use existing modems -
Select Next to continue configuring ICA Session Shadowing.
-
Configure shadowing options to be used with the Citrix farm. (See Figure 3-11.)
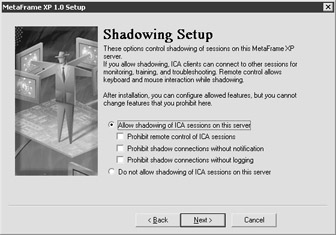
Figure 3-11: Shadowing optionsExam Watch Due to the requirements of customers such as financial institutions, shadowing options selected here are permanent. Once they are chosen, reinstalling Citrix MetaFrame is the only method by which these options can be altered.
-
Select Next to continue. This dialog box discusses remapping drives within Citrix MetaFrame XP. (See Figure 3-12.)
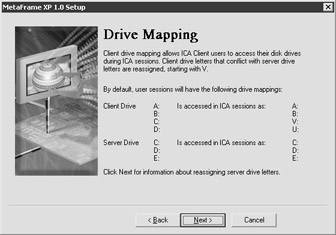
Figure 3-12: Drive mapping options -
Select the drive letters to use when reassigning server drives. (See Figure 3-13.) By default, no drive remapping is done.
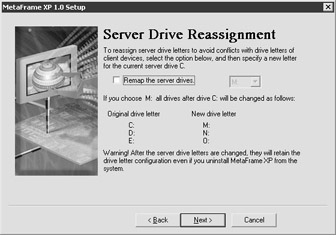
Figure 3-13: Selecting new drive lettersOn The Job When reassigning drive mappings with Citrix MetaFrame, any application that will be installed on this server should be completed AFTER the Citrix installation. Applications such as Microsoft Office use drive letters in registry entries as well as configuration files, resulting in application issues if implemented prior to the drives being reassigned.
-
Select the port to be used with the Extensible Markup Language, or XML services. (See Figure 3-14.) This option is used in cooperation with NFuse technologies (as discussed in Chapter 11). Select Next.
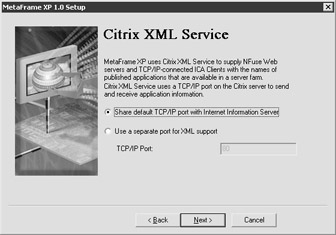
Figure 3-14: XML Service configuration -
By default, NFuse is selected for installation with MetaFrame XP. (See Figure 3-15.) Press Next to continue. (NFuse is discussed in depth later in Chapter 11.)
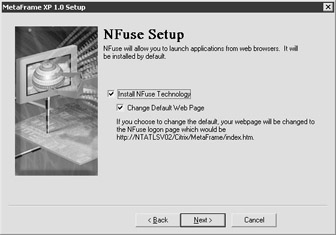
Figure 3-15: NFuse installation options -
Now that all installation options have been elected, press Next to process these selections. Once Next is pressed, the Citrix MetaFrame software will be installed, the server farm created, and each of the options chosen will be implemented. (See Figure 3-16.)
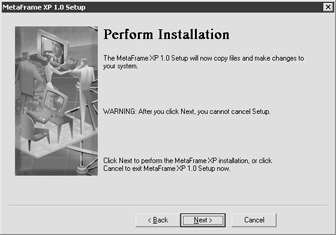
Figure 3-16: Installation confirmation -
When prompted, select Next to begin configuring Independent Computing Architecture, or ICA client distribution.
-
Choose the location from which to copy client files. (See Figure 3-17.) These files are stored on the server to assist with the deployment and update of Citrix clients.
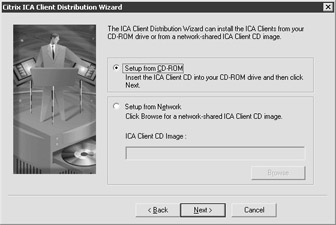
Figure 3-17: Client distribution setup options -
Press Next using the default options to continue. Choosing Custom allows the selection of particular clients to be installed on the server for distribution. (See Figure 3-18.)
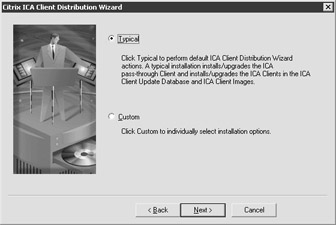
Figure 3-18: Determining distribution clients -
Input licenses for use with Citrix MetaFrame XP and add-on products. (See Figure 3-19.) Licenses can be activated once the MetaFrame installation is completed and the server has restarted.
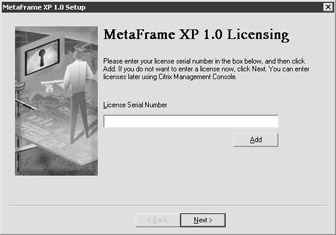
Figure 3-19: Installing licenses -
Select the product code to be used with Citrix MetaFrame XP. (See Figure 3-20.) Press Next to continue.
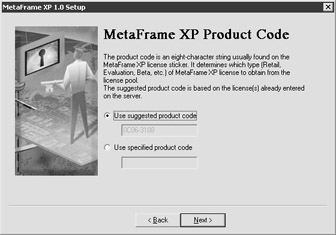
Figure 3-20: Selecting the Citrix product codeOn The Job The product code is a new license feature in MetaFrame XP. It is critical that the product codes are used correctly. For example, to add a Citrix MetaFrame XP server to an existing farm does not require a server license as in older versions. Instead, only the product code must be entered and then existing user connection licenses will be pooled between servers, by default, within the same farm.
-
Once all items are completed, press Restart to complete the installation. (See Figure 3-21.) When the server has rebooted, Citrix MetaFrame XP will be installed and available for use.
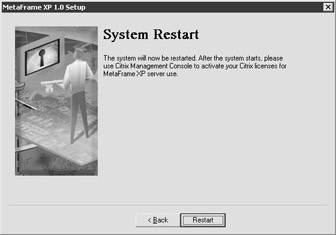
Figure 2-21: Restarting the server after installation
|
| < Free Open Study > |
|
EAN: 2147483647
Pages: 169