| Open Microsoft Visual Studio .NET, and you will see a starting window similar to what is shown in Figure A-1. Figure A-1. Visual Studio .NET main window. 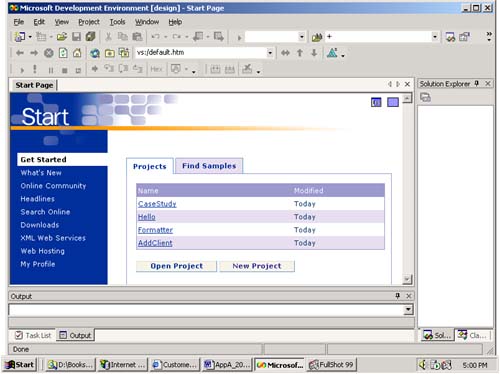 What you see on default startup is the main window with an HTML page that can help you navigate among various resources, open or create projects, and change your profile information. (If you close the start page, you can get it back anytime from the menu using Help Show Start Page.) Clicking on My Profile brings up a profile page on which you can change various settings. Several profiles are available in Visual Studio, including a standard one for "typical" work (called the Visual Studio Developer profile) and special ones for various languages. Because Visual Studio .NET is the unification of many development environments, programmers used to one particular previous environment may prefer a particular keyboard scheme, window layout, and so on. For example, if you choose the profile Visual Basic Developer, you will get the Visual Basic 6 keyboard scheme. In this book, we use all the defaults, so go back to the profile Visual Studio Developer if you made any changes. See Figure A-2. Figure A-2. Visual Studio .NET profile page. 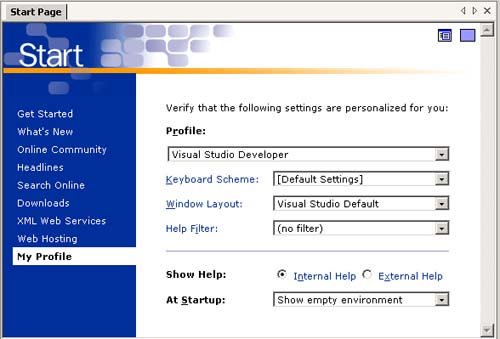  | To gain an appreciation for some of the diverse features in Visual Studio .NET, open the Bank console solution in this chapter: Choose File Open Solution, navigate to the Bank directory, and open the file Bank.sln . You will see several windows . (See Figure A-3.) | Figure A-3. A console project in Visual Studio .NET. 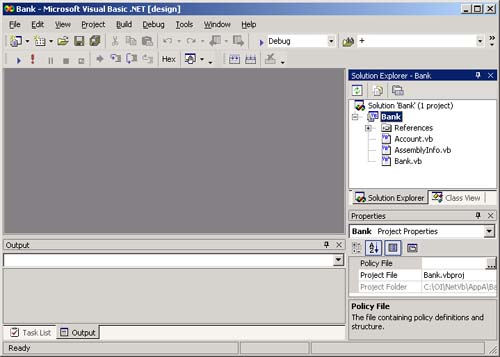 Starting from the left is the Toolbox, [1] followed by the main window area, which currently is just a gray area. Below the main window is the Output window, which shows the results of builds and so on. On the top right, the Solution Explorer enables you to conveniently see all the files in a solution, which may consist of several projects. On the bottom right is the Properties window, which lets you conveniently edit properties on forms for Windows applications. [1] The Toolbox is used in Windows Forms applications, and will be discussed in Chapter 7. You can show or hide the Toolbox from the View menu. From the Solution Explorer, you can navigate to files in the projects. In turn , double-click on Account.vb and Bank.vb , the two source files in the Bank project. Text editor windows appear in the main window area. Across the top of the main window are horizontal tabs that let you quickly select any of the open windows. Visual Studio .NET is a Multiple Document Interface (MDI) application, so you can also select the window to show from the Windows menu. Figure A-4 shows the open source files with the horizontal tabs. Figure A-4. Horizontal tabs for open source files. 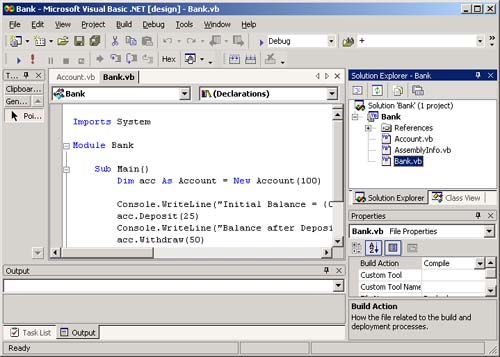 Toolbars Visual Studio comes with many different toolbars. You can configure the toolbars you want displayed, and you can drag toolbars to the position you find most convenient . You can also customize toolbars by adding or deleting buttons that correspond to different commands. To specify which toolbars are displayed, use the menu View Toolbars. You can also right-click in any empty area of a toolbar. A list of toolbars appears with check marks beside the ones currently displayed. By clicking on an item on this menu, you can make the corresponding toolbar appear or disappear. For your work in this book, add these toolbars: Customizing a Toolbar We want to make sure that the Start Without Debugging command is available on the Debug toolbar. If this command (which looks like a red exclamation point) is not already on your Debug toolbar, you can add it using the following procedure, which can be used to add other commands to toolbars: -
Select menu Tools Customize to bring up the Customize dialog. -
Select the Commands tab. -
In Categories, select Debug, and in Commands, select Start Without Debugging. See Figure A-5. Figure A-5. Adding a new command to a toolbar. 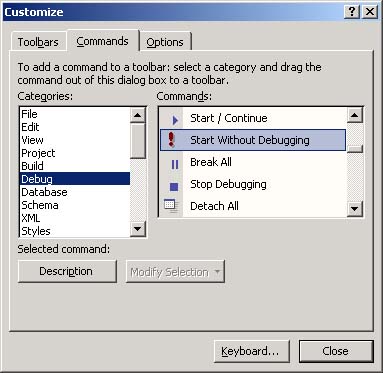 -
Drag the selected command onto the Debug toolbar, positioning it where you desire . For now, place it to the immediate right of the wedge -shaped Start  button. button. -
Close the Customize dialog.  |
