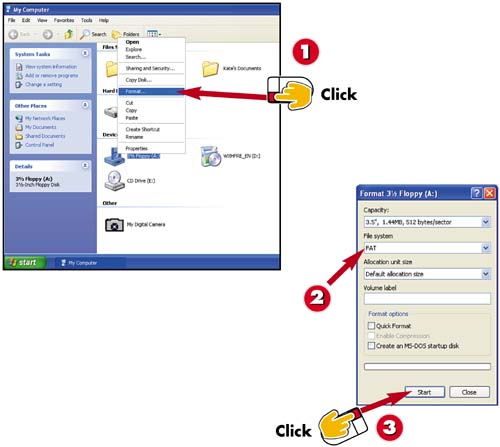
After you've inserted a floppy disk into the drive, open the My Computer window, right-click the floppy disk drive, and choose Format .
Make any changes in the Capacity, File system , and Allocation unit size sections (and type a label for the disk if you want).
Click Start .
INTRODUCTION
For you to be able to use a floppy disk, the disk must be formatted. Many disks sold are already formatted, but if they are not or if you want to reformat a disk, you can do so.
TIP
Closing Open Files
The format process will not work if any files on the disk are open, if the contents of the disk are displayed, or if the disk contains the system or the boot partition.
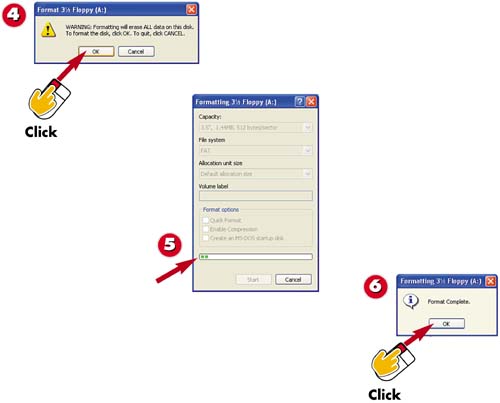
Windows warns you that formatting the disk will erase all information on that disk. Click the OK button.
Windows formats the disk, displaying the progress of the process at the bottom of the Format dialog box.
When finished, Windows notifies you that the format process is complete. Click the OK button.
TIP
Quick Format
Check the Quick Format option to remove files from the disk without scanning the disk for bad sectors. This option is appropriate only when the disk has been previously formatted, and is not damaged.