What Should Your Engine be Able to Do?
Usually you would just write down the game idea here and then determine which classes you need to get the game and all components running. We still want to create a game at the end of this Part in Chapter 8, but for now we focus on creating a reusable graphics engine to make the creation process of future games easier. This and the next two chapters just focus on the graphics engine programming and how to get textures, models, fonts, shaders, effects, and so on working for your engine. Then in Chapter 7 advanced shaders are introduced and in Chapter 8 we learn more about post screen shaders and how to write a game with the graphics engine developed in this Part.
Thanks to the XNA Framework, which already gives you many helper classes and an easy way to manage the game window, game components, and content files (models, textures, shaders, and sound files), you don’t have to worry that much about custom file formats, writing your own window management class, or how to get 3D models into your engine and then on the screen. If you have worked with DirectX or OpenGL before you probably know that the samples and tutorials were not that hard, but as soon as you wanted to get your own textures, 3D models, or sound files into the engine, you often ran into problems like unsupported file formats, no support for the 3D models, or no ability to play your sound files. Then you would either continue your search or write your own classes to support those features. Texture and model classes do exist, but that does not mean they are perfect. Sometimes you want to add more functionality or have an easier way to load and access textures and models. For this reason you are going to write new classes for texture and model management, which internally still use the XNA classes, but will make it easier for you to work with textures, models, and later, materials and shaders too.
Okay, first of all you want a cool 3D model displayed on your screen. It should not only have a texture, but also use an exciting shader effect on it. Just watching a static 3D model in the center of the screen is not very exciting and can also be accomplished by just showing a screenshot, so you have to create a camera class to move around a little in your 3D world.
To help you in your future unit tests and for the UI (user interface) you also need the ability to render 2D lines as well as 3D lines to help you find out if 3D positions are correct for unit tests and debugging. You might now say “Hey, rendering lines is nothing special, can’t XNA do that already like OpenGL with a method like glLine?” Well, it would be nice, but the creators of XNA removed all the fixed function capabilities of DirectX, and though you can still render some lines with help of vertex buffers and then render line primitives, it is just way too complicated. Remember you are going to write your unit test first and that is not the way you think on how to render lines; you just want to draw a line from (0, 50) to (150, 150) or in 3D from (–100, 0, 0) to (+100, 0, 0). Besides that, the performance of your application will be really bad if you render each line by itself and create a new vertex buffer or vertex array for it and then get rid of it again, especially in the unit tests you will do at the end of this book with several thousand lines rendered every frame.
Then you also want the capabilities you had in the previous games to render text on the screen with the help of the TextureFont class. Your engine should also be able to render sprites, but you should stop thinking of sprites and just use textures. For example, if I load the background texture I don’t want to think about the sprite class; I just put the background texture on the whole background or put a UI texture at the location I want it to be. This means you will hide the SpriteHelper class from the user and let the Texture class manage all this in the background for you, very similar to the TextureFont class, which also handles the entire sprite rendering in the background for you.
The Engine Unit Test
Before you go deeper into the implementation details and problems of the 3D graphics engine, write your unit test for the end of this chapter first and therefore specify what the engine should be capable of by then. Please note that the initial version of this unit test looked a little different; it is absolutely okay to change it a bit if you forgot something or if you have some dependencies that were not used in the unit test, but make sense in the engine and should be used. Generally you should try to make the unit test work without changing them; in the unit test I initially just wrote testModel.Render(); to render the test model, but it makes more sense to specify a matrix or vector to tell the model where it has to be rendered in the 3D world.
Enough talk; take a look at the code:
/// <summary> /// Test render our new graphics engine /// </summary> public static void TestRenderOurNewGraphicEngine() { Texture backgroundTexture = null; Model rocketModel = null; TestGame.Start("TestRenderOurNewGraphicEngine", delegate { // Load background and rocket backgroundTexture = new Texture("SpaceBackground"); rocketModel = new Model("Rocket"); }, delegate { // Show background backgroundTexture.RenderOnScreen( BaseGame.ResolutionRect); SpriteHelper.DrawSprites(width, height); // Render model in center BaseGame.Device.RenderState.DepthBufferEnable = true; rocketModel.Render(Matrix.CreateScale(10)); // Draw 3d line BaseGame.DrawLine( new Vector3(-100, 0, 0), new Vector3(+100, 0, 0), Color.Red); // Draw safe region box for the Xbox 360, support for old monitors Point upperLeft = new Point(width / 15, height / 15); Point upperRight = new Point(width * 14 / 15, height / 15); Point lowerRight = new Point(width * 14 / 15, height * 14 / 15); Point lowerLeft = new Point(width / 15, height * 14 / 15); BaseGame.DrawLine(upperLeft, upperRight); BaseGame.DrawLine(upperRight, lowerRight); BaseGame.DrawLine(lowerRight, lowerLeft); BaseGame.DrawLine(lowerLeft, upperLeft); // And finally some text TextureFont.WriteText(upperLeft.X + 15, upperLeft.Y + 15, "TestRenderOurNewGraphicEngine"); }); } // TestRenderOurNewGraphicEngine() The test starts by initializing a background texture and a rocket model in the first delegate, and then another delegate is used to render everything on the screen each frame. In the previous chapters you only used very simple unit tests with just one render delegate; now you also allow data to be created in a special init delegate, which is required because you need the graphics engine to be started before you can load any content from the content manager in XNA.
You might wonder why I call a RenderOnScreen method of the Texture class or the Render method of the Model class, when these methods don’t exist. The unit test also uses many properties and methods of the BaseGame that do not exist yet, but that does not mean you can’t write it this way and want this to work out later. For example, you might say that the following line is too long and too complicated to write:
BaseGame.Device.RenderState.DepthBufferEnable = true; Then just write it in a simpler way by using a new imaginary method BaseGame.EnableDepthBuffer and worry later about the implementation. The reason why I use a Texture and Model class and have methods like Render in this unit test is quite simple: That’s the way I think about this problem. Sure, I know XNA does not have these methods for me, but nothing stops me from writing my own Texture and Model classes to do just that. If you’d like to simplify the unit test even more or have other additions you would like to make, feel free to edit the unit test and then implement the features as you read through this chapter.
As a little note before you get started, I like to mention that there are several additions to the BaseGame class and some new game components like the camera class, which are also used in this unit test, but are not visible in the form of code because they are executed automatically. You will learn more about these additions, new classes, and improvements as you go through this chapter.
3D Models
Before you can start rendering 3D models you need to have an idea first of what the 3D model should look like or, even better, have some working 3D models to use. If you are not really a professional in 3D Studio Max, Maya, or Softimage or don’t have an artist that can throw some models at you quickly, don’t start with that yourself. Instead use files that are freely available from samples and tutorials or files from previous projects. This chapter uses the Rocket model from the Rocket Commander game I wrote last year (see Figure 5-1).
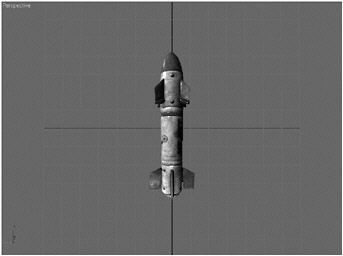
Figure 5-1
The Rocket model consists of the 3D geometry data (vectors, normals, tangents, and texture coordinates), the ParallaxMapping.fx shader, and the textures for this shader:
-
Rocket.dds for the rocket texture (red head, gray, all logos in the middle, and so on).
-
RocketNormal.dds for the normal mapping effect discussed in Chapter 7.
-
RocketHeight.dds for the parallax mapping effect used in the Rocket Commander game.
All this is created by the 3D model artist, who also specifies how the rocket should look by setting additional shader and material settings for the ambient, diffuse, and specular color and any other parameters defined in the shader or material that can be set in 3D Studio. This model file is saved as a .max file, which is a custom format just for 3D Studio Max (or in whatever modeling programs you or your artist use). To get this into your game you would need a .max importer, which does not exist for DirectX or XNA, and the .max files can get very big and it would not make sense to have a 100 MB file with all kinds of high polygon objects for your game if you just need the low polygon rocket model, which might fit into 100 KB. You need an exporter to just get the model data you need for your game. There are many formats available, so why do I even talk about this for so long? Well, none of the standard export formats in 3D Studio Max support the shader settings you need for your game. And XNA is also only able to import .x and .fbx files. That really sucks.
You probably could just export an .x file or use the .fbx format and live with the fact that there will be no exported shader settings, tangent data, and whatever else you need to perform normal mapping, parallax mapping, or whatever custom shader you want to use in your game. But then you would have a lot of work in your game engine to fix this for every single model. Or alternatively you could write your own custom exporter for 3D Studio Max, which many big game studios do, but they have a lot more time and money than you can ever have as an individual. Another way might be to have some custom xml files that store all the shader settings for each model and this is then imported and merged in your game engine, which again can lead to a lot of work, not only implementing the importing and merging, but also keeping the xml settings file up to date. I have seen all these approaches being used and you are free to do whatever you like, but I strongly suggest using a painless process if possible.
In this case the Rocket model can be exported to a custom .x file with help of the community-created Panda-Exporter for 3D Studio Max (see Figure 5-2), which then can be imported to the XNA Framework. It does not support all the features (tangent data is missing) and having more complex objects with bone and skinning data can be a pain, but you won’t need that for your games yet. A good alternative is the new Collada format, which exports data from many 3D modeling programs in a very clear and easy-to-use xml data file, which can then be imported into your game more easily than writing your own custom exporter and importer for model data. For skinned models (that means your models use a bone skeleton and each vertex has several skinning factors to apply any bone movement to them, often used in shooter games and whenever your game has any character models running around), I would suggest the .fbx format (.x format works too in XNA) or just search for an .md3, .md5, or similar model format importer, which is the famous format used in the Quake and Doom series of games.

Figure 5-2
The exported rocket.x file can now be used in your XNA engine the same way you use textures or other content files. Just drop the content file into your project and it will automatically pick up all used shaders and textures and warn you if they are missing. You don’t have to add the used textures and shaders yourself; the XNA .x Model processor will do that automatically for you. You just have to make sure the dependent files can be found in the same directory; in this case it would be the files Rocket.dds, RocketNormal.dds, RocketHeight.dds, and ParallaxMapping.fx. The implementation of the Model class and how to render the Rocket model on the screen is handled in the next part of this chapter.
Rendering of Textures
Until now you used the Texture class of the XNA Framework to load textures and then used the SpriteHelper class you wrote in Chapter 3 to render sprites on the screen with the help of the SpriteBatch class. This worked nice for your first couple of games, but it is not really useful for using textures in a 3D environment and it is still too complicated to use with all these sprite helper classes. As you just saw in the unit test for this chapter there should be a new method called RenderOnScreen to render the whole texture or just parts of it directly on the screen. In the background you still use the SpriteHelper class and all the code you wrote to render sprites, but this makes using textures much easier and you don’t have to create instances of the SpriteHelper class anymore. Additionally, you could later improve the way sprites are rendered and maybe even implement your own shaders to accomplish that without having to change any UI code or any unit tests.
Figure 5-3 shows the layout of the new Texture class; the code is pretty straightforward and the previous chapters already covered most of the functionality. The only important thing to remember is that you now have two texture classes, the one from the XNA Framework and the one from your own engine. Sure, you could rename your own class to something crazy, but who wants to write MyOwnTextureClass all the time, when you can just write Texture? Instead you will just rename the use of the XNA Texture class, which is not required anymore except in your new Texture class, which internally still uses the XNA texture. To do that you write the following code in the using region:
using Texture = XnaGraphicEngine.Graphics.Texture; Or this code when you need to access the XNA texture class:
using XnaTexture = Microsoft.Xna.Framework.Graphics.Texture; 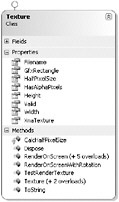
Figure 5-3
Some of the properties and methods are not important yet and I just included them here to have the complete texture class working right now so you can use it later in this book without having to re-implement any missing features (for example, rendering rotated texture sprites).
Before you analyze the code in this class, you should first look at the unit test, which always gives a quick overview on how to use the class. Please note that I split up the static unit test into each class now instead of having them all in the main game class. It is more useful this way because there will be a lot of classes in your engine and it makes it easier to check out functionality and quickly test the capabilities of each class. The unit test just loads the texture with help of the texture constructor, which takes the content name, and then you can render it with the RenderOnScreen method:
/// <summary> /// Test render textures /// </summary> public static void TestRenderTexture() { Texture testTexture = null; TestGame.Start("TestTextures", delegate { testTexture = new Texture("SpaceBackground"); }, delegate { testTexture.RenderOnScreen( new Rectangle(100, 100, 256, 256), testTexture.GfxRectangle); }); } // TestTextures() The most important method for you right now is the RenderOnScreen method. The Valid property indicates if the loading of the texture succeeded and if you can use the internal XnaTexture property. Width and Height and GfxRectangle give you the dimensions of the texture, and the other properties are not important to you right now. They will be used later when you render materials with shaders.
/// <summary> /// Render on screen /// </summary> /// <param name="renderRect">Render rectangle</param> public void RenderOnScreen(Rectangle renderRect) { SpriteHelper.AddSpriteToRender(this, renderRect, GfxRectangle); } // RenderOnScreen(renderRect) Looks quite simple, doesn’t it? There are several overloads that all add sprites to the SpriteHelper class, which uses code you already wrote in Chapter 3. Only the AddSpriteToRender method was changed to be static now and accept GfxRectangles instead of creating new instances of the SpriteHelper class:
/// <summary> /// Add sprite to render /// </summary> /// <param name="texture">Texture</param> /// <param name="rect">Rectangle</param> /// <param name="gfxRect">Gfx rectangle</param> public static void AddSpriteToRender( Texture texture, Rectangle rect, Rectangle gfxRect) { sprites.Add(new SpriteToRender(texture, rect, gfxRect, Color.White)); } // AddSpriteToRender(texture, rect, gfxRect) Finally, you also use the TextureFont class. It was moved to the graphics namespace, it uses the new Texture class now instead of the XNA Texture class, and it has a new unit test for text rendering. Other than that the class remains unchanged; you use it directly to write text on the screen with the help of the tatic WriteText methods (a few more overloads were added):
/// <summary> /// Write text on the screen /// </summary> /// <param name="pos">Position</param> /// <param name="text">Text</param> public static void WriteText(Point pos, string text) { remTexts.Add(new FontToRender(pos.X, pos.Y, text, Color.White)); } // WriteText(pos, text)
Line Rendering
To render lines in XNA you can’t just use a built-in method, you have to do it your own way. As I said before there are several ways and the most efficient one is to create a big vertex list and render all lines at once after you’ve collected them throughout the frame (see Figure 5-4).
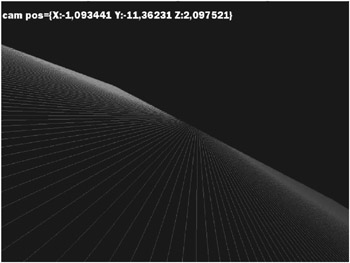
Figure 5-4
Additionally, you use a very simple shader to draw the lines. You could also use the BasicEffect class of XNA, but it is much faster to use your own custom shader, which just spits out the vertex color for each line. Because rendering 2D and 3D lines is basically the same, just the vertex shader looks a tiny bit different; this section only talks about rendering 2D lines. The LineManager3D class works in almost the same manner (see Figure 5-5).
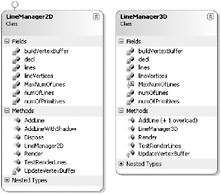
Figure 5-5
To learn how to use these classes, just take a look at the TestRenderLines unit test:
/// <summary> /// Test render /// </summary> public static void TestRenderLines() { TestGame.Start(delegate { BaseGame.DrawLine(new Point(-100, 0), new Point(50, 100), Color.White); BaseGame.DrawLine(new Point(0, 100), new Point(100, 0), Color.Gray); BaseGame.DrawLine(new Point(400, 0), new Point(100, 0), Color.Red); BaseGame.DrawLine(new Point(10, 50), new Point(100, +150), new Color(255, 0, 0, 64)); }); } // TestRenderLines() So all you have to do is to call the BaseGame.DrawLine method, which accepts both 2D points and 3D vectors to support 2D and 3D lines. Both LineManager classes work as shown in Figure 5-6, just call the DrawLine method of the BaseGame class a couple of times and let the LineManager class handle the rest.
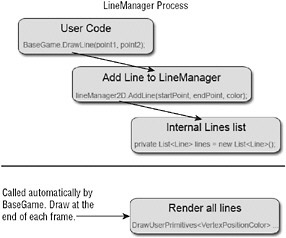
Figure 5-6
The interesting code is in the Render method, which renders all the lines you have collected this frame. The collecting of the lines and adding them to your lines list is really not complicated code; check it out yourself if you want to take a close look. The Render method uses the VertexPositionColor structure for all the vertex elements and the vertex array is created in the UpdateVertexBuffer method. This is the main part of the method:
// Set all lines for (int lineNum = 0; lineNum < numOfLines; lineNum++) { Line line = (Line)lines[lineNum]; lineVertices[lineNum * 2 + 0] = new VertexPositionColor( new Vector3( -1.0f + 2.0f * line.startPoint.X / BaseGame.Width, -(-1.0f + 2.0f * line.startPoint.Y / BaseGame.Height), 0), line.color); lineVertices[lineNum * 2 + 1] = new VertexPositionColor( new Vector3( -1.0f + 2.0f * line.endPoint.X / BaseGame.Width, -(-1.0f + 2.0f * line.endPoint.Y / BaseGame.Height), 0), line.color); } // for (lineNum) First you might wonder why each line start point and end point is divided through the width and height of your game and then multiplied by two and then subtracted by one. This formula is used to convert all 2D points from screen coordinates into your view space, which goes from –1 to +1 for both x and y. In the LineManager3D class this is not really required because you already have the correct 3D points. For each line you store two points (start and end) and each vertex gets the position and the color, hence the VertexPositionColor structure from the XNA Framework.
In the Render method you now just go through all primitives you have added (which are the lines; you got half as much as you have points) and render them with help of the LineRendering.fx shader:
// Render lines if we got any lines to render if (numOfPrimitives > 0) { BaseGame.AlphaBlending = true; BaseGame.WorldMatrix = Matrix.Identity; BaseGame.Device.VertexDeclaration = decl; ShaderEffect.lineRendering.Render( "LineRendering2D", delegate { BaseGame.Device.DrawUserPrimitives<VertexPositionColor>( PrimitiveType.LineList, lineVertices, 0, numOfPrimitives); }); } // if The AlphaBlending property of BaseGame makes sure you can render lines with alpha blending to allow blending them in and out. WorldMatrix is discussed later; for now just make sure here that the world matrix is reset to use the original position values of the lineVertices list. This is especially important for the LineManager3D.
Then the vertex declaration is set, which just makes sure that you can render VertexPositionColor vertices now (this is just the way DirectX does this and XNA works very similar to that, but you still have the advantage of using generics and other cool .NET functionality):
decl = new VertexDeclaration( BaseGame.Device, VertexPositionColor.VertexElements); That looks simple, doesn’t it? Well, why even bother with the declaration; couldn’t XNA do that for you automatically? Yes, it could, but remember you can also create your own custom vertex declaration if you need a custom format, which makes sense if you write your own custom shaders. See Chapter 7 on how to do that, in the discussion of the TangentVertexFormat.
The final thing you have to figure out to understand the rendering of the lines is to render data with shaders. Yeah, I know, it’s a lot of work just to render a few lines, but you will need all the shader functionality for anything you do in 3D anyway. You cannot render anything in XNA without shaders; period! You might now say “What about the SpriteBatch class, you used it to render 2D graphics and you never talked about shaders yet?” That is correct; you don’t have to know anything about shaders if you just want to create a simple 2D game. But that does not mean the SpriteBatch class does not use shaders internally. Another class that hides the shader capability is the BasicEffect class, which allows you to render 3D data without writing your custom shader effects first. It uses a basic shader internally to mimic the fixed function pipeline functionality, but it is similar to the fixed function pipeline, not as fast as writing your own custom shaders, and it does not support anything special.
The model class that is discussed in a little bit also uses shaders, but XNA allows you to hide all the shader management. You can just set the shader parameters for the matrices and then use the Draw method to let XNA render all mesh parts of the 3D model.
Shaders are discussed in great detail in Chapter 6. Before you take a look at the LineRendering.fx shader that brings the lines on the screen, you should first look at the ShaderEffect class that allows rendering of 3D data for the shader with help of a RenderDelegate:
/// <summary> /// Render /// </summary> /// <param name="techniqueName">Technique name</param> /// <param name="renderDelegate">Render delegate</param> public void Render(string techniqueName, BaseGame.RenderDelegate renderDelegate) { SetParameters(); // Start shader effect.CurrentTechnique = effect.Techniques[techniqueName]; effect.Begin(SaveStateMode.None); // Render all passes (usually just one) //foreach (EffectPass pass in effect.CurrentTechnique.Passes) for (int num = 0; num < effect.CurrentTechnique.Passes.Count; num++) { EffectPass pass = effect.CurrentTechnique.Passes[num]; pass.Begin(); renderDelegate(); pass.End(); } // foreach (pass) // End shader effect.End(); } // Render(passName, renderDelegate) The ShaderEffect class uses the effect instance to load the shader from the content pipeline. You then can use the effect to render 3D data with it. This is done by first selecting the technique either by name or index, then the shader is started and you have to call Begin and End for each pass the shader has. Most shaders in this book and most shaders you will ever encounter will only have one pass, and that means you only have to call Begin and End once for the first pass. Usually only post screen shaders are more complex, but you can write shaders with many passes, which might be useful for fur shaders or things of this nature with multiple layers. In between Begin and End the 3D data is rendered with the help of the RenderDelegate you used earlier to call DrawUserPrimitives with the lineVertices array.
EAN: 2147483647
Pages: 138