| Distributing your iMovies on DVD is the ultimate in digital video. You start by recording your footage digitally, editing in iMovie, and retaining the digital quality by going directly to DVD. iMovie makes creating DVDs simple by linking up with iDVD.  | Be aware that you can't use iDVD unless you have a Mac with Apple's SuperDrive, which can read and write both CDs and DVDs. |
Task: Exporting to iDVD While there is an Export To iDVD option in the Export dialog box, the message, shown in Figure 17.15, tells you that it is no longer necessary to export to iDVD because iMovie prepares projects for iDVD every time they are saved. You can still choose to "export" your project this way. Figure 17.15. Exporting an iMovie for iDVD. 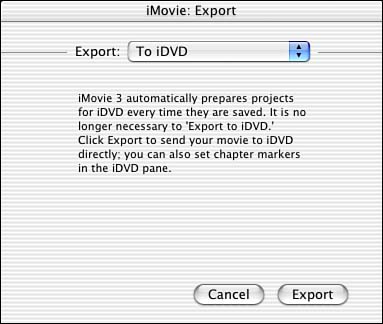 Alternatively, you could open the iDVD palette on the right side of the iMovie interface and click the button for Create iDVD Project. It will take a moment for your movie to open in iDVD where you can customize the menus and add additional movies. Task: Adding Chapters to Your Movie Besides maintaining video quality, DVDs offer another benefit to your iMovies: chapters. Adding chapters allow you to segment your video project so that people viewing the completed DVD can skip straight to the part they want to see, just like on a commercial DVD. Follow these steps to add chapters to an existing iMovie. -
Open a finished iMovie project and make sure you are in Timeline view. -
Click on the iDVD button in the main iMovie window to display the iDVD palette. -
In the Timeline viewer, move the playhead to the point in your movie at which you want to start a new chapter. -
In the iDVD palette, click the Add Chapter button. -
A row for the newly created chapter will appear in the iDVD palette, where you can type in a Chapter Title, as shown in Figure 17.16. Figure 17.16. Type a descriptive title for your chapter. 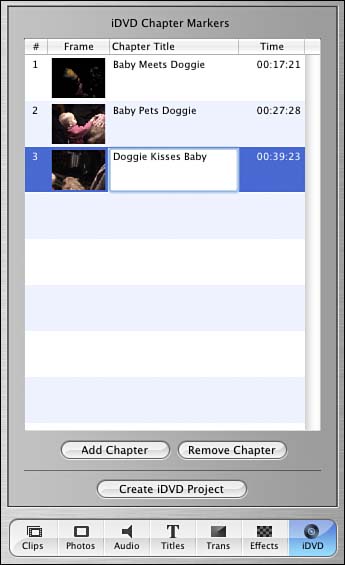 -
A small yellow diamond will appear in the Timeline viewer to mark the location of chapters, as shown in Figure 17.17. Figure 17.17. Chapter markers will appear as yellow diamonds at the top of the Timeline. 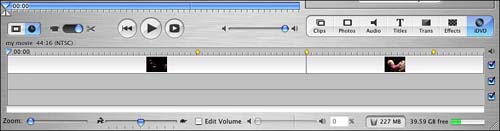 -
You can repeat steps 4 through 6 until you've added up to 36 chapters to your iMovie. -
When you are finished adding chapters, click the Create iDVD Project button to open your iMovie in iDVD, as shown in Figure 17.18, where you can choose themes to customize the menu that displays your chapters. Before iDVD can be launched, you will be asked to save your project. Figure 17.18. This is an iMovie with chapters after export to iDVD. 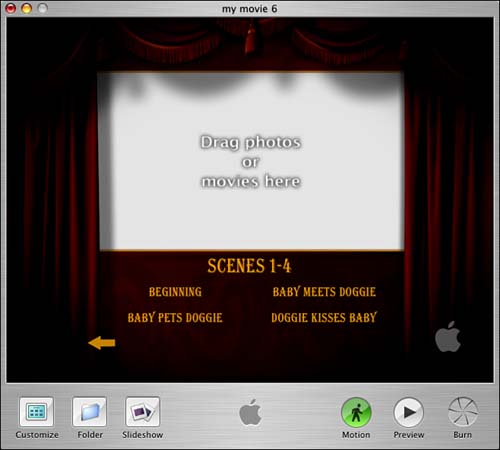 By default, iDVD saves your project in the Documents folder of your user account with the file extension . dvdproj . (We talk about customizing your presentation in iDVD in Chapters 18 through 20.)  |