Working with Audio
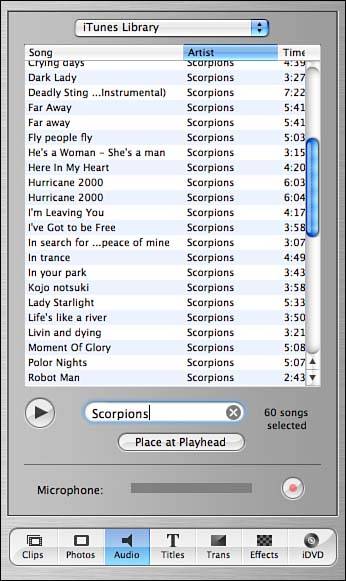
| There are a number of different ways to add audio to a project, so we'll start with one of the most common (and useful), then discuss how to work with audio clips that have been added to a timeline, and, finally, examine other means of importing audio. Accessing the iTunes Music LibraryAdding audio to an iMovie project takes place through the Audio pane, accessed by clicking the Audio button in the icon bar on the lower right half of the screen. Figure 16.13 shows the iMovie window with the Audio pane active. Figure 16.13. Access Audio import features by clicking the Audio (speaker) icon in the lower-right portion of the iMovie window. Your iTunes library is the default source for audio that is added to the project. You can use the pulldown menu at the top of the iTunes listing to choose between your iTunes playlists or type a few characters into the search field at the bottom of the song list to filter the songs that are shown.
If you have a library of thousands of songs and can't remember which one you're looking for, you can choose a song from the list, then click the Play button underneath the list to listen to the song.
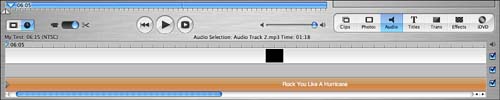
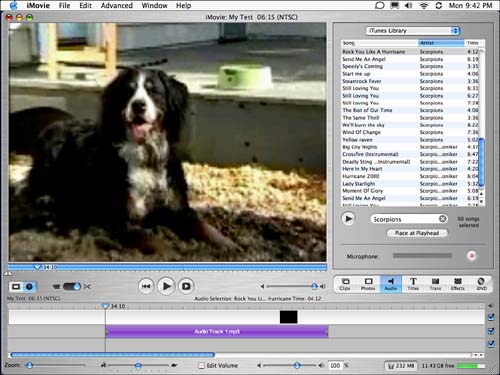
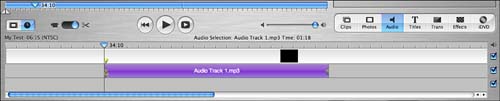
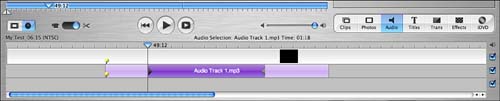
Adding iTunes Audio to the ProjectAfter you've located the song file that you want to add to the iMovie project, position the Playhead where you would like the sound to be inserted, click within the audio track that should receive the sound file, then click the "Place at Playhead" button in the Audio pane. iMovie will take a few seconds (or minutes, depending on the length of the file), then the corresponding audio clip will appear in the selected audio track as a colored bar labeled with the name of the audio file, as shown in Figure 16.14. Figure 16.14. iMovie has just finished adding the chosen song to the selected audio track.
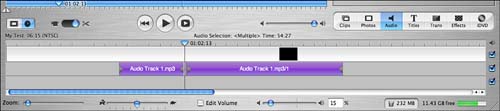
Manipulating Audio within the iMovieOnce a piece of audio has been added to an audio track, it can easily be manipulated to match up with your video tracks or the volume can be changed to better mix with the video or other audio files. Repositioning AudioSometimes you place a sound in a movie and it "just doesn't fit," or doesn't sync up with the video. To move an audio clip, click and drag it horizontally within the Timeline. The audio segment will move to any position you'd like within the project. While you are dragging, the playhead will automatically track the start position of the audio, enabling you to position it perfectly within the project, as seen in Figure 16.15. Figure 16.15. Drag the audio clip to reposition it.
If you decide that you want to remove an audio clip from the project, simply click on it, then press Delete or choose Clear from the Edit menu. Locking Audio to a Video ClipOften the act of moving audio around is an attempt to synchronize it with a piece of video. iMovie's ability to position on a frame-by-frame basis makes this simple, but what if you decide later that you want to reposition the video clip? If you drag the video, all of your hard work synching the audio will be lost. To "lock" a piece of audio to the video track, select the audio that you've positioned where you want it, then choose Lock Audio Clip at Playhead from the Advanced menu. The audio track will then be "attached" to the video that occurs at the same place as the audio. Moving the video track within the timeline will move the audio as well, keeping your synchronization intact. You can tell a lock is in place by graphical "pushpins" that appear on the audio and video tracks, as seen in Figure 16.16. Figure 16.16. Pushpins denote an audio track that is locked to a video track. To unlock an audio clip, select it within the audio track, then choose "Unlock Audio Clip" from the Advanced menu.
By default, all locked audio clips are displayed with the pushpins all the time. To change the display so that the pushpins are only shown when the audio clip is selected, be sure to check the Show Locked Audio Only When Selected option within the iMovie preferences. Using Crop MarkersLike video, audio clips also have crop markers that can be used to choose how much, or how little of a clip is played . These two arrows appear at the ends of an audio clip and can be dragged with the mouse to limit audio playback to a certain part of a sound, as demonstrated in Figure 16.17. Figure 16.17. Drag the crop markers to limit what parts of the song are played. To completely crop (remove) the portions of the audio clip that aren't being played, mark off the appropriate portions with the crop markers, then choose "Crop" from the Edit menu. Adjusting VolumeSuppose you want soft background music in one portion of your movie, but want it to slowly build to a blaring orchestra in another? Before iMovie 3, the only way to do this was to edit the sound files in another audio program. Now, adjusting the volume is as simple as clicking and dragging. To edit the volume editing mode, click the Edit Volume checkbox at the bottom of the iMovie window. Within a few seconds, all the audio clips (and the video clips that contain audio) will display little lines through them. These lines represent the volume level of the clips. To change the volume level of a clip, highlight the clip within any of the tracks (remember, even the video track's audio can be adjusted here), then click and drag the volume adjustment at the very bottom of the iTunes window, or type a new volume level (100% being the "default" volume) into the field beside the volume slider. As you change the volume level, the line will raise or lower within the clip. Multiple clips can even be selected at once (shift-click) and simultaneously be adjusted with this control. You're thinking, "Okay, that's nice," but it still doesn't get me the fine- tuned control I need to really mix different audio clips together. Don't worry, volume adjustment can be as simple (as we've seen) or as complex (as we're about to see) as you want. To alter the volume level within a specific part of an audio or video clip, click and drag the volume line within the clip. As you drag, an adjustment "handle" (a big yellow dot) will appear. Dragging this dot up or down raises or lowers the volume at that point. To carry the volume change through to a different part of the clip, simply click wherever you want another volume adjustment handle to be added, and the level changes will be carried through to that point. Each handle that is added also carries with it a transition point that determines how the audio clip will transition to the new volume level (will it happen abruptly? smoothly?). The transition point is displayed as a small red/orange square to the right of the adjustment handle. The point can be dragged so that it is right above or below an adjustment handle, making for an immediate transition in volume, as seen in Figure 16.18. Figure 16.18. Moving the transition point directly above or below the adjustment handle will cause an immediate volume transition. To smooth things out a bit, the transition point can be dragged all the way along the volume line up to another adjustment point. The transition then occurs all the way between these two points. For example, Figure 16.19 shows the same volume adjustment being made as in 16.18, but the transition place over a much larger span of the audio clip. Figure 16.19. The transition point can be used to spread the volume transition out over a long span of the audio clip. Volume adjustment can be used to ramp down an audio clip while ramping up another (similar to video transitions that blend the end of one clip with the beginning of another, this is called a cross-fade), or to create any number of other effects within your project. Splitting AudioIf you have a sound or song that you want to play part of at one time, and another part at another time, you have two choices ”you can import the audio clip twice, or you can simply "split" the existing clip into different pieces and use them wherever you'd like. To split an audio clip, position the Playhead where you'd like the clip to break, then choose Split Audio Clip at Playhead from the Edit menu. New crop marks will appear at the location of the split within the audio clip. You can use these markers to fine tune the split location, as seen in Figure 16.20. Figure 16.20. Using the split feature will add crop markers at the location of the Playhead. To "finish" the split, you must choose Crop from the Edit menu, otherwise the split audio segments will still be attached to one another and won't be able to be moved separately. |


EAN: 2147483647
Pages: 349