Flylib.com

Books Software


Making Changes to Effects


Making Changes to Effects

After you've tried effects by simply applying them to successive clips, you'll probably discover that you want to make things more interesting or customized.

graphics/bookpencil_icon.gif

You can drag and drop transitions, but the drag-and-drop feature doesn't work with effects.


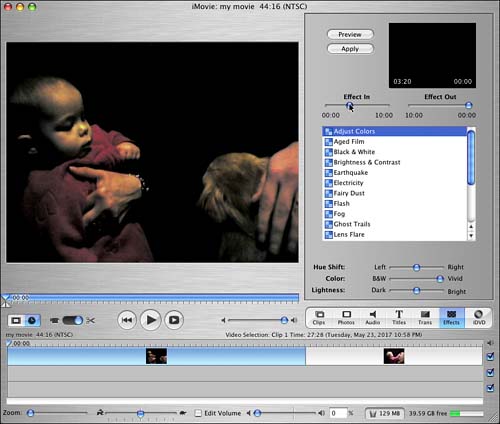
Because you've already applied an effect to a clip, you will need to reapply the changed effect. To do this, select the clip you want to change the effect for, choose the effect you wish to change, make the changes, and then click Apply. A dialog message sheet window will appear in some cases to let you know that the new effect invalidates the previous one. You must choose OK for your new effect to be processed .

Task: Changing and Updating an Effect

This example picks up where we left off with the last task. We've decided that we want to try the mysterious Effect In and Effect Out features in the Effects palette. We want to slowly increase the impression that the effect has on our clip over the space of a few seconds by bringing in the effect to give the clip a unique feel and then fading out the effect.

  1. Select a clip in the Timeline that has an effect applied to it.

  2. Click the blue slider in the Effect In area of the Effects palette, and drag it a bit to the right to choose the length of time that it takes for the effect to develop to full strength (see Figure 15.27).

    Figure 15.27. Instead of simply turning on, the effect now fades in over the course of a few seconds.

    graphics/15fig27.jpg

  3. Now click the Effect Out slider and drag it to the left to choose how long it takes for the video to return to normal.

  4. Click the Apply button to re-apply the effect with these new settings.

When you click the Apply button, iMovie starts to process the video. In a short while, you can preview it to see the final version of the video. Of course, if the effect doesn't measure up to your expectations, you can continue steps 14, trying out different adjustments until you're happy with the effect.


Summary

In this chapter, you found out how you can bring your iMovies one step closer to their Hollywood (or living room) debut by learning about titles, transitions, and effects. You learned how easy it is to make and adjust titles in iMovie. You also learned how iMovie enables you to add professional-looking transitions to a project, which can help digital video to look and feel more like a real movie. Finally, you saw how, in certain situations, an effect such as Brightness/Contrast can actually help you to see your video better if it was shot in a setting where there wasn't much light, also known as a low-light situation .


Chapter 16. Using Still Photos, Music, and Sound Effects in iMovie

iMovie isn't only useful for people with video cameras . Still images with accompanying sound can be used to create high-impact presentations or documentaries, and can be used to spice up live-action films with professional title and credit backgrounds. Even if you're a digital photographer who is completely satisfied with iPhoto, you'll find that iMovie can create new and exciting ways to display your masterpieces.

If you've added view clips to your project from your camera or from other sources, they've almost certainly had sound accompanying them. What if you decide that you don't like the sound that goes along with your movie clip? Do you have to reshoot the video just for a new audio track? No, not at all. iMovie provides you the ability to use dozens of canned sound effects, record audio from your computer's microphone (if available), use music from your iTunes library, or even take the sound from other video clips and use them with different video sequences.