| To get the feel for how Crystal Reports works, you'll create a simple Products Listing report, as shown in Figure 20.1. This report will contain only a few fields, but it should give you a good idea about how to build a report for your project using Crystal Reports. Figure 20.1. Your finished report should look like this.
To get started, follow these steps: -
Select the Project, Add New Item menu item. -
From the Add New Item dialog box, select Crystal Report. Set the name of the report to ProductsReport.rpt, as shown in Figure 20.2. Click Open to move on to the next step. Figure 20.2. Use the Add New Item dialog box to add a new report to your project.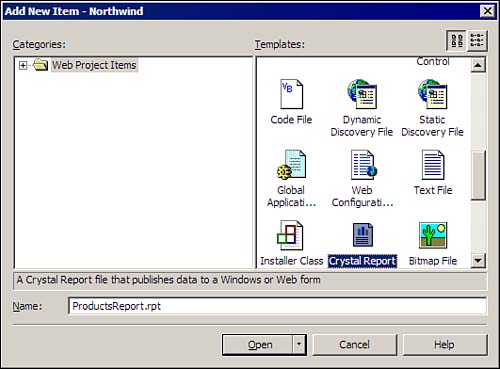
WARNING The first time you use the Crystal Reports designer, you will need to register your product, and this requires a few minutes of your time and a live Internet connection. -
From the Crystal Report Gallery (see Figure 20.3), you can select how to create the new document and which Expert to use. For now, accept the defaults and click OK. Figure 20.3. Select the style of report you'd like from the gallery.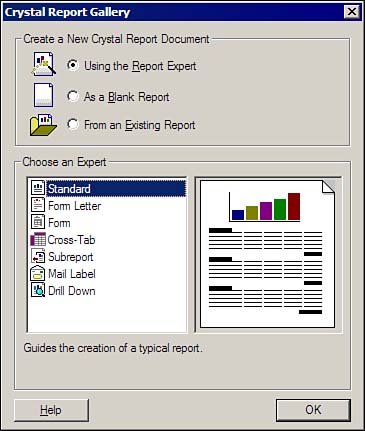
-
From the Data page of the Standard Report Expert dialog box, you must select a data source. You have a lot of choices here, including OLE DB (ADO) sources, ADO.NET DataSets, XML files, local database files, and more. For now, select OLE DB (ADO) and follow the prompts to add a connection to SQL Server and the Northwind sample database. (You'll need to supply the server name, login ID, and password in order to proceed.) Figure 20.4 shows the Standard Report Expert dialog box after you've selected the data source and drilled down into the list of tables. Figure 20.4. Start out by selecting your data source.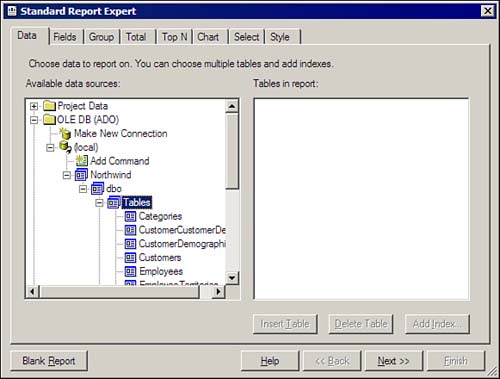
-
In order to tell the Expert which tables you need, select the Products table from the Available Data Sources list and then click Insert Table to add the table to the Tables in Report list. Click Next to move to the next page of the Expert. -
On the Fields page, you must select the fields your report will require. In this case, select ProductID, ProductName, UnitPrice, and UnitsInStock, as shown in Figure 20.5. When you're done, click Finish to conclude making selections you're now done making choices for this simple report. Figure 20.5. Select fields to add to your report.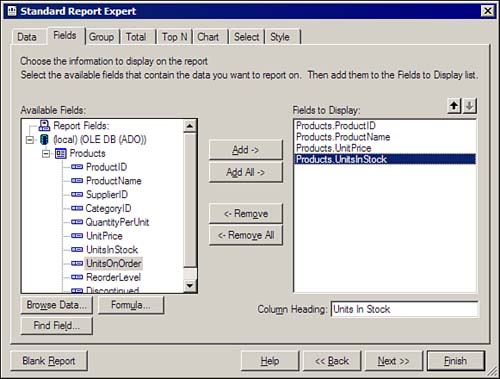
TIP If you investigate further, you'll find many more options buried in this Expert. You can set up groupings, totals, charts, subsets, and more and this is just one of several Experts! As you can see, there are a lot of options when creating reports using Crystal Reports.
Now that you've finished specifying options, Crystal Reports displays its designer, allowing you to modify the layout of the report. Figure 20.6 shows the sample report in the designer. Figure 20.6. Use the Crystal Reports designer to lay out the report.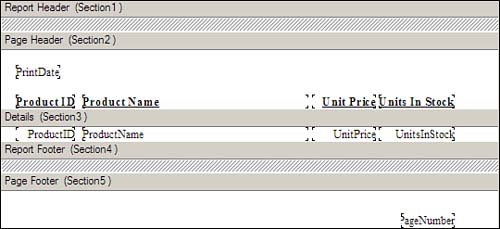
|
