Developing a Web Part
Developing a Web Part
The previous example showed how to use Web Parts within a page and how to switch the page between various modes at runtime. The catalog built into the page includes a TextBox control that you may add to a WebPartZone on the page. The example delivers a small glimpse into the flexibility and power of Web Parts. However, simply dropping a TextBox onto a WebPartZone isn't very interesting. In this example, we'll build a hyperlink Web Part that you may use to augment the Links WebPartZone.
Developing a Web Part is actually fairly straightforward and quite similar to developing a custom control (like the ones from Chapters 4 and 5). Instead of deriving a class from System.Web.UI.Controls.WebControl or System.Web.UI.Controls.CompositeControl, you derive a class from System.Web.UI.WebControls.WebParts.WebPart. From that point, you have the choice of either rendering HTML or composing a Web Part from other controls. The WebPart includes considerable functionality for integrating with the Web Part architecture. For example, in the next sample, the navigation URL and display name properties of the hyper link Web Part will be exposed as properties that the end user may modify through the PropertyGridEditorPart.
The following example illustrates how to create a hyperlink Web Part that you may add to the Links WebPartZone in the UseWebParts project. While, you could add a regular HyperLink control to the catalog, normal controls don't have the same support for the user to modify the links. For that, the link need to be represented as a Web Part.
Developing the HyperLinkWebPart
Add a new subproject to the UseWebParts solution. Make it a class library and name the library WebPartLib. When Visual Studio asks you to name the first class being placed in the library, name the file “HyperLinkWebPart.cs.” (Visual Studio will name the class HyperLinkWebPart.)
Make a reference to the System.Web assembly within the new subproject. Right mouse click on the WebPartLib node in Solution Explorer and use the Add Reference option from the local menu to add the System.Web assembly.
Derive the new class from System.Web.UI.WebControls.WebParts.WebPart by adding it to the inheritance list, as shown here:
using System; using System.Collections.Generic; using System.Text;using System.Web; using System.Web.UI; using Sy stem.Web.UI.WebControls; using Sy stem.Web.UI.WebControls.WebParts; namespace WebPartLib { public class HyperLinkWebPart : System.Web.UI.WebControls.WebParts.WebPart { } }
Add two string member variables to the HyperLinkWebPart class—one to represent the display name of the Web Part and the other to represent the actual URL. Initialize them with reasonable values:
using System; using System.Collections.Generic; using System.Text; using System.Web; using System.Web.UI; using System.Web.UI.WebControls; using System.Web.UI.WebControls.WebParts; namespace WebPartLib { public class HyperLinkWebPart : System.Web.UI.WebControls.WebParts.WebPart { string _strURL = "http://www.microsoft.com"; string _strDisplayName = "This is a link"; } }Add a member variable of type HyperLink to the class. The Web Part will leverage the already-existing functionality of the HyperLink control. Override CreateChildControls to create an instance of HyperLink and add it to the HyperLinkWebPart controls collection. Initialize the HyperLink.Text property to the member variable representing the display name. Initialize the HyperLink.NavigateUrl property to the member variable representing the URL:
using System; using System.Collections.Generic; using System.Text; using System.Web; using System.Web.UI; using System.Web.UI.WebControls; using System.Web.UI.WebControls.WebParts; namespace WebPartLib { public class HyperLinkWebPart : System.Web.UI.WebControls.WebParts.WebPart { HyperLink _hyperLink; string _strURL = "http://www.microsoft.com"; string _strDisplayName = "This is a link"; protected override void CreateChildControls() { _hyperLink = new HyperLink(); _hyperLink.NavigateUrl = this._strURL; _hyperLink.Text = this._strDisplayName; this.Controls.Add(_hyperLink); base.CreateChildControls(); } } }Finally, expose the URL and the display name as properties so that the Web Parts architecture can understand and work with them. To allow the exposed properties to work with the Web Parts architecture through the PropertyGridEditorPart, be sure to adorn the properties with the following attributes: Personalizable, WebBrowsable, and WebDisplayName, as shown here:
using System; using System.Collections.Generic; using System.Text; using System.Web; using System.Web.UI; using System.Web.UI.WebControls; using System.Web.UI.WebControls.WebParts; namespace WebPartLib { public class HyperLinkWebPart : System.Web.UI.WebControls.WebParts.WebPart { HyperLink _hyperLink; string _strURL = "http://www.microsoft.com"; string _strDisplayName = "This is a link"; [Personalizable(), WebBrowsable, WebDisplayName("DisplayName")] public string DisplayName { get { return this._strDisplayName; } set { this._strDisplayName = value; if (_hyperLink!= null) { _hyperLink.Text = this.DisplayName; } } } [Personalizable(), WebBrowsable, WebDisplayName("URL")] public string URL { get { return this._strURL; } set { this._strURL = value; if (_hyperLink!= null) { _hyperLink.NavigateUrl = this.URL; } } } protected override void CreateChildControls() { _hyperLink = new HyperLink(); _hyperLink.NavigateUrl = this._strURL; _hyperLink.Text = this._strDisplayName; this.Controls.Add(_hyperLink); base.CreateChildControls(); } } }Make sure the project's compiler output is going to a sensible directory (for example, the bin\debug directory for the project).
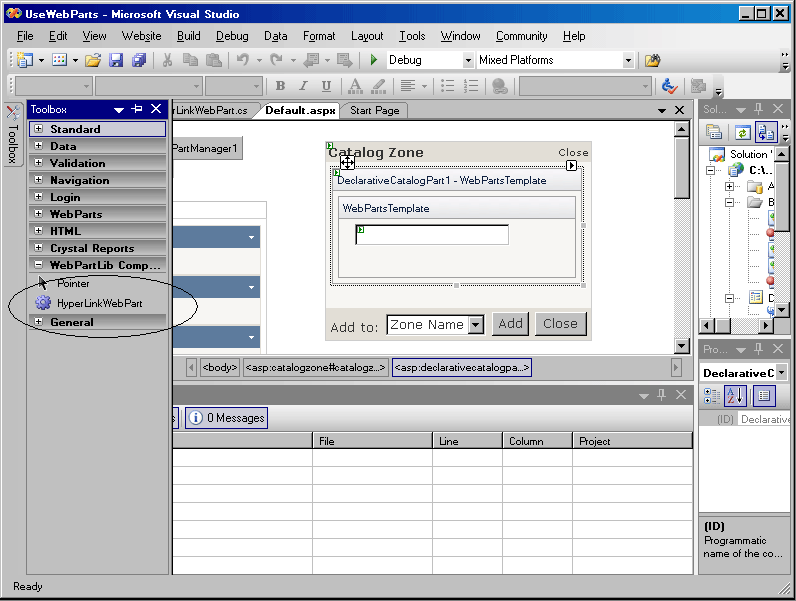
Now add the HyperLinkWebPart to the catalog. First, right mouse click in the toolbox and select “Choose Item” (just as you did when adding custom controls to a page). Find the WebPartLib.dll assembly and load it into Visual Studio. You should see the HyperLinkWebPart appear in the toolbox, as shown here:
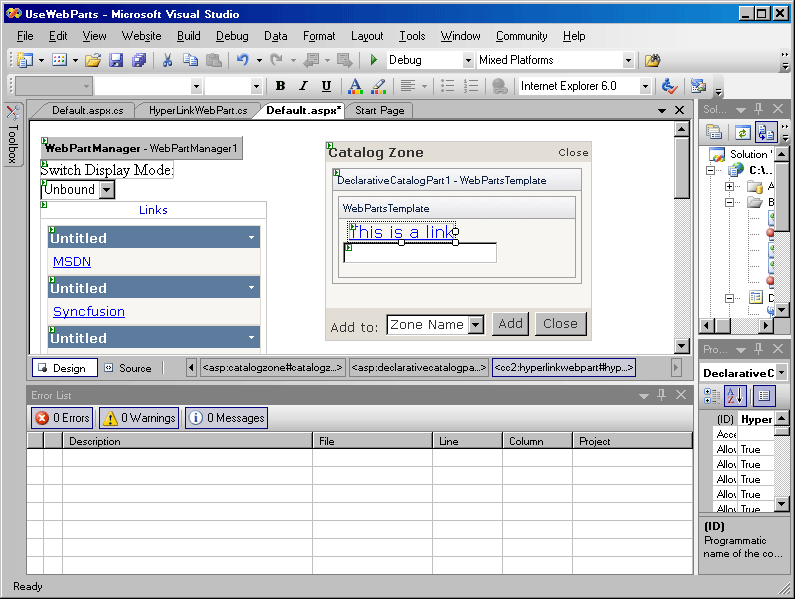
Put the CatalogZone into “Edit Template” mode by clicking on the small arrow in the Web Template. Then drag the HyperLinkWebPart into the CatalogZone, just as you did earlier with the TextBox, as shown here:
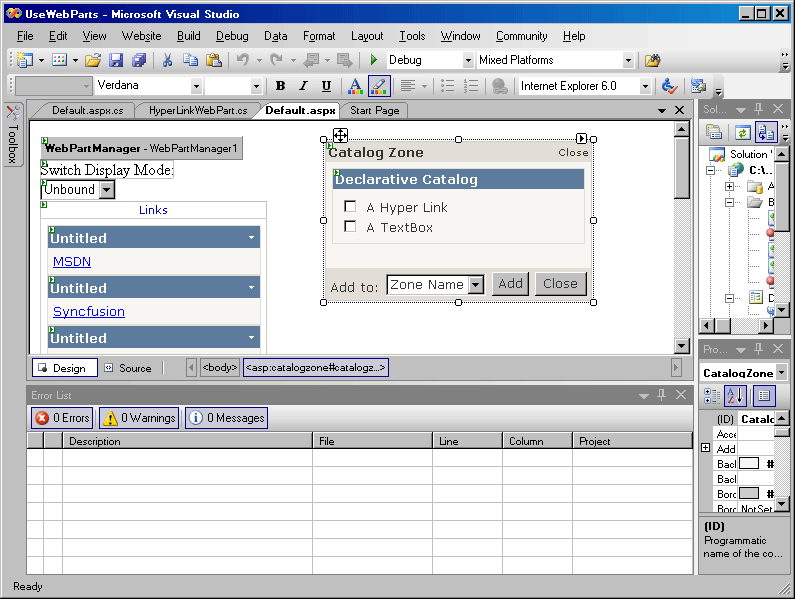
Add a title to the new catalog item. Switch to the source code window in Visual Studio. Within the source code, add a title to the new control:
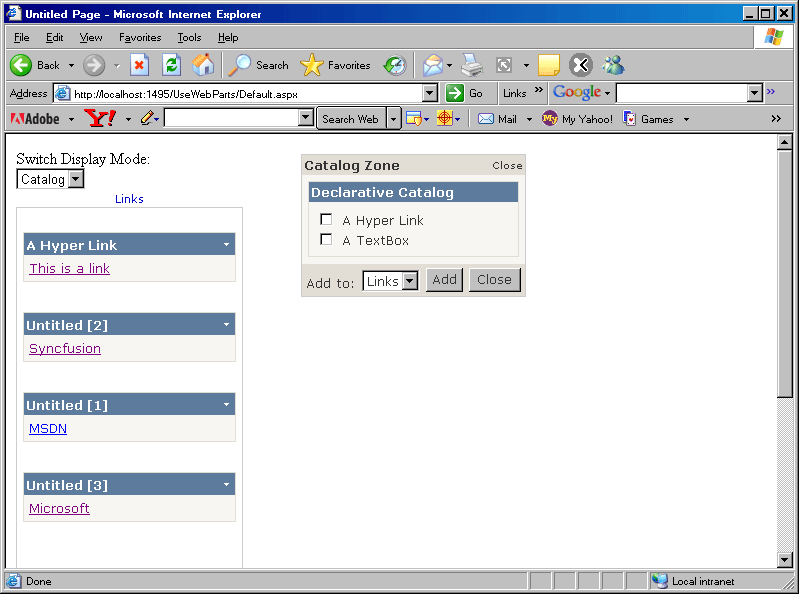
<ZoneTemplate> <asp:DeclarativeCatalogPart runat="server"> <WebPartsTemplate> <cc2:HyperLinkWebPart Title="A Hyper Link" runat="server" /> <asp:TextBox Title="A TextBox" runat="server"> </asp:TextBox> </WebPartsTemplate> </asp:DeclarativeCatalogPart> </ZoneTemplate>The HyperLinkWebPart should now appear in the catalog with a title, as shown here:
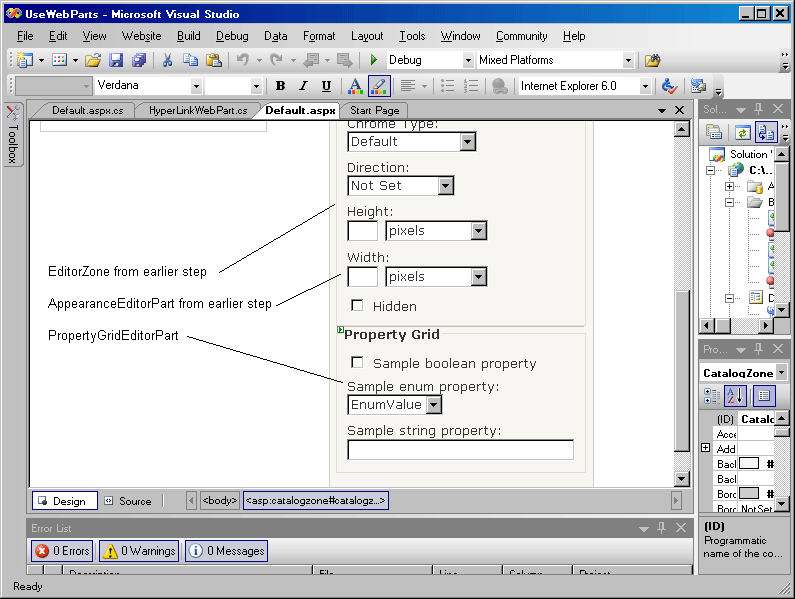
Add a PropertyGridEditorPart to the EditorZone on the page. Just pick one up out of the toolbox and drop it onto the EditorZone, as shown in the following graphic:
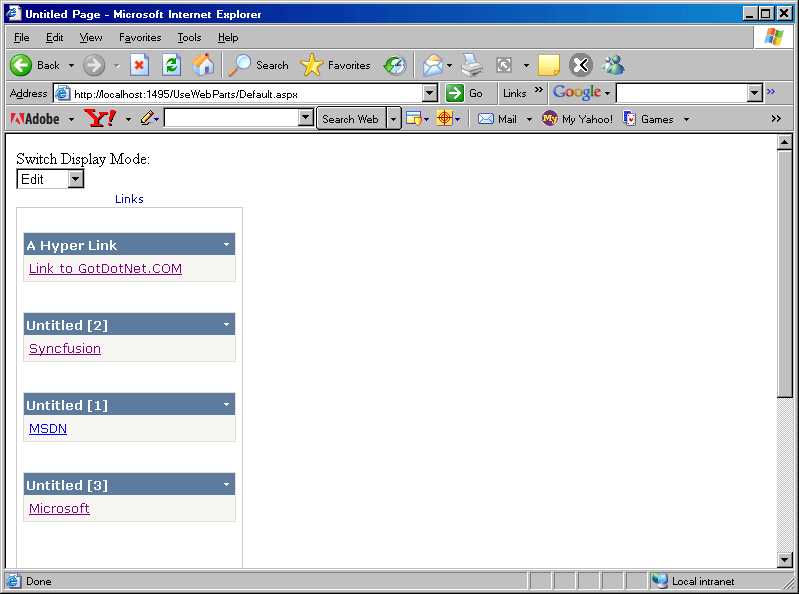
Surf to the Web site. Put the page in Catalog mode by selecting Catalog from the drop- down list box.
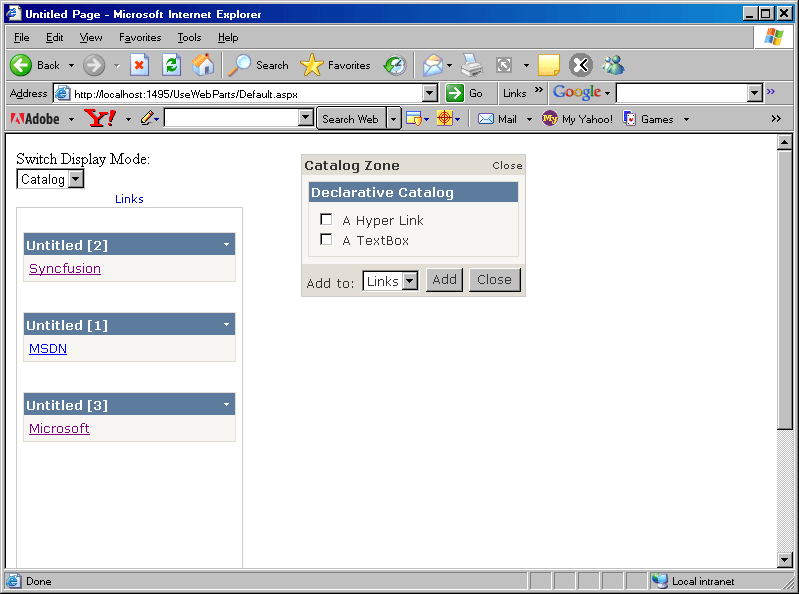
Select “A Hyper Link” from the catalog and add it to the Links Web Part Zone.
Put the Web Parts Page into Edit mode by selecting Edit from the drop-down list box. Click on the local menu area on the upper-right corner of the newly added link.
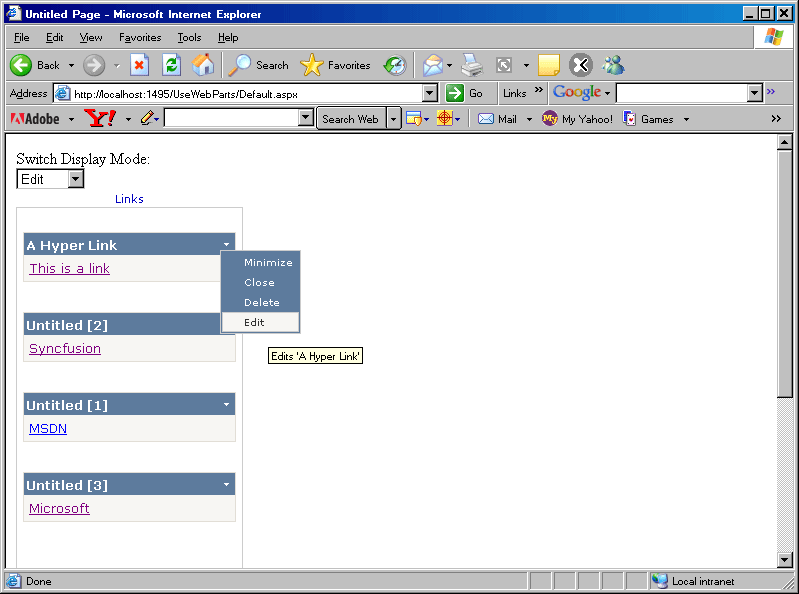
Select Edit to edit this link. You should see the Editor Zone appear, along with the new property grid showing text boxes for editing the DisplayName and the URL:
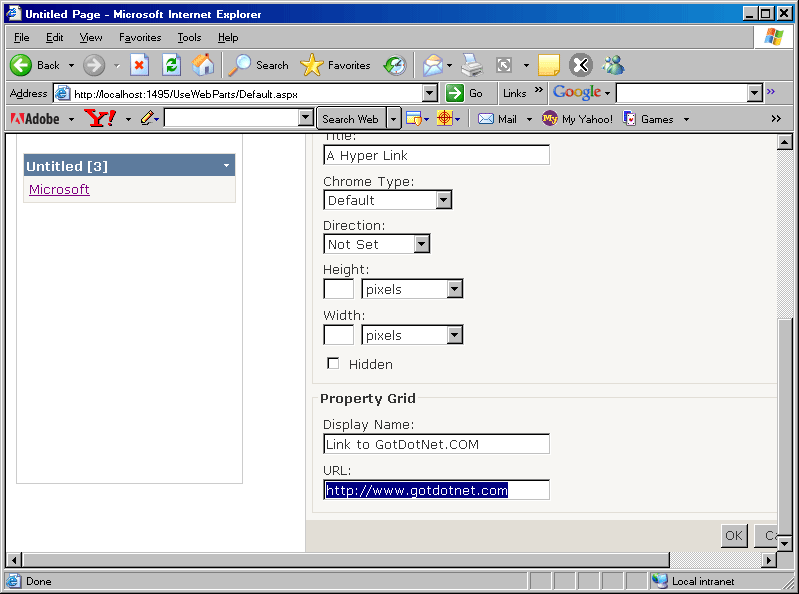
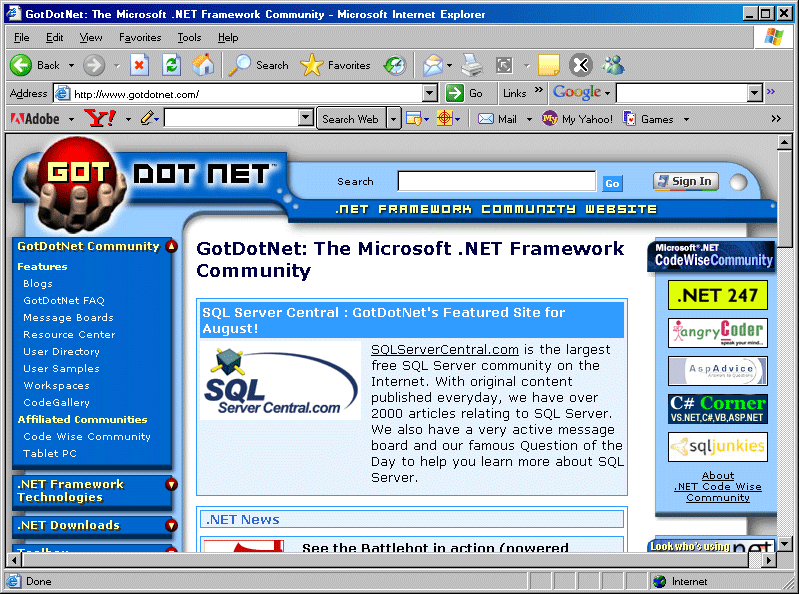
Type in a new DisplayName and a new URL. (The example points to www.gotdotnet.com) Select OK. The browser should now show the new properties for the HyperLinkWebPart, and you should be able to surf to the site represented by the link.
EAN: N/A
Pages: 177