Coastal Breeze: Creating imagery for your work and finding additional source material
|
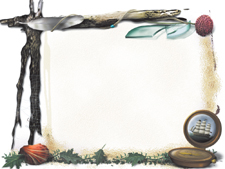
| Dave Shea, Designer www.csszengarden.com/013 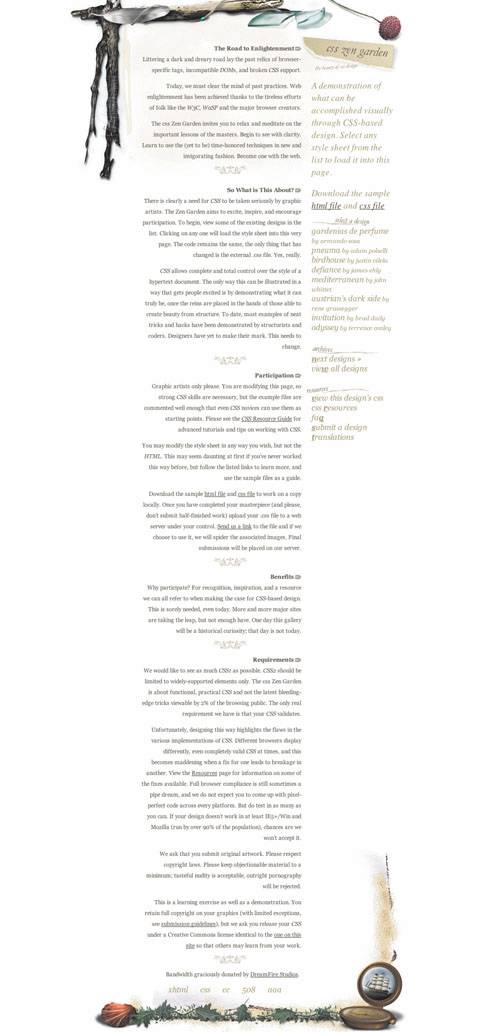 DUBBED "THE CITY OF GLASS" by local resident and popular author Douglas Coupland, Vancouver is a thriving city nestled at the foot of a towering mountain range on the west coast of Canada. A strong sea-oriented theme of driftwood and seashells complemented with a few shards of broken glass could be more evocative of the city only if a few pieces of sushi were also thrown in. But designer Dave Shea knew to quit while he was ahead. The images in Coastal Breeze were painted entirely by hand in Adobe Photoshop, without a hint of photographic material. Using Photoshop's assorted painting tools, Shea was able to produce a painterly and textured effect without relying on photography. The Starting PointThe basic objects were originally built for a long-retired site that lived years before the Zen Garden. Turning back to the original Photoshop file of 300-plus layers created in early 2001 (FIGURE 1), Shea pulled out the elements needed to generate the new layout. Adapting the imagery proved relatively easy; the challenge was in creating a layout structure to hold the text. Figure 1. The original Photoshop file from which Coastal Breeze was derived. Because the original design was a visual frame surrounding a roughly square HTML frame-based page, and the Zen Garden text is long enough to require a scrolling vertical layout, the two had to be reconciled. Shea's starting point was a square frame. It turned out that the cleanest way to adapt the frame for use in Coastal Breeze was to cleave it into top and bottom halves. L-shaped corners effectively frame Coastal Breeze while allowing for some necessary white space. TechniquesHand-painting an entire design isn't everyone's cup of tea, of course, but some of the painting techniques used in Coastal Breeze can be valuable for moregeneral touch-ups as well. Enhancing existing artwork or adding visual interest is simple with a bit of knowledge under your belt. The following techniques are written with Adobe Photoshop in mind. Since the tools necessary to reproduce them are common across many design packages, you should be able to re-create the following methods with your image editor of choice. Using Brushes and TransformsThe glass shards in the top-right corner cast shadows, complete with transparency, as if the sun were shining through them (FIGURE 2). This effect takes a bit more work than simply applying a drop shadow layer effect in Photoshop, but not much more. A reasonably good-looking cast shadow begins by duplicating the foreground shape (choose Layer > Duplicate Layer), a glass marble in this example. Duplicate it below the original and fill it with a solid color. With the help of the Free Transform command (Edit > Free Transform), which allows you to grow, shrink, rotate, and skew a shape, the shadow was vertically compressed and skewed to the left and a blur was applied to soften the hard edge (FIGURE 3). Figure 2. Transparent shadows were created for the glass shards. Figure 3. A basic marble shape with a solid shadow, skewed to rest upon an imaginary 3D surface. Making the shadow transparent involves using the Eraser and Smudge tools. Both can be adjusted to become larger or smaller, softer or harder-edged. A large, soft-edged brush was used to manually erase the middle of the shadow; and a smaller soft-edged smudge was used over the result to add imperfections to the shadow (FIGURE 4). A clean, brand new finish might be nice, but real objects are seldom flawless so they end up looking unrealistic without extra detail work. The effect is completed by distorting the glass within the marble itself (FIGURE 5). Figure 4. The marble's shadow was made transparent with the Eraser and Smudge tools. Figure 5. The completed marble, with imperfections added for realism. Using Dodge and BurnYou could get away with using the Eraser and Smudge tools alone for plenty of touch-ups, but you probably wouldn't want to. Shadows and highlights are easy additions to any complex graphic, thanks to the Burn and Dodge tools, respectively. These tools are used just like the Eraser and Smudge tools, and they even share the same adjustment options. Using a basic flat-color shape as an underlying layer (FIGURE 6), light veins were traced into the sample leaf by dodging. Extra depth may be added to the veins by burning to clarify slight shadows underneath. Figure 6. A basic leaf shape. A lattice of veins on top of the flat leaf shape looks inauthentic, so more shading was burned into the leaf's surface to increase the three-dimensionality (FIGURE 7). Figure 7. Highlights and shadows are added to simulate veins and texture. The tools mentioned so far were used to create the leaves of a creeping vine by duplicating the same leaf a few times and then scaling and rotating each one. After the addition of a vine stem and a bit more highlight and shadow work, the illusion was complete (FIGURE 8). Figure 8. Completed vine and leaves. You might notice that the veins begin to disappear as the leaf shrinks; as an image is scaled smaller, details become less distinguishable. But it's important to note that the eye still discerns many of them, and the overall effect is more convincing with extra visual cues, no matter how faint. It can be challenging to scale down well-done detail work, since the natural inclination is to leave it larger. Creating ImageryWhile not everyone is able to find the budget or spend the countless hours that go into a hand-painted work like Coastal Breeze, it offers a worthwhile look at one possible way to acquire your design's supporting imagery. Turning to the traditional visual arts is perhaps the most obvious method of image creation. While painting and drawing aren't often used throughout an entire site-design process, many designers start out a design by sketching their layout ideas on paper and working out the visual problems there before committing to pixels. Keeping a repository of drawings, photographs, and any other creative work may prove useful when you're tired of the usual sources, and serve as a useful source of future inspiration if nothing else. Talents vary, and people with many differing skill sets are designing for the Web today. Even if you can't draw, chances are you already have the resources to generate your own imagery. Thanks to the ever-increasing power of technology (along with the ever-decreasing prices), the cheap scanner and digital camera you may already own are generally good enough to produce high-quality source material for the Web if you know how to get the most out of them. A good guidebook for your hardware may have been included with it, but a general primer on digital imaging can go a long way if you have yet to learn the basics. Tip Suggested further reading: Mastering Digital Photo graphy and Imaging, by Peter K. Burian (Sybex, 2004). Acquiring ImageryOf course, the realities of most Web design budgets usually rule out any option of commissioning custom artwork for a site, although clients with deeper pockets may appreciate the extra care that can be given to theme and composition with commissioned work. Commissioned and Royalty-FreeFinding a good local photographer or illustrator might involve a cruise through the yellow pages, although you may have better luck networking with other local creative types. There's no need to limit yourself to the local talent pool, thoughplenty of sites exist to match up creative professionals with clients. Aquent (www.aquent.com) is one of the leaders, but there are many others of varying effectiveness. Commissioning artwork is expensive, and many jobs simply won't have the budget available to do so. You may instead wish to go the more affordable route of royalty-free stock photography. Royalty-free means that you pay for an image once, and thereafter you may use it for whatever purposes you wish without further payment, according to the terms of the license. Most royalty-free stock licenses allow you to do anything short of reselling the image, so after you pay, you can use the image for multiple projects. The only risk is that others have similar access to the source material, so it's quite possible that one day the "professional businesswoman" in your latest masterpiece will show up as someone else's "physical therapist." It happens. If your budget curtails the use of stock imagery, there are sites that give you the source material. By allowing budding photographers and illustrators to share with each other, communities like iStockphoto (www.istockphoto.com) (FIGURE 9) and stock.xchng (www.sxc.hu) have built up impressive catalogs of medium- to high-resolution photography and illustration that work wonderfully on the Web. Some images are low-cost, some are free, and either way the value is incredible. Figure 9. iStockphoto encourages artists to share their works with others.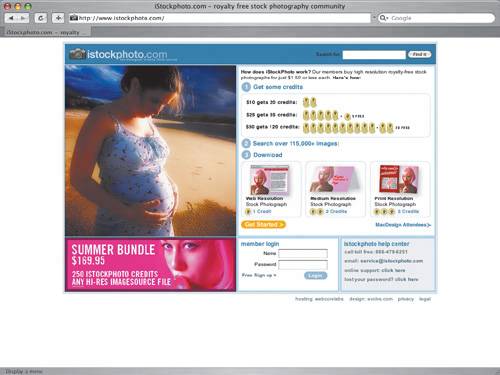 Finding Alternative SourcesYou can find even more royalty-free sources if you're willing to cast your net a little wider. While many current copyright laws reach back quite a few decades, depending on where you are in the world, the cutoff point for work entering the public domain is recent enough to be useful. As of mid-2004 in the United States, for example, any work published prior to 1923 was considered within the public domain, as was any work published between 1923 and 1963 that hadn't received a copyright extension. You may use work within the public domain for any purpose, commercial or private, so if you require imagery from another era, this might be a good method to consider. Finding available work can be as easy as typing public domain into your favorite search engine. Libraries and art-supply stores have books cataloging public-domain creative material that you may sample. Your library may even have a catalog of public-domain photographs of its own. You don't always have to reach back so far into the past, though, since projects striving to release new work into the public domain exist. Creative Commons (http://creativecommons.org) is "devoted to expanding the range of creative work available for others to build upon and share" (FIGURE 10). While the site's main focus in 2004 is encouraging artists to share, you will also find works that others have released under a Creative Commons license. Be mindful when using these, as there are various license levels; not everything is up for grabs. Figure 10. Sites such as Creative Commons offer public-domain art.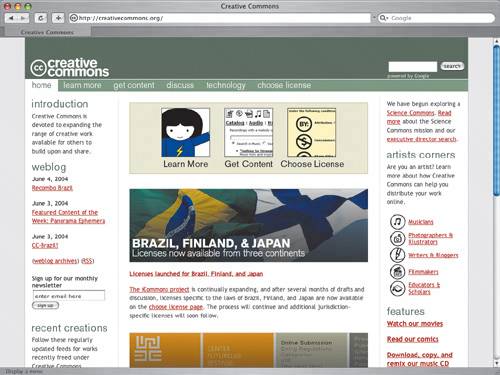 Copyright NotesIf a work isn't available for use but you absolutely must have it, you can always ask the creator (or, in many cases, the publisher) for permission. The worst that can happen is that they say no. Make sure to get permission in writing from the proper copyright holder; then you may use the work for the purposes agreed upon. Note that copyright law is complex and always changing. New creative works are copyrighted from the moment they are created, and they are protected whether or not the creator has applied a copyright notice. Make sure you know the laws in your jurisdiction. If you aren't absolutely confident that you are allowed to use a work, either obtain permission or use something else. It is illegal to use copyrighted work without permission, and you can be prosecuted. Don't take the chance. Tip The Creative Commons search tool is at http://creativecommons.org/getcontent. Verdict: The Painted LookCoastal Breeze is a powerful example of what can be done with a little bit of talent and a lot of time. Shea estimates that he put well over 80 hours into the original Photoshop sessions that produced the artwork for this design. Tip Here are some useful regional government copyright resources: US Copyright Office Web site (www.copyright.gov); Canada's Copyright Act Web site (http://laws.justice.gc.ca/en/C-42); the Copyright page of the UK Patent Office (www.patent.gov.uk/copy). Only a dream client would be willing to pay for that sort of time investment. A commercial project's creative brief requesting what was built for Coastal Breeze would benefit most from photography. With the right resources, photo-based work might create the same atmosphere without blowing the budget. The painted look is distinct, but the reality is that budget often ends up determining what can be done with a project. The look is best saved for small details and touch-ups. |


|
EAN: N/A
Pages: 117