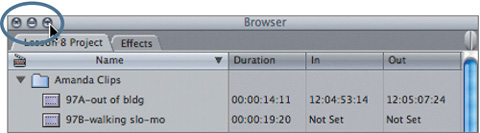
| Final Cut Pro knows everything there is to know about all the clips and other items in your project. It knows the length, start and stop timecode, number of audio tracks or whether it's video-only, the In to Out duration, and so on. This information is made available to you through the 65 Browser columns available in the View As List mode. Although it's not necessary to view these columns continuously during the editing process, referring to them when you need to review or add additional clip information can be a great help. Viewing and Sorting Browser Columns In the Browser, clips are sorted alphabetically according to their names because the Name column is the default sort mode. If you need to identify clips based on specific criteria for example, according to their scene numbers clicking once on that column heading will reorder the clips accordingly. 1. | Reveal the contents of all the bins in the Browser, but don't change the size of the Browser window yet.
| 2. | To enlarge the window to show the contents of the open bins, click the Browser Zoom button.
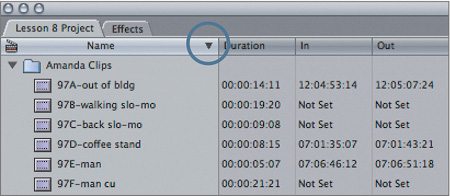
When you click this button, the Browser expands to display all contents, or as many items as possible, in the window. In the Name column, all clips and sequences are arranged alphabetically by name within a bin, and all bins are arranged alphabetically as well.
TIP Another way to open and close bins and navigate through items in the Browser is to use the up, down, left, and right arrows. When a bin is highlighted, the up and down arrows move the highlight from one bin to the next. The right arrow will reveal contents of the highlighted bin. Clicking the right arrow again will step into those contents, and clicking the left arrow will step back up and out. | 3. | At the bottom of the Browser window, drag the blue horizontal scroll bar to the right to see the other column headings. Then drag the scroll bar left, back to the Name column.
When the Name column heading is selected, the title bar is lighter than the others. This indicates that it is the primary sort column. There is a downward arrow indicating that sorting is from low to high, or from A to Z.
| 4. | Click the Name column heading to reverse the current sort order so the elements go from high to low, or from Z to A.
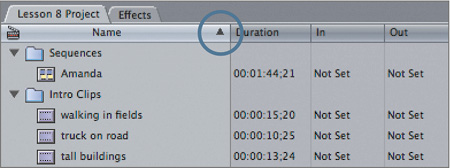
The arrow in the Name heading now points upward, and all the elements in the window reverse order, including the bins themselves.
| 5. | Click the Duration column heading to sort the clips by duration. Click it again to reverse the sort order.
The default sort order is always from low to high, or in this case, low durations to high durations.
| 6. | Drag the blue scroll bar to the right until you see the Reel column. Click this column head to sort the clips by reel number.
| 7. | Drag the scroll bar to the left, and click the Name column heading.
|
TIP To widen any column, drag its right boundary line to the right.
Moving, Showing, and Hiding Columns You may not need to refer to many of the Browser columns during editing, but there may be times when you want quick and easy access to specific information, such as clip scene and shot/take numbers. Although the Name column is a fixed column, all other columns can be repositioned. In addition, there are two preset column layouts you can use: standard columns and logging columns. And you can choose to hide or show a variety of other columns that do not appear as part of the default Browser layout. 1. | Drag the Duration column to the right and release it just after the Out column.
When you drag a column heading, a faint bounding box appears representing that column. Surrounding columns shift to make room for the column you are moving.
| 2. | Drag the Good column to the left to follow the Duration column, then drag the Log Note column to follow the Good column.
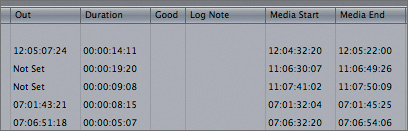
These are currently empty, but in the next exercise you will add clip information to these columns.
| 3. | Ctrl-click the Good column heading and look at the different column options that appear on the shortcut menu.
You can hide a column, save or load a column layout, or choose a preset layout. And there are several column headings you can choose to show or add to the current Browser layout.
| 4. | Choose Show Length from the shortcut menu.
The Length column appears to the left of the Good column.
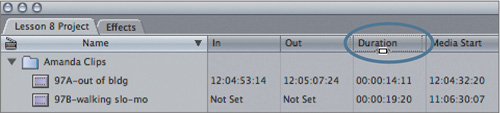
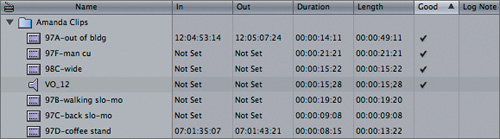
| 5. | In the Name column, select the 97D-coffee stand clip, and look at the In, Out, Duration, and Length columns.

If a clip has marked In and Out points, the marked duration appears in the Duration column. The Length column always displays the full length of the media.
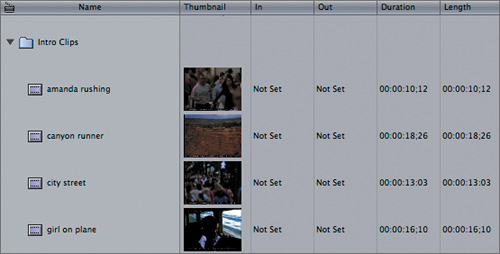
| 6. | Ctrl-click the In column heading and choose Show Thumbnail from the shortcut menu. Scroll down to see the clips in the Intro Clips bin.
A thumbnail appears next to each clip name, giving you a visual reference to the clip's contents.
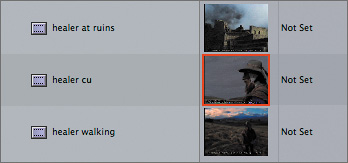
 | 7. | Find the healer cu clip. To scrub through the clip, click the thumbnail image and drag right, then left. To reset a clip's poster frame in this column, drag to a new frame, hold down Control, release the mouse, and then release the Control key.
| 8. | Ctrl-click the Show Thumbnail column heading and choose Logging Columns from the shortcut menu to display a different layout.
This layout places columns that reflect logged information such as Scene, Shot/Take, and Reel closer to the Name column for easier access.
| 9. | To return to the previous layout, Ctrl-click any column heading and choose Standard Columns from the shortcut menu.
The changes you make in one preset layout do not affect the other preset layout.
NOTE Changes you make to Browser or bin columns in a project remain until you change them again or load a previously saved layout. If you create a new project, it will have the default Standard Columns layout. | 10. | To save this column layout, Ctrl-click any column head and choose Save Column Layout from the shortcut menu. In the Save window, enter thumbnails for the layout name, and click Save.
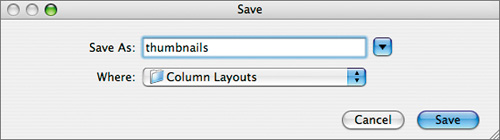
The automatic destination for the saved layout is a folder named Column Layouts in the Final Cut Pro User Data folder, discussed earlier in this lesson. If you want to transfer this layout to another computer station, go to the Column Layouts folder, copy the appropriate file, and place it in the same location on the other computer.
TIP To recall a saved layout, Ctrl-click a column head and choose the layout from the shortcut menu. | 11. | To hide a column, Ctrl-click that column heading and choose Hide Column from the shortcut menu. Hide the Thumbnail and Length columns.
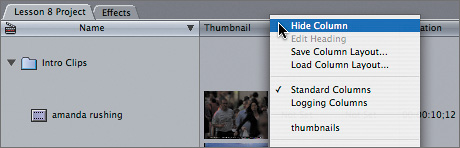
These columns are removed from the current Browser layout but can be chosen again from the shortcut menu by Ctrl-clicking any active column heading. Notice in the image above that the saved layout, thumbnails, appears as an option to recall.
|
Adding Column Information As you can see, Browser columns can contain a lot of information that could be helpful when you want to find a clip or group of clips using specific criteria. Yet some of the columns in Lesson 8 Project appear blank. When these clips were captured from tape, this clip information was not entered. However, most clip information can be entered any time after capturing. For larger projects, being able to search for clips that have been checked "Good," or more specifically given a log note such as "great sunset" or "very smooth pan," can make a big difference in how quickly you find a certain clip. Let's add some information about the clips in this project. 1. | Find the VO_12 clip in the Amanda Clips bin under the Name column, move the pointer toward the right to the Good column, and click. A checkmark appears, identifying this narration clip as "good."

When you move the pointer over a clip or line of information, a dark, faint highlight appears across the entire Browser window. This acts as a guide to ensure you are making changes to the correct clip.
| 2. | Click in the Good column for these clips: 97A-out of bldg, 97F-man cu, and 98C-wide.
| 3. | Now click the Good column heading to sort and display the clips checked Good. Click again to reverse the sort order so the clips appear at the top of the column.
 The clips that have a check in the Good column appear together. The clips that have a check in the Good column appear together.
| 4. | Click the Name column to sort by name once again. Select the healer at ruins clip, and click in the Log Note column on the clip's highlighted line.
A text box appears with a flashing cursor.
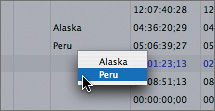
 | 5. | In the Log Note text box, type Peru, and press Return.
NOTE Each vignette of this film was shot at a different location. The material with the healer was shot in Peru. | 6. | Select the girl on plane clip, and enter Alaska in the Log Note text box.
| 7. | Move to the row where the healer cu clip sits. This time, Ctrl-click in the Log Note area and choose Peru from the shortcut menu of previously entered options. Add Peru as a log note for the healer walking clip as well. In this option, you don't have to preselect the clip before bringing up the Log Note options.
Once a note has been added, it can easily be deleted.
| 8. | Double-click the girl on plane log note, and press Delete.
Log notes are one way to further identify a clip. Another way is to use the Final Cut Pro set of labels, which color the clip in the Browser and Timeline. There are two ways you can choose a label, in the Label column or by Ctrl-clicking the clip icon in the Name column.
| 9. | Find the Label column, and Ctrl-click the word None for any one of the clips in the Amanda Clips bin. Now Ctrl-click the 97A-out of bldg clip under the Name column. Choose Label > Best Take from the shortcut menu.
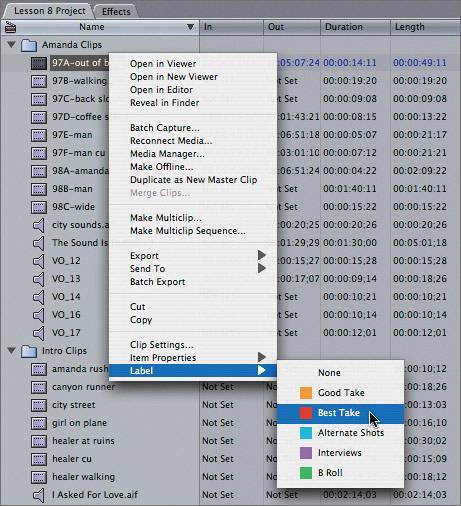
In the latter option, you can see the colors assigned to each label category. When you choose Best Take, the selected clip icon becomes red.
NOTE You can also select a group of clips and choose a label for the entire group. | 10. | Open the Amanda sequence.
In the Timeline, the 97A-out of bldg clip name is red to indicate it is labeled "Best Take."
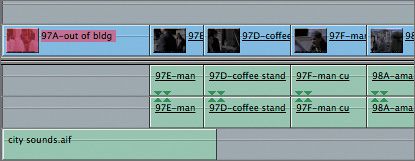
Labeling clips in this way can be helpful when you want to organize your material by type or be able to quickly identify it in the Timeline.
|
TIP To remove a label, Ctrl-click the clip or group of selected items and choose Label > None from the shortcut menu. For the moment, leave these labels attached for the next exercise.
|