Lab 4A: Making the Game Board
In this lab session, you will create the basic game board by drawing a set of shapes and arranging them in relation to one another.
Level of difficulty: Moderate
Time to complete: 15 to 30 minutes
-
Start a new blank presentation and save it as
 MyLab04A.pptx.
 -
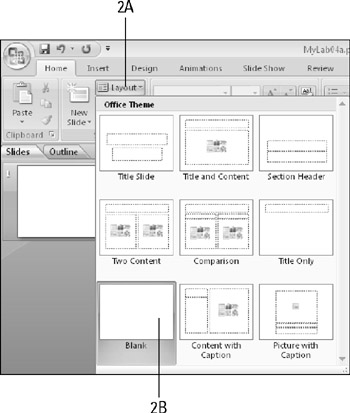
Change the layout of the slide to Blank.
-
On the Home tab, click Layout.
-
Click Blank.
-
-
Draw a rounded rectangle on the slide that is 0.75″ high and 2″ wide.
-
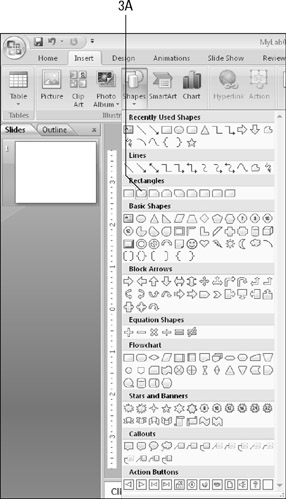
On the Insert tab (or Home tab), click Shapes, and click the rounded rectangle.
-
Drag on the slide, near the top-left corner, to create the shape.
-
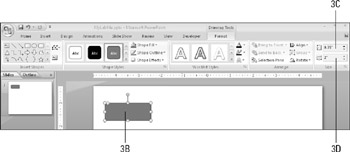
On the Drawing Tools Format tab, click in the Shape Height box and type 0.75″.
-
Click in the Shape Width box and type 2″.
-
-
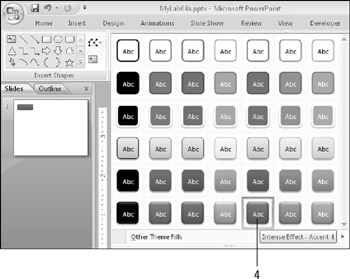
Apply a dark purple Shape Style to the shape. On the Drawing Tools Format tab, open the Shape Styles gallery and click the bottommost dark purple style.
-
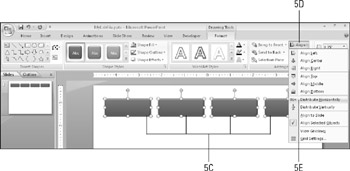
Copy the shape, and paste it three times. Then arrange the copies side-by-side horizontally across the top of the slide and distribute them evenly.
-
Select the purple shape.
-
Hold down Shift+Ctrl and drag it to the right to create a copy. Repeat two more times so that you have a total of four shapes.
-
Select all four shapes by holding down the Shift key and clicking each one.
-
On the Drawing Tools Format tab, click Align.
-
Click Distribute Horizontally.
-
-
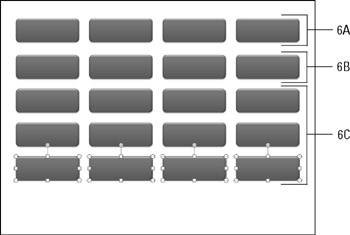
Copy the four shapes four times, and place the copies under the originals to form columns.
-
Select all four purple shapes if they are not already selected.
-
Hold down Shift+Ctrl and drag downward to create a copy below the originals.
-
Repeat 6B three more times to create three more rows of buttons.
-
-
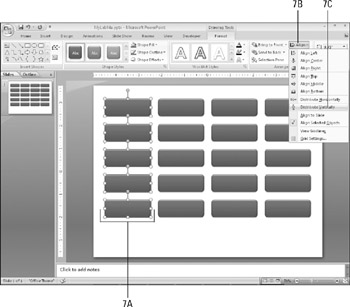
Use Align and Distribute to make sure the grid of buttons is evenly spaced.
-
Select all of the shapes in the first column.
-
On the Drawing Tools Format tab, click Align
-
Click Distribute Vertically.
-
Repeat steps 7a through 7c for each column.
-
-
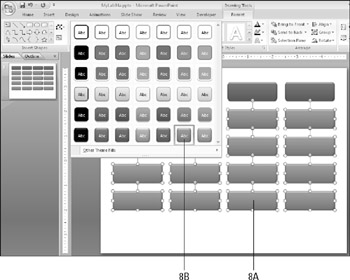
Change the color of all of the rows except the first one to turquoise blue.
-
Select all of the shapes in each row except the first one.
-
On the Drawing Tools Format tab, open the Shape Styles gallery and click the turquoise blue sample in the bottom row.
-
-
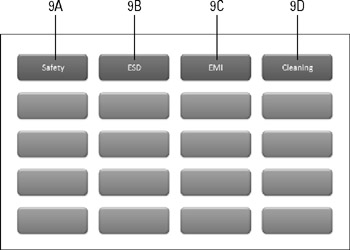
Type the following text into the top row of shapes.
-
Select the leftmost purple shape and type Safety.
-
Select the second purple shape and type ESD.
-
Select the third purple shape and type EMI.
-
Select the fourth purple shape and type Cleaning.
-
-
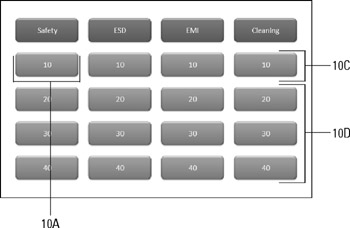
Type 10, 20, 30, and 40 in each column.
-
In the topmost leftmost turquoise shape, type 10.
-
Select the 10 you just typed and press Ctrl+C to copy it.
-
Select the next shape in that row and press Ctrl+V. Repeat two more times so that all of the shapes in the first turquoise row have 10 in them.
-
Repeat the process to put 20 in the next row, 30 in the next, and then 40 in the bottom row.
-
-
Save your work.
EAN: 2147483647
Pages: 268