Scenario
Up to this point, you have avoided mandatory sign-on to a server when testing your Web-Faced application, since your user ID and password are set as the default. Now you need to move the application into production and you need the WebFaced application to prompt the users for sign-on information.
This exercise demonstrates how to enable authentication support and how to use your own authentication dialog instead of the default WebFacing dialog.
Using the Project Properties Dialog
In this section, you use the CL command run-time properties page to remove the default user ID and password information.
-
In the WebFacing Project view, right-click your wflabxx project.
-
Select Properties from the pop-up menu.
Providing Run-Time Properties for the Project
The Properties for wflabxx dialog opens as shown in Figure 10.1.
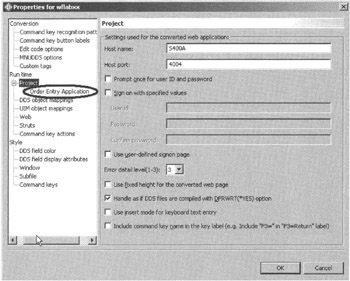
Figure 10.1: Project properties dialog
Under Run time in the tree view on the left side of the dialog,
-
Select Order Entry Application.
The Order Entry Application properties dialog displays, as shown in Figure 10.2.
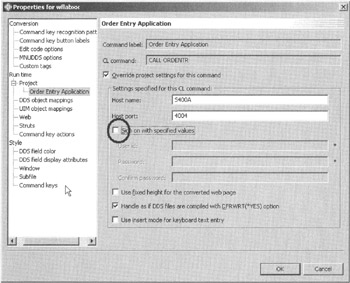
Figure 10.2: Application properties page
-
Deselect the Sign on with specified values check box.
-
Click the OK push button at the bottom of the dialog.
You return to the WebFacing project view.
You have changed the authentication behavior for this link, in this application. In this WebFacing project only one link exists, but imagine if there were multiple entry points in your application, such as a menu. If that were the case, you could specify a different authentication behavior for each link.
| Tip | If you have multiple links in a WebFacing project and you want the authentication to be the same for each link, you can specify an authentication rule on the project level. In this case, you would specify the desired authentication behavior in the project properties page instead of the application properties page. |
Running the Web Application
As before, run your application in the WAS test environment.
-
Click the Order Entry link.
You will see the authentication dialog. If the authentication dialog does not display, you need to restart the application server.
You restart the server by using the Servers view in the bottom right area of the workbench (see Figure 10.3):

Figure 10.3: Restarting the WAS test environment
-
Select the Servers view by clicking the Servers tab.
-
Select Restart from the pop-up menu.
After a short while, the Server console displays a message that the server is ready for business.
-
Run the application.
Now you should see the authentication dialog as shown in Figure 10.4.
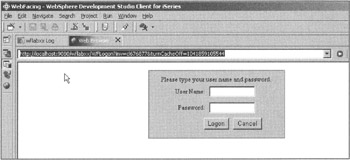
Figure 10.4: WebFacing Tool authentication dialog
-
Specify your User Name and Password.
-
Click the Logon push button on the authentication dialog.
The application runs as it did before, as long as the job environment for the user ID you specified is set up correctly for this application.
Next I will show you how to use your own authentication dialog, instead of the one provided by the WebFacing Tool.
EAN: 2147483647
Pages: 153