Section 7.4.Link a Form to a Database
|
7.4. Link a Form to a DatabaseInfoPath forms can submit data to Microsoft SQL or Microsoft Access databases. In fact, you can build forms directly from SQL and Access tables or queries. Working with existing data sources is where InfoPath forms really start to shine. Tip: The following examples use the NWind.mdb Access database provided with the Office System 2003. 7.4.1. How to do itThe following procedure is for InfoPath SP1. The Version 1.0 release displays names in the task pane and produces a form containing separate query and data entry views. To build a form from a database table or query:
Figure 7-16. Choose a data source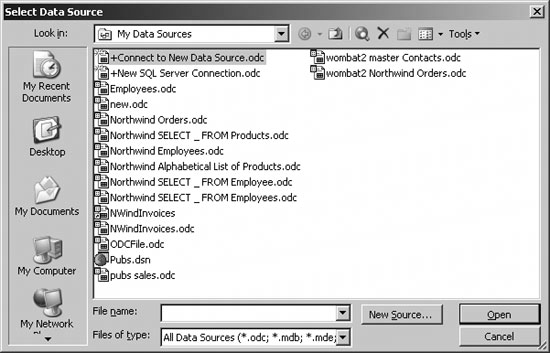 Figure 7-17. Change the query as needed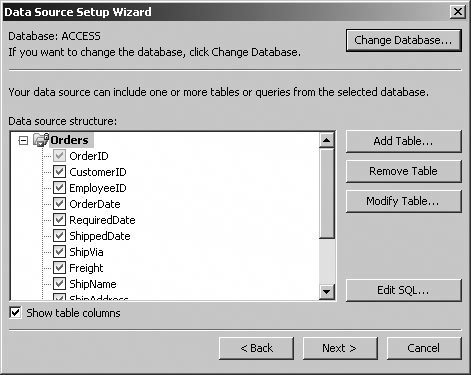 Figure 7-18. Click Finish to create a combined view (SP1)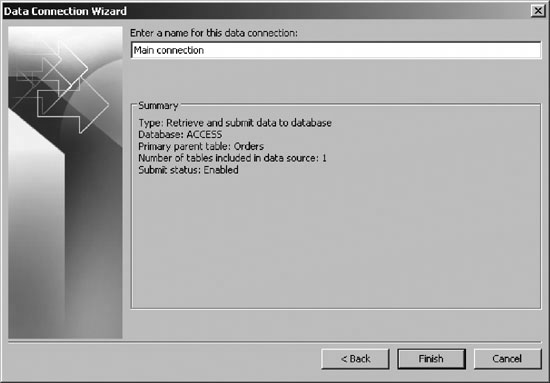 Figure 7-19. Voila! InfoPath SP1 creates a combined query/edit view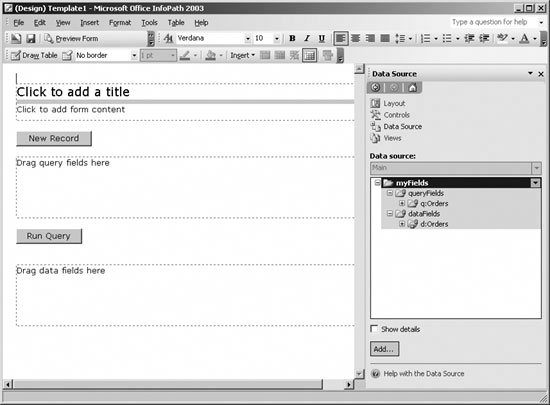 The Data Connection Wizard creates two groups within the data source:
To make the form functional, you need to drag fields from the data source to the form. For example: Drag the :CustomerID and :EmployeeID fields from the queryFields group onto the query fields area on the form. InfoPath creates text boxes and labels for those fields of the form. Drag the d:Orders group from the dataFields group onto the data fields area of the form. InfoPath displays a pop-up menu. Select Repeating Table. InfoPath creates a table to display query results (Figure 7-20). Figure 7-20. Drag queryFields and dataFields onto the form to create a query form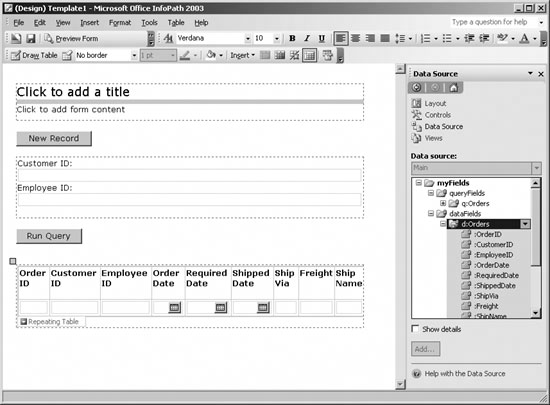 If you add a title, save the form, and then open the form in user mode, Infopath displays results (Figure 7-21). Figure 7-21. Query results for Northwind orders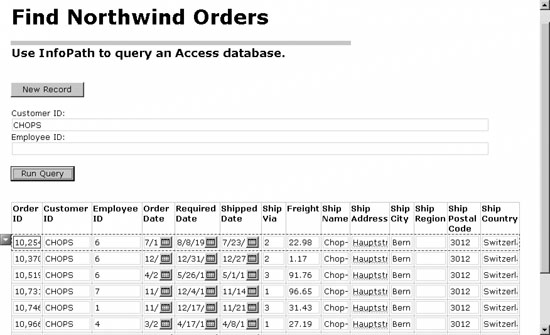 As with other form templates, opening the template file (.xsn) starts a new, empty form. You may want to set up database forms with some initial data and save them in user mode as form files (.xml). Then the user can open that XML file to load the database template. This approach displays the name of the XML file (rather than Form1) in the InfoPath titlebar, plus makes it easier for the user to save the results of her query locally. 7.4.2. How it worksInfoPath generates schemas for the fields sent as a query and returned by the data connection. It uses those schemas to generate a tree view of the returned data (shown in the task pane of Figure 7-20). If you are only trying to create a form to display query results, the process can pretty much end here. You can delete unneeded fields from the generated query form and adjust the column widths of the results table as needed using InfoPath's visual design features. Figure 7-22 shows a database query form modified to display results a little better. These changes are cosmetic, relatively simple, and require no code, so I won't go into detail about how to make them. Messing around in InfoPath's Design mode is half the fun! The two changes that I will briefly mention are:
These changes save a world of trouble because any new rows or changes submitted to the database should be validated, and that requires more work. Updating a database is always harder than querying it. 7.4.3. What you can't submitThe biggest limitation working with databases is InfoPath's orientation to Microsoft products. InfoPath directly supports only Microsoft Access and Microsoft SQL databases. You can enable access to other types of databases by creating web service frontends to those data sources, generating XML from those data sources in some way, or using the ADO objects provided in the InfoPath object model. The next biggest limitation is that you can't always submit form data to a database. In general, InfoPath can submit records that come from a single database table and where InfoPath has enough information to maintain the relationships and normal form within the database. In cases where InfoPath is unable to submit changes, the Submit Status field on the summary page of the Data Source Setup Wizard displays the reason for the limitation. Finally, InfoPath's format for binary data, such as images, is based on XML and so uses base 64 encoding. Database formats for binary data items (BLOBs) is different, so you must convert between the two formats if you want to work with binary data in InfoPath forms. Submitting rich-text format (RTF) data also requires special handling. 7.4.4. What about...
|
 Design a Form. InfoPath displays the Design a Form task pane.
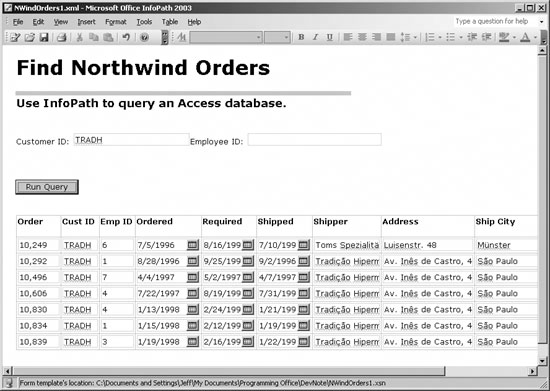
 Submitting Forms to set those options).
|
EAN: 2147483647
Pages: 133