Section 2.2.Create a Shared Workspace
|
2.2. Create a Shared WorkspaceExcel calls workbooks shared through SharePoint shared workspaces or sometimes shared lists. The Excel documentation isn't always careful about it, but there is a difference:
How you share those two things is different, so, first-things-first, let's talk about shared workspaces. Note: Shared workspaces are a big improvement over shared workbooksExcel's earlier feature that allowed multiple users to share edits. For one thing, workspaces provide tools to manage a workbook's users or send out notices to those users. 2.2.1. How to do itOnce you've signed up for a trial SharePoint site or installed SharePoint on your own server, you'll have an address (also know as a URL) for your site. Write that down. My SharePoint URLs are:
I can use any of those URLs to share a workbook, though //wombat1/ is the quickest since it goes over a very fast local network connection. To share a workbook through your SharePoint site:
Note: Don't confuse Tools  Share Workspace with File Save Workspace. Save Workspace creates an .xlw file that stores your Excel windows and open documents. Also don't confuse it with Tools Share Workbook Share Workbook is the old way of allowing multiple authors access. Share Workspace with File Save Workspace. Save Workspace creates an .xlw file that stores your Excel windows and open documents. Also don't confuse it with Tools Share Workbook Share Workbook is the old way of allowing multiple authors access.Figures 2-4 through 2-7 illustrate these steps. Figure 2-4. Step 1-you'll see this if you haven't added the SharePoint URL to your Trusted Sites in Internet Explorer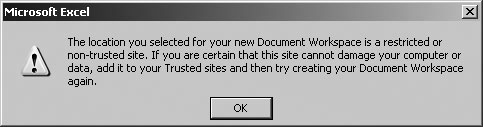 2.2.2. How it worksExcel connects to the SharePoint site and creates a new document workspace for each workbook you share from Excel. The workbook stored locally on your computer is now linked to the workbook stored on SharePoint. If you save the workbook, changes are saved locally and then sent to the server. If you close and then reopen the local workbook, Excel connects to SharePoint to get any changes from others. Each new workspace has its own folder on the site. This relationship, one file per folder, may seem a little strange, but it has to do with the way ASP.NET controls access for other users. You'll learn more about that later. You can put additional documents in the workspace folder by clicking Add new document on the workspace page (Figure 2-7). Figure 2-5. Steps 2 and 3Create the shared workspace Figure 2-6. Step 4Sign on to the SharePoint site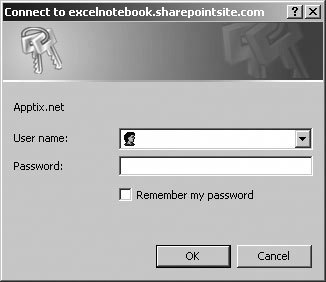 You can control how the workbook displays the Shared Workspace task pane and how updates are handled by clicking Options on the task pane (Figure 2-8.) Figure 2-7. Finito!The workbook is shared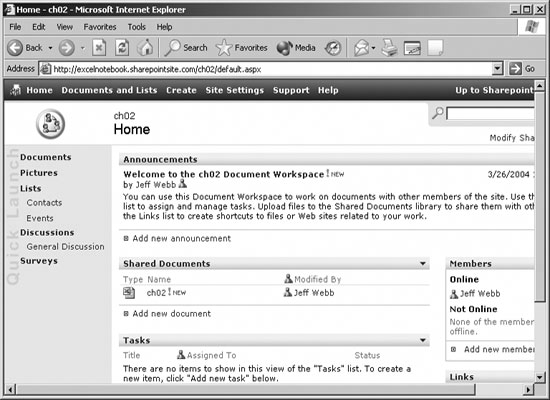 Figure 2-8. Shared Workspace options set how updates, alerts, and the task pane are handled |
 Internet Options
|
EAN: 2147483647
Pages: 133