| In many enterprise settings, it is likely that Microsoft SQL Server will be the database of choice, rather than Microsoft Access. Connection to a Microsoft SQL Server database is supported using the Data Source Setup Wizard in InfoPath 2003. The following example will demonstrate the use of InfoPath 2003 with Microsoft SQL Server 2000 SP3. The example makes use of the pubs (publishers) sample database provided with SQL Server 2000. The example assumes that the SQL Server instance is installed on the local machine. If you have installed SQL Server on another machine, make appropriate adjustments at the stage where the data source is chosen . Using the Data Source Setup Wizard There are many similarities to using Microsoft Access as a data source when using SQL Server from InfoPath 2003. However, I will describe the use of SQL Server step-by-step rather than cross-referencing heavily to the description of using Access as data source: -
Open the Design a Form task pane and click New from Data Source in the Design a New Form section. The Data Source Setup Wizard window opens. -
Select the Database (Microsoft SQL Server or Microsoft Office Access only) option. Click the Next button. -
In the next window, click the Select Data Source button. The Select Data Source window opens. Even if the SQL Server instance is installed on the local machine, InfoPath cannot access the desired database directly via the filesystem. Therefore, if you haven't already used InfoPath to connect to the target data source, you will have to add a new data source by clicking the New Source button. The Data Connection Wizard window opens (see Figure 7.28). Figure 7.28. The Data Connection Wizard window. 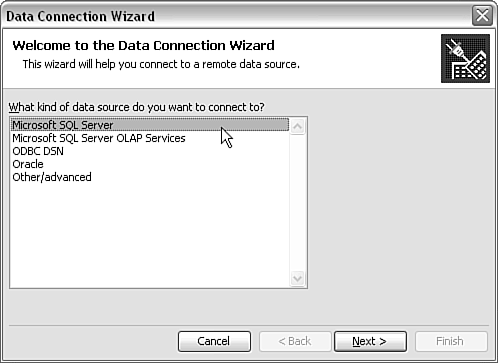 -
In the Data Connection Wizard window, you are first asked to what type of data source you want to connect. Choose Microsoft SQL Server (the default). Click the Next button. -
In the Data Connection Wizard window, you are asked to name the server on which SQL Server is installed (see Figure 7.29). In this case, I have installed SQL Server on the local machine, so I enter (local) in the Server Name text box. Figure 7.29. Specify the database location in the Data Connection Wizard window. 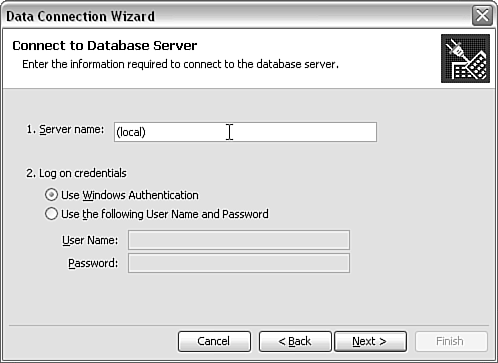 -
There are two options for authenticationWindows authentication, or a username and password. I chose Windows authentication. Your choice will depend on how you (or your SQL Server administrator) have set up SQL Server. Click Next. -
In the next Database Connection Wizard window, select which SQL Server database you want to use (see Figure 7.30). We will use the pubs database ( pubs is short for publications , and not indicative of drinking establishments). Figure 7.30. Selecting the SQL Server database to use. 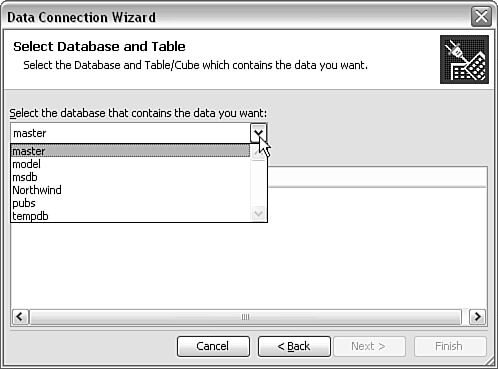 -
Uncheck the Connect to a Specific Table check box, because we will use more than one table. (If you wanted to use only a single table in the pubs database, you would leave this check box checked.) The list of views and tables is grayed out (see Figure 7.31). Click Next. Figure 7.31. Uncheck the Connect to a Specific Table check box. 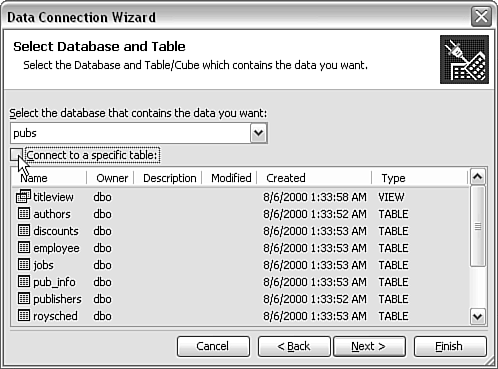 -
The next Data Connection Wizard window opens (see Figure 7.32). Enter a filename for the data source (in this case, accept the default), and enter a brief description for the data source. Click the Finish button. Figure 7.32. Enter a filename and description for the chosen data source. 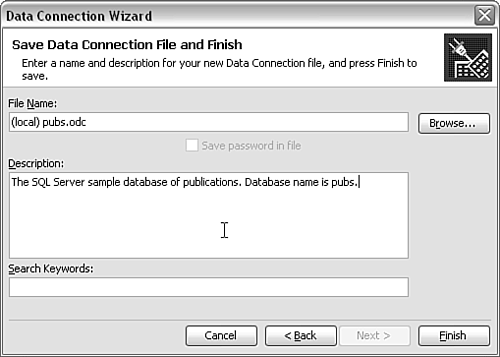 -
We are returned to the Select Data Source window, where the newly created data source is now listed. Click it, and then click the Open button. -
The Select Table window opens (see Figure 7.33). We want to use two tablesthe publishers table and the titles table. Click publishers, and then click the OK button. Figure 7.33. The Select Table window. 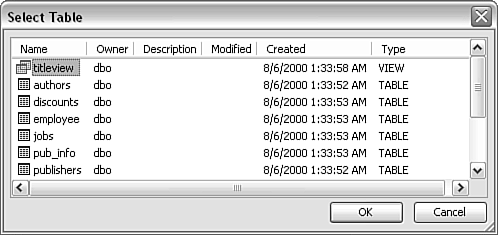 -
The Data Source Setup Wizard window opens (see Figure 7.34). We will use all the columns in the publishers table. Figure 7.34. The Data Source Setup Wizard window immediately after selecting the publishers table in the pubs database. 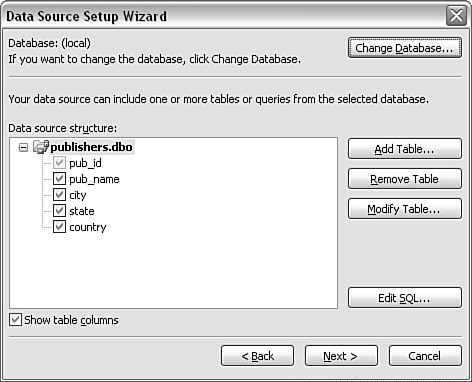 -
Now we want to add the titles available for each publisher. Click the Add Table button to open the Add Table or Query window (see Figure 7.35). Figure 7.35. The Add Table or Query window. 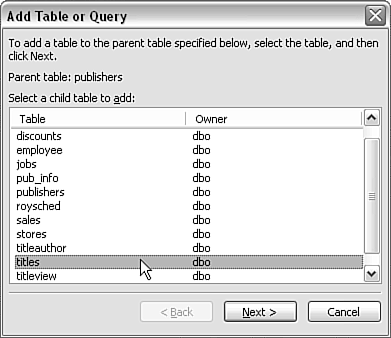 -
Select the titles table and click the Next button. The Edit Relationship window opens (see Figure 7.36). Figure 7.36. The Edit Relationship window. 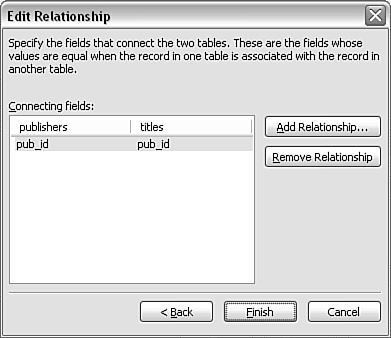 -
If the primary key of the parent table has a correspondingly named foreign key in the child table (in this case, the titles table), a relationship is displayed in the Edit Relationship window. If InfoPath cannot automatically identify corresponding keys in the two tables, you can manually specify the relationship between the two chosen tables by clicking on the Add Relationship button. Click Finish. -
The titles table is added to the graphic for the data source structure in the Data Source Setup Wizard window (see Figure 7.37). Figure 7.37. The titles table is added to the graphic of the data source structure. 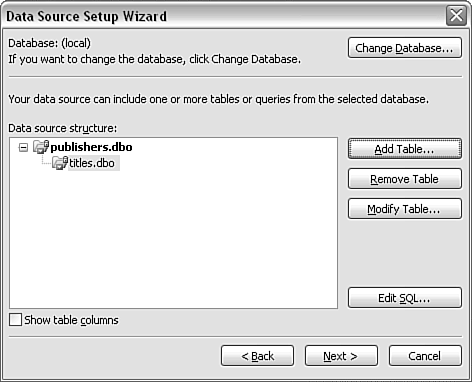 -
Click the Edit SQL button to view the SQL statement created by InfoPath. The Edit SQL window opens (see Figure 7.38). If you need to edit the automatically created SQL statement, you can do so and test whether the edited syntax is correct by clicking the Test SQL Statement button. For this example, we don't need to edit the SQL; click OK, and then click Next in the Data Source Setup Wizard window. The so-called SQL in this case is actually a SHAPE command, which is processed by the ADO shape provider and then turned into SQL statements. Figure 7.38. The Edit SQL window. 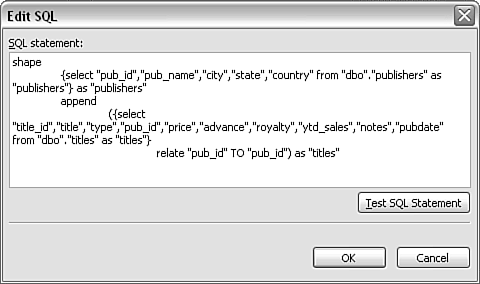 -
The final window for the Data Source Setup Wizard opens (see Figure 7.39). Figure 7.39. The final Data Source Setup window. 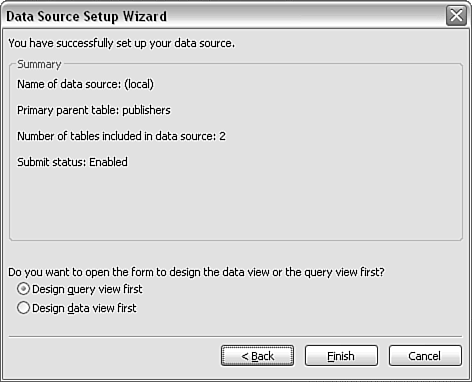 Notice that the name of the data source is specified as (local) , which is the location of the SQL Server instance that was entered earlier in the wizard. The primary table is the publishers table. We chose to include two tables in the data source, and this is confirmed in the window. The Submit Status is specified as Enabled. (If you attempt to use several tables in the data source, you might get a message indicating that the Submit Status is disabled, typically because of a many-to-one relationship in the table relationships.) Select the Design Query View First option and click Finish. The form area is displayed with an automatically created Query view. The Data Source task pane opens automatically (see Figure 7.40). This allows you to alter the automatically generated Query view to suit your needs. Figure 7.40. The automatically created Query view. 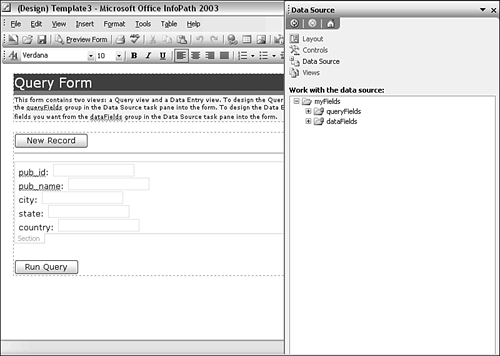 If you are wondering what happens if you create the Data Entry view first, it opens as a blank form area. The Query view is created behind the scenes. Adding a Data Entry View We need to create a Data Entry view to hold data returned from use of the Query view. Follow these steps: -
Select Manage Views from the View menu. The Views task pane opens. -
Click the Data Entry view to display the Data Entry view, which currently has a blank form area. -
Add some basic text to the form area. Then open the Data Source task pane and drag the dataFields group onto the form area. A context menu opens, offering options to add a section with controls or to simply add a section (see Figure 7.41). As we dragged a group , the section control you are offered is a Repeating Section form control, with or without additional form controls inside it. Figure 7.41. The context menu when dragging the dataFields group to the form area. 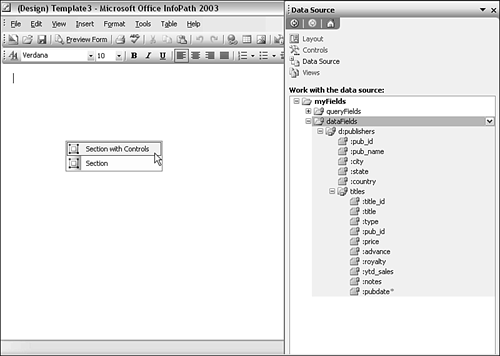 -
If you select the Section with Controls option, a basic, but functional, Data Entry view is created (see Figure 7.42), which includes a Section form control. Inside it is nested a Repeating Section form control (for each publisher), and inside that is nested another Repeating Section form control (for each title published by that publisher). Figure 7.42. A basic data entry view. 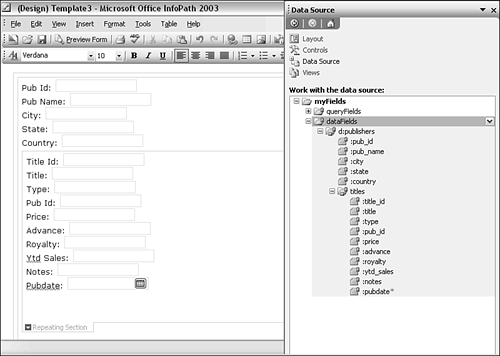 -
It is straightforward to add basic background information into the Repeating Section form controls for the publisher and titles (see Figure 7.43). Figure 7.43. Adding information to the repeating section form controls. 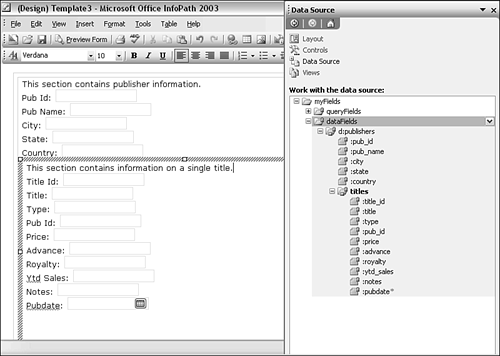 The Section with Controls option in the context menu is adequate for convenience when creating a test form. In a production InfoPath form template, you would likely choose to insert a section in the form area and then add appropriate text to help the user and use layout tables to produce a visually more appealing layout.  To learn more about individual form controls, see the section describing each form control in Chapter 4, "InfoPath Form Controls and Chapter 5, "Expression Boxes." To learn more about individual form controls, see the section describing each form control in Chapter 4, "InfoPath Form Controls and Chapter 5, "Expression Boxes."
 To learn more about layout tables, see the sections describing each type of layout table in Chapter 6, "Designing Visual Aspects of InfoPath Forms." To learn more about layout tables, see the sections describing each type of layout table in Chapter 6, "Designing Visual Aspects of InfoPath Forms."
SHOP TALK
INFOPATH AS A DATABASE FORMS TOOL You have seen how easy it is to connect an InfoPath form template to an SQL Server database. The visual richness and dynamic functionality of InfoPath form templates will likely displace Access as a front end to SQL Server databases in many situations where complex queries are not involved. I can envisage InfoPath almost totally displacing Access for upcoming projects that connect to back-end SQL Server databases when the number of tables used is limited. However, for more complex queries, the limitations of InfoPath leave a role for Access projects. |
|


 To learn more about individual form controls, see the section describing each form control in Chapter 4, "InfoPath Form Controls and Chapter 5, "Expression Boxes."