Using the DetailsView Control In this section, you learn how to use the DetailsView control when working with database records. In particular, you learn how to display, page, edit, insert, and delete database records with the DetailsView. You also learn how to format the appearance of the DetailsView control. Displaying Data with the DetailsView Control A DetailsView control renders an HTML table that displays the contents of a single database record. The DetailsView supports both declarative and programmatic databinding. For example, the page in Listing 12.1 displays a record from the Movies database table, using declarative databinding (see Figure 12.1). Figure 12.1. Displaying a movie record. 
Listing 12.1. ShowDetailsView.aspx <%@ Page Language="VB" %> <!DOCTYPE html PUBLIC "-//W3C//DTD XHTML 1.1//EN" "http://www.w3.org/TR/xhtml11/DTD/xhtml11.dtd"> <html xmlns="http://www.w3.org/1999/xhtml" > <head runat="server"> <title>Show DetailsView</title> </head> <body> <form runat="server"> <div> <asp:DetailsView DataSource Runat="server" /> <asp:SqlDataSource ConnectionString="<%$ ConnectionStrings:Movies %>" SelectCommand="SELECT Id,Title,Director,InTheaters FROM Movies WHERE Id=1" Runat="server" /> </div> </form> </body> </html>
|
In Listing 12.1, the SQL Select statement associated with the SqlDataSource control retrieves the first movie from the Movies database table. The DetailsView control is bound to the SqlDataSource control through its DataSourceID property. You also can bind a DetailsView control programmatically to a data source. The page in Listing 12.2 contains a DetailsView that is bound to a collection of employees. Listing 12.2. ShowEmployee.aspx| [View full width] <%@ Page Language="VB" %> <%@ Import Namespace="System.Collections.Generic" %> <!DOCTYPE html PUBLIC "-//W3C//DTD XHTML 1.1//EN" "http://www.w3.org/TR/xhtml11/DTD/xhtml11.dtd"> <script runat="server"> ''' <summary> ''' Represents an employee ''' </summary> Public Class Employee Public _firstName As String Public _lastName As String Public _retired As Boolean Public ReadOnly Property FirstName() As String Get Return _firstName End Get End Property Public ReadOnly Property LastName() As String Get Return _lastName End Get End Property Public ReadOnly Property Retired() As Boolean Get Return _retired End Get End Property Public Sub New(ByVal firstName As String, ByVal lastName As String, ByVal retired  As Boolean) _firstName = firstName _lastName = lastName _retired = retired End Sub End Class ''' <summary> ''' Load employees into DetailsView ''' </summary> Private Sub Page_Load() ' Create employees collection with one employee Dim NewEmployee As New Employee("Steve", "Walther", False) Dim employees As New List(Of Employee)() employees.Add(NewEmployee) ' Bind employees to DetailsView dtlMovies.DataSource = employees dtlMovies.DataBind() End Sub </script> <html xmlns="http://www.w3.org/1999/xhtml" > <head runat="server"> <title>Show Employee</title> </head> <body> <form runat="server"> <div> <asp:DetailsView Runat="server" /> </div> </form> </body> </html> As Boolean) _firstName = firstName _lastName = lastName _retired = retired End Sub End Class ''' <summary> ''' Load employees into DetailsView ''' </summary> Private Sub Page_Load() ' Create employees collection with one employee Dim NewEmployee As New Employee("Steve", "Walther", False) Dim employees As New List(Of Employee)() employees.Add(NewEmployee) ' Bind employees to DetailsView dtlMovies.DataSource = employees dtlMovies.DataBind() End Sub </script> <html xmlns="http://www.w3.org/1999/xhtml" > <head runat="server"> <title>Show Employee</title> </head> <body> <form runat="server"> <div> <asp:DetailsView Runat="server" /> </div> </form> </body> </html>
|
In Listing 12.2, an Employee class is defined, which contains properties for the employee first name, last name, and retirement status. In the Page_Load() method, a new employee is created and added to a generic collection. This collection is bound to the DetailsView control. Using Fields with the DetailsView Control If you need more control over the appearance of the DetailsView, including the particular order in which columns are displayed, then you can use fields with the DetailsView control. The DetailsView control supports exactly the same fields as the GridView control: BoundField Enables you to display the value of a data item as text. CheckBoxField Enables you to display the value of a data item as a check box. CommandField Enables you to display links for editing, deleting, and selecting rows. ButtonField Enables you to display the value of a data item as a button (image button, link button, or push button). HyperLinkField Enables you to display the value of a data item as a link. ImageField Enables you to display the value of a data item as an image. TemplateField Enables you to customize the appearance of a data item.
Note Another option is to create custom fields for the DetailsView control. You can create custom fields that work with the DetailsView control in exactly the same way as you create custom fields that work with the GridView control. Custom fields for the GridView control are discussed in the final section of Chapter 11, "Using the GridView Control."
The page in Listing 12.3 contains a DetailsView control that contains three BoundFields. The BoundFields display the values of the Title, Director, and BoxOfficeTotals database columns (see Figure 12.2). Listing 12.3. ShowFields.aspx <%@ Page Language="VB" %> <!DOCTYPE html PUBLIC "-//W3C//DTD XHTML 1.1//EN" "http://www.w3.org/TR/xhtml11/DTD/xhtml11.dtd"> <html xmlns="http://www.w3.org/1999/xhtml" > <head runat="server"> <title>Show Fields</title> </head> <body> <form runat="server"> <div> <asp:DetailsView DataSource AutoGenerateRows="false" Runat="server"> <Fields> <asp:BoundField DataField="Title" HeaderText="Movie Title:" /> <asp:BoundField DataField="Director" HeaderText="Movie Director:" /> <asp:BoundField DataField="BoxOfficeTotals" DataFormatString="{0:c}" HtmlEncode="false" HeaderText="Box Office Totals:" /> </Fields> </asp:DetailsView> <asp:SqlDataSource ConnectionString="<%$ ConnectionStrings:Movies %>" SelectCommand="SELECT Id,Title,Director,BoxOfficeTotals FROM Movies WHERE Id=1" Runat="server" /> </div> </form> </body> </html>
|
Figure 12.2. Using BoundFields with the DetailsView control. 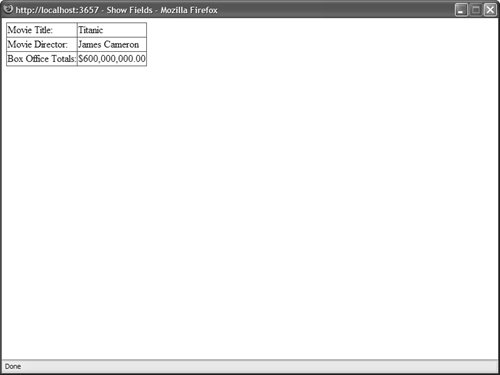
Notice that the DetailsView control has an AutoGenerateRows property that has the value False. When you specify fields for a DetailsView control, you'll want to include this property so that the fields do not appear more than once. Each of the BoundFields in Listing 12.3 includes a HeaderText attribute that is used to specify the label for the field. In addition, the BoundField associated with the BoxOfficeTotals column includes a DataFormatString property that is used to format the value of the column as a currency amount. Warning Make sure that you disable HTML encoding by setting the HtmlEncode property to the value False when you use the DataFormatString property. Otherwise the format string is ignored.
Displaying Empty Data with the DetailsView Control The DetailsView control includes two properties that you can use to display a message when no results are returned from its data source. You can use the EmptyDataText property to display an HTML string, or the EmptyDataTemplate property to display more complicated content. For example, the SqlDataSource in Listing 12.4 does not return a record because no record in the Movies database table has an ID of 1. Listing 12.4. ShowEmptyDataText.aspx <%@ Page Language="VB" %> <!DOCTYPE html PUBLIC "-//W3C//DTD XHTML 1.1//EN" "http://www.w3.org/TR/xhtml11/DTD/xhtml11.dtd"> <html xmlns="http://www.w3.org/1999/xhtml" > <head runat="server"> <title>Show Empty Data Text</title> </head> <body> <form runat="server"> <div> <asp:DetailsView DataSource EmptyDataText="<b>No Matching Record!</b>" Runat="server" /> <asp:SqlDataSource ConnectionString="<%$ ConnectionStrings:Movies %>" SelectCommand="SELECT Id,Title,Director,InTheaters FROM Movies WHERE Id=-1" Runat="server" /> </div> </form> </body> </html>
|
When you open the page in Listing 12.4, the contents of the EmptyDataText property are displayed. If you need to display more complicated content when no results are returned, such as ASP.NET controls, then you can specify an EmptyDataTemplate. The page in Listing 12.5 illustrates how you can use the EmptyDataTemplate to display complicated HTML content (see Figure 12.3). Listing 12.5. ShowEmptyDataTemplate.aspx <%@ Page Language="VB" %> <!DOCTYPE html PUBLIC "-//W3C//DTD XHTML 1.1//EN" "http://www.w3.org/TR/xhtml11/DTD/xhtml11.dtd"> <html xmlns="http://www.w3.org/1999/xhtml" > <head runat="server"> <style type="text/css"> .noMatch { background-color:#ffff66; padding:10px; font-family:Arial,Sans-Serif; } .noMatch h1 { color:red; font-size:16px; font-weight:bold; } </style> <title>Show Empty Data Template</title> </head> <body> <form runat="server"> <div> <asp:DetailsView DataSource Runat="server"> <EmptyDataTemplate> <div > <h1>No Matching Results!</h1> Please select a different record. </div> </EmptyDataTemplate> </asp:DetailsView> <asp:SqlDataSource ConnectionString="<%$ ConnectionStrings:Movies %>" SelectCommand="SELECT Id,Title,Director,InTheaters FROM Movies WHERE Id=-1" Runat="server" /> </div> </form> </body> </html>
|
Figure 12.3. Displaying content when no results are returned. 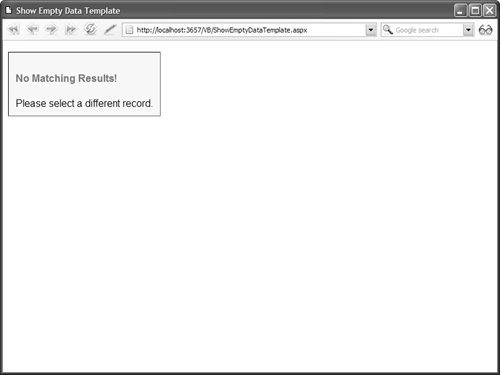
Paging through Data with the DetailsView Control You can use the DetailsView to page through a set of database records by enabling the DetailsView control's AllowPaging property. The page in Listing 12.6 illustrates how you can page through the records in the Movies database table (see Figure 12.4). Listing 12.6. ShowPaging.aspx <%@ Page Language="VB" %> <!DOCTYPE html PUBLIC "-//W3C//DTD XHTML 1.1//EN" "http://www.w3.org/TR/xhtml11/DTD/xhtml11.dtd"> <html xmlns="http://www.w3.org/1999/xhtml" > <head runat="server"> <title>Show Paging</title> </head> <body> <form runat="server"> <div> <asp:DetailsView DataSource AllowPaging="true" Runat="server" /> <asp:SqlDataSource ConnectionString="<%$ ConnectionStrings:Movies %>" SelectCommand="SELECT Id,Title,Director,InTheaters FROM Movies" Runat="server" /> </div> </form> </body> </html>
|
Figure 12.4. Paging through records with the DetailsView control. 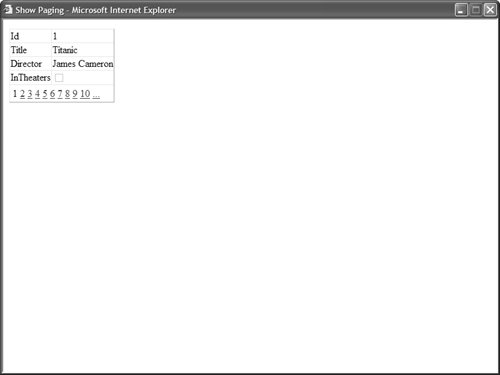
Warning In this section, you learn how to take advantage of user interface paging when paging through records with the DetailsView control. Although user interface paging is convenient, it is not efficient. When working with large sets of records, you should use data source paging. This option is described in Chapter 15, "Using the ObjectDataSource Control."
Paging with AJAX By default, when you page through records with the DetailsView control, the page is posted back to the server each and every time you click a page number. As an alternative, you can take advantage of AJAX to page through records. When you take advantage of AJAX, only the DetailsView control and not the entire page is updated when you navigate to a new page of records. Note AJAX (Asynchronous JavaScript and XML) enables you to retrieve content from a web server without reloading the page. AJAX works with all modern browsers including Microsoft Internet Explorer 6.0, Firefox 1.0, and Opera 8.0.
The page in Listing 12.7 illustrates how you can use AJAX with the DetailsView control. Listing 12.7. ShowAJAX.aspx <%@ Page Language="VB" %> <!DOCTYPE html PUBLIC "-//W3C//DTD XHTML 1.1//EN" "http://www.w3.org/TR/xhtml11/DTD/xhtml11.dtd"> <html xmlns="http://www.w3.org/1999/xhtml" > <head runat="server"> <title>Show Paging</title> </head> <body> <form runat="server"> <div> <%= DateTime.Now %> <asp:DetailsView DataSource AllowPaging="true" EnablePagingCallbacks="true" Runat="server" /> <asp:SqlDataSource ConnectionString="<%$ ConnectionStrings:Movies %>" SelectCommand="SELECT Id,Title,Director,InTheaters FROM Movies" Runat="server" /> </div> </form> </body> </html>
|
Notice that the DetailsView control in Listing 12.7 includes an EnablePagingCallbacks property which has the value true. This property enables AJAX while paging with the DetailsView. Furthermore, notice that the page in Listing 12.7 displays the current time. The time is not updated when you navigate to a new page of records. The time is not updated because the entire page is not updated. When you navigate to a new page, only the contents of the DetailsView are updated. Customizing the Paging Interface You can customize the appearance of the paging interface by modifying the PagerSettings property. For example, the DetailsView control in Listing 12.8 displays first, previous, next, and last links instead of page numbers (see Figure 12.5). Figure 12.5. Using PagerSettings to customize the paging interface. 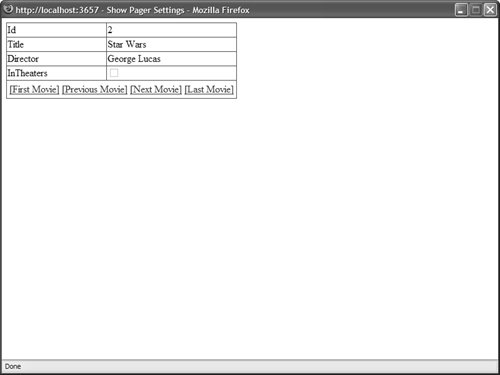
Listing 12.8. ShowPagerSettings.aspx <%@ Page Language="VB" %> <!DOCTYPE html PUBLIC "-//W3C//DTD XHTML 1.1//EN" "http://www.w3.org/TR/xhtml11/DTD/xhtml11.dtd"> <html xmlns="http://www.w3.org/1999/xhtml" > <head runat="server"> <title>Show Pager Settings</title> </head> <body> <form runat="server"> <div> <asp:DetailsView DataSource AllowPaging="true" Runat="server"> <PagerSettings Mode="NextPreviousFirstLast" FirstPageText="[First Movie]" LastPageText="[Last Movie]" NextPageText="[Next Movie]" PreviousPageText="[Previous Movie]" /> </asp:DetailsView> <asp:SqlDataSource ConnectionString="<%$ ConnectionStrings:Movies %>" SelectCommand="SELECT Id,Title,Director,InTheaters FROM Movies" Runat="server" /> </div> </form> </body> </html>
|
The PagerSettings class supports the following properties: FirstPageImageUrl Enables you to display an image for the first page link. FirstPageText Enables you to specify the text for the first page link. LastPageImageUrl Enables you to display an image for the last page link. LastPageText Enables you to specify the text for the last page link. Mode Enables you to select a display mode for the pager user interface. Possible values are NextPrevious, NextPreviousFirstLast, Numeric, and NumericFirstLast. NextPageImageUrl Enables you to specify the text for the next page link. NextPageText Enables you to specify the text for the next page link. PageButtonCount Enables you to specify the number of page number links to display. Position Enables you to specify the position of the paging user interface. Possible values are Bottom, Top, TopAndBottom. PreviousPageImageUrl Enables you to display an image for the previous page link. PreviousPageText Enables you to specify the text for the previous page link. Visible Enables you to hide the paging user interface.
If you need to customize the paging interface completely, then you can use a template. For example, the page in Listing 12.9 displays a list of page numbers in a drop-down list control (see Figure 12.6). Figure 12.6. Using a PagerTemplate to customize the paging interface. 
Listing 12.9. ShowPagerTemplate.aspx| [View full width] <%@ Page Language="VB" %> <!DOCTYPE html PUBLIC "-//W3C//DTD XHTML 1.1//EN" "http://www.w3.org/TR/xhtml11/DTD/xhtml11.dtd"> <script runat="server"> Protected Sub dtlMovies_DataBound(ByVal sender As Object, ByVal e As EventArgs) Dim ddlPager As DropDownList = CType(dtlMovies.BottomPagerRow.Cells(0).FindControl ("ddlPager"), DropDownList) For i As Integer = 0 To dtlMovies.PageCount - 1 Dim item As New ListItem(String.Format("Record {0}", i + 1), i.ToString()) If dtlMovies.PageIndex = i Then item.Selected = True End If ddlPager.Items.Add(item) Next End Sub Protected Sub btnPage_Click(ByVal sender As Object, ByVal e As EventArgs) Dim ddlPager As DropDownList = CType(dtlMovies.BottomPagerRow.Cells(0).FindControl ("ddlPager"), DropDownList) dtlMovies.PageIndex = Int32.Parse(ddlPager.SelectedValue) End Sub </script> <html xmlns="http://www.w3.org/1999/xhtml" > <head runat="server"> <title>Show Pager Template</title> </head> <body> <form runat="server"> <div> <asp:DetailsView DataSource AllowPaging="true" OnDataBound="dtlMovies_DataBound" Runat="server"> <PagerTemplate> <asp:DropDownList Runat="server" /> <asp:Button Text="Select" Runat="server" OnClick="btnPage_Click" /> </PagerTemplate> </asp:DetailsView> <asp:SqlDataSource ConnectionString="<%$ ConnectionStrings:Movies %>" SelectCommand="SELECT Id,Title,Director,InTheaters FROM Movies" Runat="server" /> </div> </form> </body> </html>
|
After you open the page in Listing 12.9, you can select a record from the DropDownList control and navigate to the record by clicking the Button control. Updating Data with the DetailsView Control You can use the DetailsView control to update existing database records. In order to update an existing record, assign the value True to the DetailsView control's AutoGenerateEditButton property as illustrated in Listing 12.10 (see Figure 12.7). Figure 12.7. Editing a record with the DetailsView control. 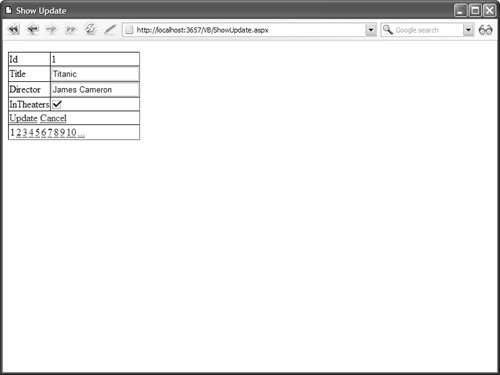
Listing 12.10. ShowUpdate.aspx <%@ Page Language="VB" %> <!DOCTYPE html PUBLIC "-//W3C//DTD XHTML 1.1//EN" "http://www.w3.org/TR/xhtml11/DTD/xhtml11.dtd"> <html xmlns="http://www.w3.org/1999/xhtml" > <head runat="server"> <title>Show Update</title> </head> <body> <form runat="server"> <div> <asp:DetailsView DataKeyNames="Id" AutoGenerateEditButton="true" AllowPaging="true" DataSource Runat="server" /> <asp:SqlDataSource ConnectionString="<%$ ConnectionStrings:Movies %>" SelectCommand="SELECT Id,Title,Director,InTheaters FROM Movies" UpdateCommand="UPDATE Movies SET Title=@Title,Director=@Director, InTheaters=@InTheaters WHERE Id=@Id" Runat="server" /> </div> </form> </body> </html>
|
When you open the page in Listing 12.10, the record appears in Read Only mode. You can click the Edit button to switch the DetailsView into Edit mode and update the record. Notice that the DetailsView control includes a DataKeyNames property and an AutoGenerateEditButton property. The DataKeyNames property contains the name of the primary key column. The AutoGenerateEditButton property automatically generates the user interface for editing the record. Notice that the SqlDataSource control includes an UpdateCommand. The UpdateCommand updates the Title, Director, and InTheaters database columns. If you want the DetailsView control to initially appear in Edit mode, then you can set the DetailsView control's DefaultMode property to the value Edit. For example, the page in Listing 12.11 contains a Master/Detail form. If you select any of the records in the GridView, you can edit the record with the DetailsView control (see Figure 12.8). Figure 12.8. Displaying a Master/Detail form with the DetailsView control. 
Listing 12.11. MasterDetailEdit.aspx| [View full width] <%@ Page Language="VB" %> <!DOCTYPE html PUBLIC "-//W3C//DTD XHTML 1.1//EN" "http://www.w3.org/TR/xhtml11/DTD/xhtml11.dtd"> <script runat="server"> Private Sub Page_Load() If Not Page.IsPostBack Then grdMovies.SelectedIndex = 0 End If End Sub Protected Sub dtlMovies_ItemUpdated(ByVal sender As Object, ByVal e As DetailsViewUpdatedEventArgs) grdMovies.DataBind() End Sub </script> <html xmlns="http://www.w3.org/1999/xhtml" > <head runat="server"> <style type="text/css"> html { background-color:silver; font:14px Georgia,Serif; } .content { margin:auto; width:600px; background-color:white; } .column { float:left; width:250px; } .selectedRow { background-color:yellow; } </style> <title>Master/Detail Edit</title> </head> <body> <form runat="server"> <div > <div > <asp:GridView DataSource DataKeyNames="Id" AutoGenerateSelectButton="true" SelectedRowStyle-Css Runat="server" /> </div> <div > <asp:DetailsView DefaultMode="Edit" AutoGenerateEditButton="true" AllowPaging="true" DataSource DataKeyNames="Id" OnItemUpdated="dtlMovies_ItemUpdated" Runat="server" /> <asp:SqlDataSource ConnectionString="<%$ ConnectionStrings:Movies %>" SelectCommand="SELECT Id,Title FROM Movies" Runat="server" /> </div> <asp:SqlDataSource ConnectionString="<%$ ConnectionStrings:Movies %>" SelectCommand="SELECT Id,Title,Director,InTheaters FROM Movies WHERE Id=@MovieId" UpdateCommand="UPDATE Movies SET Title=@Title,Director=@Director, InTheaters=@InTheaters WHERE Id=@Id" Runat="server"> <SelectParameters> <asp:ControlParameter Name="MovieId" Control /> </SelectParameters> </asp:SqlDataSource> </div> </form> </body> </html>
|
Notice that the DetailsView control includes a DefaultMode property that is set to the value Edit. When you select a record, the record is displayed by the DetailsView in Edit mode by default. Using Templates when Editing By default, you don't get any validation when editing records with the DetailsView control. In other words, there is nothing to prevent you from attempting to submit a null value to a database column that does not accept null values. If you need to perform validation, then you need to use templates with the DetailsView control. The page in Listing 12.12 uses TemplateFields for the Title and BoxOfficeTotals columns. Both TemplateFields contain a RequiredFieldValidator. The BoxOfficeTotals column also includes a CompareValidator to check whether the value entered is a currency value (see Figure 12.9). Figure 12.9. Using a template when editing with the DetailsView control. 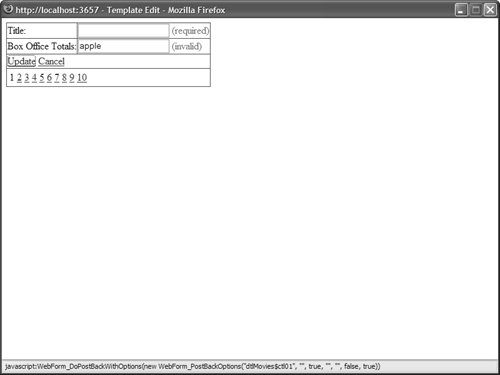
Listing 12.12. TemplateEdit.aspx <%@ Page Language="VB" %> <!DOCTYPE html PUBLIC "-//W3C//DTD XHTML 1.1//EN" "http://www.w3.org/TR/xhtml11/DTD/xhtml11.dtd"> <html xmlns="http://www.w3.org/1999/xhtml" > <head runat="server"> <title>Template Edit</title> </head> <body> <form runat="server"> <div> <asp:DetailsView AutoGenerateRows="false" AutoGenerateEditButton="true" AllowPaging="true" DefaultMode="Edit" DataSource DataKeyNames="Id" Runat="server"> <Fields> <asp:TemplateField HeaderText="Title:"> <EditItemTemplate> <asp:TextBox Text='<%# Bind("Title") %>' runat="server" /> <asp:RequiredFieldValidator ControlToValidate="txtTitle" Text="(required)" Display="Dynamic" Runat="server" /> </EditItemTemplate> </asp:TemplateField> <asp:TemplateField HeaderText="Box Office Totals:"> <EditItemTemplate> <asp:TextBox Text='<%# Bind("BoxOfficeTotals", "{0:f}") %>' runat="server" /> <asp:RequiredFieldValidator ControlToValidate="txtBoxOfficeTotals" Text="(required)" Display="Dynamic" Runat="server" /> <asp:CompareValidator ControlToValidate="txtBoxOfficeTotals" Text="(invalid)" Display="Dynamic" Operator="DataTypeCheck" Type="currency" Runat="server" /> </EditItemTemplate> </asp:TemplateField> </Fields> </asp:DetailsView> <asp:SqlDataSource ConnectionString="<%$ ConnectionStrings:Movies %>" SelectCommand="SELECT Id,Title,BoxOfficeTotals FROM Movies" UpdateCommand="UPDATE Movies SET Title=@Title, BoxOfficeTotals=@BoxOfficeTotals WHERE Id=@Id" Runat="server" /> </div> </form> </body> </html>
|
If you attempt to edit a record, and you do not provide a value for the Title or BoxOfficeTotals columns, then a validation error is displayed. Also, if you enter anything other than a currency amount for the BoxOfficeTotals column, a validation error message is displayed. Handling Concurrency Issues What happens when two users edit the same record at the same time? By default, the last user to update the database record wins. In other words, one user can overwrite changes made by another user. Imagine that Sally opens a page to edit a database record. After opening the page, Sally leaves for her two-week vacation in Las Vegas. While Sally is vacationing, Jim edits the same record and submits his changes. When Sally returns from vacation, she submits her changes. Any modifications that Jim makes are overwritten by Sally's changes. If you need to prevent this scenario, then you can take advantage of optimistic concurrency. The SqlDataSource control's ConflictDetection property supports the following two values: CompareAllValues OverwriteChanges
By default, the ConflictDetection property has the value OverwriteChanges. If you set this property to the value CompareAllValues, then the SqlDataSource tracks both the original and modified versions of each column. For example, the page in Listing 12.13 doesn't allow a user to update a record when the original record has been modified after the user has opened the page. Listing 12.13. Concurrency.aspx <%@ Page Language="VB" %> <!DOCTYPE html PUBLIC "-//W3C//DTD XHTML 1.1//EN" "http://www.w3.org/TR/xhtml11/DTD/xhtml11.dtd"> <html xmlns="http://www.w3.org/1999/xhtml" > <head runat="server"> <title>Concurrency</title> </head> <body> <form runat="server"> <div> <asp:DetailsView DataKeyNames="Id" AutoGenerateEditButton="true" AllowPaging="true" DataSource Runat="server" /> <asp:SqlDataSource ConnectionString="<%$ ConnectionStrings:Movies %>" SelectCommand="SELECT Id,Title,Director,InTheaters FROM Movies" UpdateCommand="UPDATE Movies SET Title=@Title,Director=@Director,InTheaters=@InTheaters WHERE Title=@original_Title AND Director=@original_Director AND InTheaters=@InTheaters AND Id=@original_Id" ConflictDetection="CompareAllValues" OldValuesParameterFormatString="original_{0}" Runat="server" /> </div> </form> </body> </html>
|
Notice the contents of the UpdateCommand in Listing 12.13. The current values are compared against the original values for each database column when updating a record. If the current and original values don't match, then the record is not updated. The SqlDataSource has both its ConflictDetection and OldValuesParameterFormatString properties set. The OldValuesParameterFormatString specifies the prefix added to the parameters that represent the original field values. Inserting Data with the DetailsView Control You can use the DetailsView control to insert new records into a database table. For example, the page in Listing 12.14 enables you to insert a new record into the Movies database table. Listing 12.14. ShowInsert.aspx <%@ Page Language="VB" %> <!DOCTYPE html PUBLIC "-//W3C//DTD XHTML 1.1//EN" "http://www.w3.org/TR/xhtml11/DTD/xhtml11.dtd"> <html xmlns="http://www.w3.org/1999/xhtml" > <head runat="server"> <title>Show Insert</title> </head> <body> <form runat="server"> <div> <asp:DetailsView AllowPaging="true" DataSource AutoGenerateInsertButton="true" Runat="server" /> <asp:SqlDataSource ConnectionString="<%$ ConnectionStrings:Movies %>" SelectCommand="SELECT Title,Director,InTheaters FROM Movies" InsertCommand="INSERT Movies (Title,Director,InTheaters) VALUES (@Title,@Director,@InTheaters)" Runat="server" /> </div> </form> </body> </html>
|
Notice that the DetailsView control in Listing 12.14 includes an AutoGenerateInsertButton property that has the value true. This property automatically generates the user interface for inserting a new record. After you open the page in Listing 12.14, you can click the New button to display a form for inserting a new record. When you click the Insert button, the SQL command represented by the SqlDataSource control's InsertCommand property is executed. If you want the DetailsView control to display an insert form by default, then you can assign the value Insert to the DetailsView control's DefaultMode property. This approach is illustrated by the page in Listing 12.15 (see Figure 12.10). Figure 12.10. Inserting a record with the DetailsView control. 
Listing 12.15. ShowInsertMode.aspx <%@ Page Language="VB" %> <!DOCTYPE html PUBLIC "-//W3C//DTD XHTML 1.1//EN" "http://www.w3.org/TR/xhtml11/DTD/xhtml11.dtd"> <html xmlns="http://www.w3.org/1999/xhtml" > <head runat="server"> <style type="text/css"> html { background-color:silver; font:14px Arial,Sans-Serif; } td,th { padding:10px; } #divDisplay { border:solid 1px black; width:400px; padding:15px; background-color:#eeeeee; } #divInsert { display:none; border:solid 1px black; width:400px; position:absolute; top:30px; left:100px; padding:10px; background-color:white; } </style> <script type="text/javascript"> function showInsert() { var divInsert = document.getElementById('divInsert'); divInsert.style.display = 'block'; } </script> <title>Show Insert Mode</title> </head> <body> <form runat="server"> <div > <asp:GridView DataSource Runat="server" /> <br /> <a href="JavaScript:showInsert();">Insert Movie</a> </div> <div > <h1>Insert Movie</h1> <asp:DetailsView DataSource AutoGenerateInsertButton="true" AutoGenerateRows="false" DefaultMode="Insert" Runat="server"> <Fields> <asp:BoundField DataField="Title" HeaderText="Title:" /> <asp:BoundField DataField="Director" HeaderText="Director:" /> <asp:CheckBoxField DataField="InTheaters" HeaderText="In Theaters:" /> </Fields> </asp:DetailsView> </div> <asp:SqlDataSource ConnectionString="<%$ ConnectionStrings:Movies %>" SelectCommand="SELECT Title,Director,InTheaters FROM Movies" InsertCommand="INSERT Movies (Title,Director,InTheaters) VALUES (@Title,@Director,@InTheaters)" Runat="server" /> </form> </body> </html>
|
The page in Listing 12.15 contains both a GridView and DetailsView control. The DetailsView control is hidden until you click the Insert Movie link. This link executes a JavaScript function named ShowInsert(), which displays the DetailsView control. Note You can hide a column when a DetailsView control is in Insert mode with the BoundField control's InsertVisible property. This property is useful, for example, when you want to prevent users from inserting a value for an identity column.
Deleting Data with the DetailsView Control You can delete records with the DetailsView control by enabling its AutoGenerateDeleteButton property. The page in Listing 12.16 enables you to both insert and delete records in the Movies database table. Listing 12.16. ShowDelete.aspx <%@ Page Language="VB" %> <!DOCTYPE html PUBLIC "-//W3C//DTD XHTML 1.1//EN" "http://www.w3.org/TR/xhtml11/DTD/xhtml11.dtd"> <html xmlns="http://www.w3.org/1999/xhtml" > <head runat="server"> <title>Show Delete</title> </head> <body> <form runat="server"> <div> <asp:DetailsView AllowPaging="true" DataSource DataKeyNames="Id" AutoGenerateInsertButton="true" AutoGenerateDeleteButton="true" AutoGenerateRows="false" Runat="server"> <Fields> <asp:BoundField DataField="Id" HeaderText="ID:" InsertVisible="false" /> <asp:BoundField DataField="Title" HeaderText="Title:" /> <asp:BoundField DataField="Director" HeaderText="Director:" /> <asp:CheckBoxField DataField="InTheaters" HeaderText="In Theaters:" /> </Fields> </asp:DetailsView> <asp:SqlDataSource ConnectionString="<%$ ConnectionStrings:Movies %>" SelectCommand="SELECT Id,Title,Director,InTheaters FROM Movies" InsertCommand="INSERT Movies (Title,Director,InTheaters) VALUES (@Title,@Director,@InTheaters)" DeleteCommand="DELETE Movies WHERE id=@Id" Runat="server" /> </div> </form> </body> </html>
|
When deleting records, you need to supply a value for the DetailsView control's DataKeyNames property. Notice that a parameter named @Id is used to represent the value of the ID column in the DeleteCommand property. Working with DetailsView Control Events The DetailsView control supports the following events: DataBinding Raised immediately before the DetailsView control is bound to its data source. DataBound Raised immediately after the DetailsView control is bound to its data source. ItemCommand Raised when any control contained in the DetailsView raises an event (for example, when you click a button rendered by a ButtonField). ItemCreated Raised when a DetailsView renders a data item. ItemDeleting Raised immediately before a data item is deleted. ItemDeleted Raised immediately after a data item is deleted. ItemInserting Raised immediately before a data item is inserted. ItemInserted Raised immediately after a data item is inserted. ItemUpdating Raised immediately before a data item is updated. ItemUpdated Raised immediately after a data item is updated. ModeChanging Raised immediately before the DetailsView control's mode is changed. ModeChanged Raised immediately after the DetailsView control's mode is changed. PageIndexChanging Raised immediately before the current page is changed. PageIndexChanged Raised immediately after the current page is changed.
Notice that several of these events reflect similar events exposed by the DataSource controls. For example, the SqlDataSource control includes Inserting and Inserted events, which mirror the DetailsView control's ItemInserting and ItemInserted events. The page in Listing 12.17 demonstrates how to use the ItemInserted event to handle any errors which might be raised when inserting a new record into a database table (see Figure 12.11). Figure 12.11. Handling database insert errors. 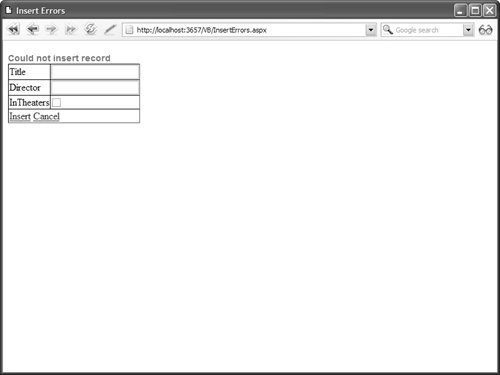
Listing 12.17. InsertErrors.aspx| [View full width] <%@ Page Language="VB" %> <!DOCTYPE html PUBLIC "-//W3C//DTD XHTML 1.1//EN" "http://www.w3.org/TR/xhtml11/DTD/xhtml11.dtd"> <script runat="server"> Protected Sub dtlMovies_ItemInserted(ByVal sender As Object, ByVal e As DetailsViewInsertedEventArgs) If Not IsNothing(e.Exception) Then e.ExceptionHandled = True e.KeepInInsertMode = True lblError.Visible = True End If End Sub </script> <html xmlns="http://www.w3.org/1999/xhtml" > <head runat="server"> <style type="text/css"> .error { color:red; font:bold 14px Arial,Sans-Serif; } </style> <title>Insert Errors</title> </head> <body> <form runat="server"> <div> <asp:Label Text="Could not insert record" Visible="false" EnableViewState="false" Css Runat="server" /> <asp:DetailsView AllowPaging="true" DataSource AutoGenerateInsertButton="true" OnItemInserted="dtlMovies_ItemInserted" Runat="server" /> <asp:SqlDataSource ConnectionString="<%$ ConnectionStrings:Movies %>" SelectCommand="SELECT Title,Director,InTheaters FROM Movies" InsertCommand="INSERT Movies (Title,Director,InTheaters) VALUES (@Title,@Director,@InTheaters)" Runat="server" /> </div> </form> </body> </html>
|
If you attempt to insert a record without providing values for the Title or Director column, then the error message contained in the Label control is displayed. When you insert a record, the DetailsView control raises the ItemInserted event. The second parameter passed to the event handler for this method contains a property that exposes any exceptions raised when inserting the record. In Listing 12.17, if there is an exception, then the exception is suppressed with the ExceptionHandled property. Furthermore, the KeepInInsertMode property prevents the DetailsView from automatically switching out of Insert mode. Formatting the DetailsView Control The DetailsView control includes an abundance of properties for formatting the control. I recommend that you format the DetailsView control by taking advantage of Cascading Style Sheets. All the following properties expose a Style object that includes a CssClass property: CssClass Enables you to associate a style sheet class with the DetailsView control. AlternatingRowStyle Represents every other row rendered by the DetailsView control. CommandRowStyle Represents the row that contains the edit buttons. EditRowStyle Represents rows when the DetailsView control is in Edit mode. EmptyDataRowStyle Represents the row displayed when the data source does not return any data items. FieldHeaderStyle Represents the cell displayed for the field labels. FooterStyle Represents the footer row. HeaderStyle Represents the header row. InsertRowStyle Represents rows when the DetailsView control is in Insert mode. PagerStyle Represents the row or rows that display the paging user interface. RowStyle Represents the rows displayed by the DetailsView control. Furthermore, you can take advantage of the following properties when formatting a DetailsView control: GridLines Enables you to specify the appearance of the rules that appear around the cells of the table rendered by a DetailsView control. Possible values are None, Horizontal, Vertical, and Both. HeaderText Enables you to specify text that appears in the header of the DetailsView control. FooterText Enables you to specify text that appears in the footer of the DetailsView control.
The page in Listing 12.18 uses several of these properties to format a DetailsView control (see Figure 12.12). Figure 12.12. Formatting a DetailsView control with CSS. 
Listing 12.18. FormatDetailsView.aspx <%@ Page Language="VB" %> <!DOCTYPE html PUBLIC "-//W3C//DTD XHTML 1.1//EN" "http://www.w3.org/TR/xhtml11/DTD/xhtml11.dtd"> <html xmlns="http://www.w3.org/1999/xhtml" > <head runat="server"> <style type="text/css"> .movies td,.movies th { padding:10px; } .movies { border:double 4px black; } .header { letter-spacing:8px; font:bold 16px Arial,Sans-Serif; background-color:silver; } .fieldHeader { font-weight:bold; } .alternating { background-color:#eeeeee; } .command { background-color:silver; } .command a { color:black; background-color:#eeeeee; font:14px Arials,Sans-Serif; text-decoration:none; padding:3px; border:solid 1px black; } .command a:hover { background-color:yellow; } .pager td { padding:2px; } </style> <title>Format DetailsView</title> </head> <body> <form runat="server"> <div> <asp:DetailsView DataSource AutoGenerateInsertButton="true" AllowPaging="true" GridLines="None" HeaderText="Movies" Css HeaderStyle-Css FieldHeaderStyle-Css AlternatingRowStyle-Css CommandRowStyle-Css PagerStyle-Css Runat="server" /> <asp:SqlDataSource ConnectionString="<%$ ConnectionStrings:Movies %>" SelectCommand="SELECT Title,Director,InTheaters FROM Movies" InsertCommand="INSERT Movies (Title,Director,InTheaters) VALUES (@Title,@Director,@InTheaters)" Runat="server" /> </div> </form> </body> </html>
|
|