The ExternalInterface API
| One thing that has perplexed Flash developers for years is the lack of a consistent way to communicate between Flash and JavaScript. Calling JavaScript functions from Flash hasn't really been a problem since the getURL method because that method can call JavaScript directly, but getting JavaScript to communicate back to Flash has been nearly impossible on a consistent basis across many browsers. Until now. Here is an example of calling a JavaScript function from Flash with getURL: getURL("javascript:alert('hello world!');"); The ExternalInterface API is designed for seamless communication calls to JavaScript functions and the capability for JavaScript to be able to call functions that are sitting on the Flash timeline. Before we jump right in and start using it, we need to make the necessary methods available on the timeline by importing the class like this: import flash.external.*; Now we can work with the first method that will enable us to call JavaScript functions. The Call MethodThe call method is a static method of the ExternalInterface object, which means we do not need an instance of the object to call it; we can call it directly on the object class, like this: ExternalInterface.call(functionName:String,Parameters); This method has two parameters:
That's the basic layout, so now let's build an example.
The preceding code first imports the ExternalInterface package. Then you set the event for the Button component that, when clicked, calls the JavaScript function alert and passes it the text from the text field all through the ExternalInterface. Now publish the movie and the HTML and place them on a server. When you test the file on the server, you will see that when you click the button, whatever is in the text field will appear in the alert. But, if you test locally, you will notice that when you click the button, nothing happens. This is a security feature of the Flash player, but there is a workaround. To be able to run this file locally, you have to open the HTML in a text editor and change the allowScriptAccess parameter from "sameDomain" to "always" in both the object parameter and the embed attribute. After this is done, the file will work locally and the alert message will appear. The final version is available from the website, and it already has this change in place. That example was a one-way example. You could have done that with the getURL method. The next example, however, will go beyond that and not only send information to JavaScript, but it will also receive data back using the addCallback method. The addCallback MethodThe addCallback method allows JavaScript to call functions sitting on the timeline in Flash. The basic layout is like this: ExternalInterface.addCallback(functionID:String, instance:Object, functionName:Function); As with the call method, this method is a static method and it has these three parameters:
That is the basic layout of the addCallback method. Now let's move on to the example. In this example, we will have Flash call a JavaScript prompt to appear that will ask the user to choose a color. After the color is filled in and the user clicks OK, an object back in Flash will change to that color. Follow these steps to see it in action:
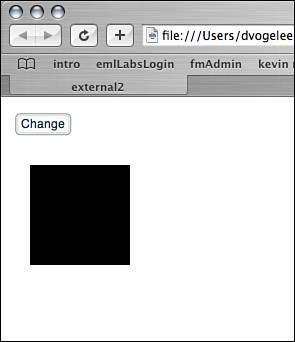
The preceding code first imports the ExternalInterface package. Then we create the function that will change the color of the square on the stage using the Color object. After that, we call the addCallback method to make the onChange function available to JavaScript. Finally, we create the event for the Button to call the JavaScript prompt. You need to publish both the SWF and the HTML at this point; then open the HTML file in a text editor. With just calling JavaScript, nothing has to be done to the HTML unless you want to run it locally, but with JavaScript calling functions in Flash, a little more work is required: Beneath the title tag, place the following JavaScript code: <script language=JavaScript> var me; //represents the swf id //get the correct reference function getID(swfID) { if (navigator.appName.indexOf("Microsoft") > -1) { me = window[swfID]; } else { me = document[swfID]; } } //this will call the onChange event back in Flash function makeCall(str){ me.onChange(str); } //this is the function being called from Flash function callPrompt(str){ makeCall(prompt(str)); } </script> First, we create the variable me to hold the reference to the SWF file; without it, we could not make calls to Flash functions. Then the function that will set the reference is created with a conditional that can tell the difference between Microsoft's Internet Explorer and other browsers, because the reference will need to be different for that browser. After that, the function makeCall is created, and this is where the Flash function is called. Finally, we create the function that is being called from Flash, which will call the makeCall function to send information back to Flash, but not before it receives the data back from the prompt. In the body tag, add the attribute onload and set it equal to the getID function like this: <body bgcolor="#ffffff" onload="getID('external2');"> Notice that when we set the function to the onload event, we pass it the id of the SWF, which can be found where the SWF is embedded. So now, when the page initially loads, the getID function will be called, and the me variable will set so JavaScript can call the Flash function. Put the files up on the server to test, or again, change the allowScriptAccess parameter and attribute to test locally. When it is run, you should see something similar to Figure 20.8. And when you set the color and click OK (or press the Enter key), the square should change to that color. Figure 20.8. Communication back and forth between Flash and JavaScript is now a breeze with the ExternalInterface API.
NOTE If the user presses the Cancel button instead of the OK button, null would be passed back to JavaScript and consequently to Flash as well, which would make the square black again. |
EAN: 2147483647
Pages: 319