7.4 How to manage user registrations
|
| < Day Day Up > |
|
7.4 How to manage user registrations
Here we describe the different options available for registering users under WebSphere Portal.
7.4.1 User self-registration
Portal users can do self-registration from the portal Web page by clicking on the 'Sign up' icon. The userid information entered on the screen will be saved as a user profile in LDAP and the DB2 TDBM backend, in the same way as if it were administered by the Portal administrator. From the Portal Web page look for the 'Sign up' icon on the navigation bar, shown as a circled icon in Figure 7-2 on page 287.
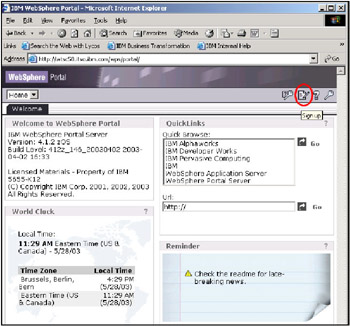
Figure 7-2: WebSphere Portal server sign up screen
Clicking on the sign up icon takes you to the user self-registration page shown in Figure 7-3 on page 288.
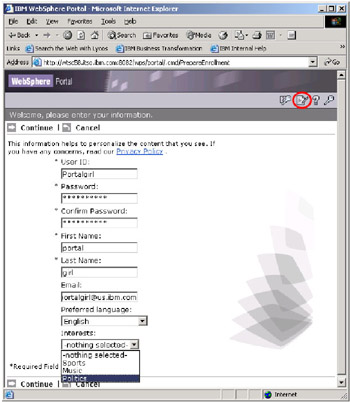
Figure 7-3: WebSphere Portal Server user self-registration
After a user has provided the sign up information, click Continue to confirm and complete registration. Once you receive confirmation of user registration completion, you can then try to log in to the Portal Web using the login icon.
After clicking on the 'Log in' icon on the navigation bar, the login page shown in Figure 7-4 is used to enter user login information and login to the Portal server.
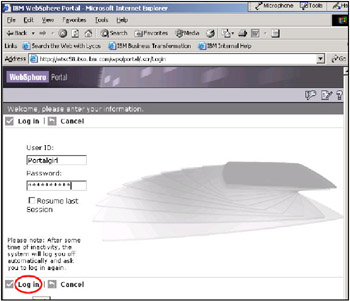
Figure 7-4: WebSphere Portal Server user login panel
Once the user is logged in to the Portal, they also have the authority to edit their own user profile.
7.4.2 Portal administrator defined registration
The portal administrator can register portal users using the system administration portlets. Also see 4.1, "Administrative privileges" on page 122, Figure 4-2 on page 124 and Figure 4-3 on page 125. After logging in as a user with administrative privileges, for example user wpsadmin, the Portal Administration place as shown in Figure 7-5 can be selected.
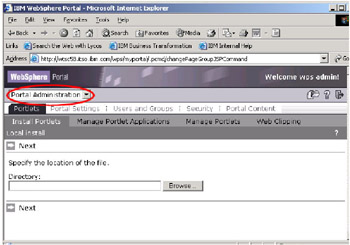
Figure 7-5: Portal administration Portlet Panel
From the Portal Administration place, Click on the Users and Groups tab to go the page seen in Figure 7-6 on page 291 to register users.
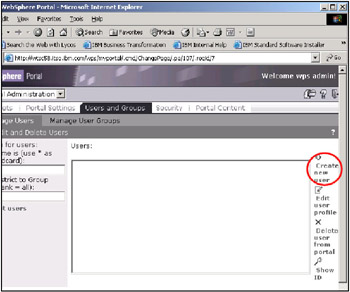
Figure 7-6: Portal administration 'User and Groups' for user registration
By clicking on Create new user you will be prompted with the self-registration screen as shown in Figure 7-3 on page 288, where the administrator can create new user information.
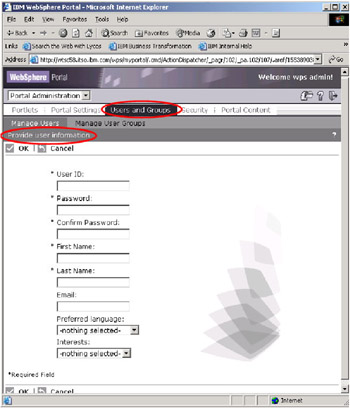
Figure 7-7: Add user and Provide User Information
7.4.3 IBM LDAP Data Management Tool (DMT)
The IBM SecureWay Directory Server has an LDAP client tool called Directory Management Tool (DMT). The DMT is shipped on CD-ROMs as a part of WebSphere Portal Server for z/OS and OS/390 development environment. DMT is a Java client graphical user interface that allows an administrator to manage LDAP directories on multiple LDAP servers. DMT supports the following functions:
-
Displaying server properties and rebinding to the server
-
Listing, adding, editing and deleting schema attributes and object classes
-
Listing, adding, editing and deleting directory entries, for example users
-
Modifying directory entry ACLs
-
Searching the directory tree
Adding, modifying and deleting users in the LDAP is also supported from the Portal server using the Portal Administration portlets.
The DMT can be installed from CD-ROMs 20 and 21 to the distributed platform of choice. To install only the DMT client, select the custom install option, and de-select options to install the LDAP server and DB2 database. After starting the DMT, if the LDAP server is not local then you must click on Add server to connect to the directory server. You then would need to enter the server name and LDAP port number, which in our case was wtsc58.itso.ibm.com and 2389 respectively.
To add a new entry, for example a new user for Portal Server, first you need to connect, or rebind to the server using an ID that has LDAP administrative privilege. Then browse the directory tree, select the users attribute cn=users and click on the Add button as shown in Figure 7-8 on page 294.
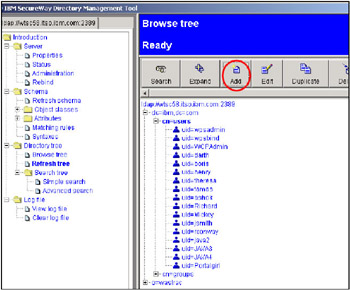
Figure 7-8: DMT Directory tree
After clicking on Add the dialog window shown in Figure 7-9 on page 295 is received.
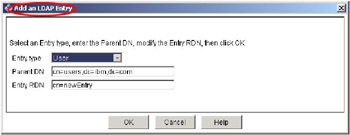
Figure 7-9: Add an LDAP Entry - Entry type 'User'
After checking and validating the base parameters, click OK to continue onto the window shown in Figure 7-10 on page 296.
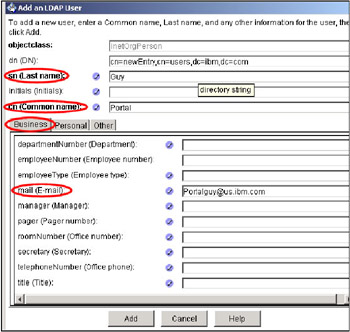
Figure 7-10: Add an LDAP User
For Portal Server the minimum attributes that need to be completed are:
-
sn: Last name
-
cn Common name
-
uid: userid
-
userpassword: password
After providing values for these parameters click on the Add shown in Figure 7-11 on page 297 button to proceed.
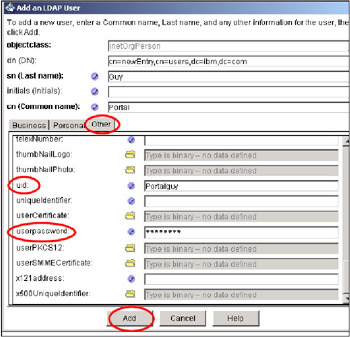
Figure 7-11: Adding a LDAP user
Other attributes, for example, email and interests as shown in Figure 7-3 on page 288 for self registration, need not be added to LDAP. This is because the CUR implementation performed by Portal Server only uses LDAP for authentication where it is checking for the existence of a user and the correct password. Anything other than userid and password information are part of the user profile which is stored in the Portal database and not LDAP.
| Note | The IBM SecureWay Directory Management Tool used in this redbook project, and provided on the CD-ROM is part of IBM Directory Server V4.1. |
For customers that already have their corporate users in an existing LDAP registry on z/OS, for example Intranet users,.you can simply point to the existing LDAP registry and make sure the LDAP is configured for Portal use.
|
| < Day Day Up > |
|