2.5 Configure and install WebSphere Portal Server
|
| < Day Day Up > |
|
2.5 Configure and install WebSphere Portal Server
After completing the SMP/E steps, you are ready to do the actual Portal server installation. This is a twelve step process. The residency portal installation process was based on the README Installing WebSphere Portal on z/OS and OS/390 Version 4.1 PTF2. This README file can be found at:
http://publib.boulder.ibm.com/pvc/wp/415/zos/en/readme41ptf2_install_zos.html
We will describe our installation for each of these steps:
-
Check that the base z/OS, OS/390 operating system is up and running.
-
WebSphere Application Server V4.01, LDAP and DB2 should be up and running.
Common step for all three Portal components
You will be extracting the tar files mentioned in Table 2-2 on page 31 for all Portal components.
Note that since Transcoding Publisher is a full product replacement, we will not extract the PTF1 level product tar file, but will directly extract the PTF2 level tar file.
The SMP/E process will have created a /usr/lpp/PortalServer directory either in the /SERVICE directory or in the root according to your customization of job EJPDDDEF.
2.5.1 Step one: Read the package contents
| Important: | Here we introduce a notation <WPS_PATH> that we use in this chapter and refers to the directory: /usr/lpp/PortalServer/PortalServer. This is the same as WPS_PATH environment variable. In other words, this notation refers to #WPS#/PortalServer. |
The installation file ejppsrv.tar is installed by SMP/E. This file contains the following directories and files:
-
wsport directory is located at <WPS_PATH>/zosinst and contains reference files as follows:
-
current.env
-
jvm.properties
-
trace.dat
-
webcontainer.conf
-
-
jcl directory is located at <WPS_PATH>/zosinst and contains:
-
Procedures to create and fill the DB2 database tables
-
JCL procedures for RACF setup
-
Control and server region procedures for WebSphere Portal
-
JCL procedures to set up WebSphere Portal on WebSphere Application Server for z/OS or OS/390
-
-
ear directory is located at WPS_PATH and contains files:
-
wsproxy.ear
-
wps.ear
-
-
scripts directory is located at <WPS_PATH>/zosinst and contains REXX and shell scripts to set up WebSphere Portal on WebSphere Application Server for z/OS or OS/390. These scripts are called by JCL procedures located in the jcl directory.
-
tools directory is located at <WPS_PATH>/zosinst and contains the 390fy tool and deployment scripts used during the installation of base portlets.
-
app directory is located at <WPS_PATH> and contains the base portlets.
2.5.2 Step two: Unpack the product files
To unpack the product files
-
Log on to the UNIX System Services (USS) on the target system as a user with root authority, UID=0).
-
Change directory to #WPS#
-
Execute commands:
tar -xv -f ejppsrv.tar tar -xv -f ejpwcpub.tar
To unpack the PTF2 product files
-
Log on to the UNIX System Services on the target system as a user with root authority.
-
Change directory to #WPS#
-
Execute commands:
tar -xv -f ejppsrv.4.1.2.tar tar -xv -f ejpwcpub.4.1.2.tar tar -xv -f ejptrcod.4.1.2.tar
At this stage, if you have followed our recommendation about using a /SERVICE/usr/lpp/PortalServer directory to perform the SMP/E steps, you should make a backup copy of the file system to another one.
For our installation we decided to copy it to /usr/lpp/PortalServer, which is the default #WPS# installation directory for Portal Server for z/OS.
Authorization settings
You need to set sufficient authorization to the userids with which you will use to perform the installation. In our example, TSO user JAVA3 was given UID=0 by issuing the following TSO command:
ALU JAVA3 OMVS(UID(0))
Install PTF2 files into your portal directory
A JCL procedure installs the PTF2 files into the WebSphere Portal directory and also prepares for removing the PTF. This JCL procedure is executed with root authority.
To install PTF2 files into the WebSphere Portal directory, perform the following:
-
Log on to a TSO session with root authority, UID=0).
-
Execute the command:
oget '/usr/lpp/PortalServer/PTF/PortalServer/ejppiPTF.jcl' '<yourhlq>.JCL(ejppiptf)' TEXT
-
Modify the job card to meet your system requirements.
-
Set the variable BBOLIB to the HLQ dataset qualifier for the WebSphere Application Server installation. The default value is BBO, however this might be different on your system.
-
Replace all occurrences of the following strings:
-
#WPS# with the HFS location for the WebSphere Portal installation; the default is /usr/lpp/PortalServer
-
#DRVNUM# with 4.1.2
-
-
Submit:
<yourhlq>.jobs.cntl(ejppiptf)
This job runs the shell script ejppiPTF.root.sh using BPXBATCH. If a problem occurs, check the job log for errors, fix the problem, and restart the job.
| Note | The shell script ejppiPTF.root.sh performs the following:
|
The highest return code from the job should be 0 and the end of that job should be similar to our display in Figure 2-4 on page 36.
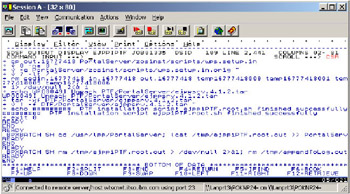
Figure 2-4: WebSphere Portal Server PTF2 files installation
2.5.3 Step three: Save the log files
Setup the proper log files (that is, /.../Install.log) as soon as possible, since it would be helpful to look at the log entries when a problem occurs. For this redbook project we found the following logs useful:
-
/usr/lpp/PortalServer/PortalServer/Install.log
-
/usr/lpp/PortalServer/PortalServer/zosinst/scripts/wps.admin.log
| Note | You can create a HFS log file that is separated from the WebSphere Portal install path, /usr/lpp/PortalServer/PortalServer, because the log file can grow in size over time in a production environment. |
All messages issued by the installation jobs are written to the job log and additionally, for some jobs, to a log file in the HFS. Furthermore, a combined installation log that comprises all information from the various log files is written to the file <WPS_PATH>/Install.log. You should save the job log of each of these jobs, and the combined installation log. These job logs are used for debugging, and are required if you contact IBM support.
2.5.4 Step four: Edit the setup file
The installation of WebSphere Portal is done by customizing and submitting several jobs for:
-
WLM setup
-
RACF setup
-
DB2 setup
-
LDAP setup
-
Setup on WebSphere Application Server for z/OS and OS/390
-
Portlet deployment
Generally, if a problem occurs, check the available logs, fix the problem, and restart the job. Usually the job will continue from where it previously failed. However, this might not apply to every section of the installation, in which case you must follow the instructions in those sections and also any guidelines in those sections explaining how to continue after a problem.
In some of the steps we describe how to recover when the job failed once and can't be rerun.
The file <WPS_PATH>/zosinst/scripts/wps.setup.in contains environment variables that need to be set prior to installation of WebSphere Portal. You can either directly edit the file <WPS_PATH>/zosinst/scripts/wps.setup.in, or copy it and edit the copy. If you do the latter, you need to supply the complete path name of your copy as a parameter to the JCL procedures for setup, and also make sure that the group CBWSPORT has read access to this directory. The advantage of copying the file <WPS_PATH>/zosinst/scripts/wps.setup.in to another location is that it allows you to migrate from one WebSphere Portal release to another without losing your changes to the file, for example, by switching or overwriting the WebSphere Portal HFS.
To make things simple, we decided to use the original file, back-up the original one, and at the end of the whole installation back-up the customized file outside of the product.
Things to remember
Agree on the naming convention for all environment variables and use the table provided in the README: WebSphere Portal on z/OS and OS/390 Version 4.1 PTF2, Step four: Edit the setup file, as a template. This README file can be found at:
http://publib.boulder.ibm.com/pvc/wp/415/zos/en/readme41ptf2_install_zos.html
-
After completing the template, it should be used throughout the rest of the installation process.
-
Our experience was to take the default values from the table, that is, installation path of WebSphere Portal was /usr/lpp/PortalServer, simply because we did not have to tailor an existing environment. Refer to Table A-1 on page 325 for the environment variable settings that were used for the redbook's Portal environment.
-
The installation default values for the LDAP suffix are set to 'dc=test,dc=com'. If you want to use any value other than the default suffix then you should modify the 'initdb' JCL under Step 8 on page 53 and replace dc=test to the value of your choice. For this redbook project's Portal environment we replaced dc=test with dc=ibm.
| Attention: | As of the writing of this book, Portal Server V4.1 supports only a two-level LDAP DN suffix. Therefore, when setting up WPS_LDAP_Server (the fully-qualified name of the LDAP server used by the WebSphere portal) and WPS_LDAP_ID, make sure your domain name uses no more than two levels. For example: 'dc=ibm,dc=com', instead of 'dc=itso,dc=ibm,dc=com' If your installation requires greater than a two-level LDAP tree name then you can use o='a.b.c',dc=x,dc=com|org|edu|net or ou='a.b.c' or dc='a.b.c' |
2.5.5 Step five: Set up WLM
In the TSO environment of the target system, make sure that WLM is set up correctly using IMWINAR0, as shown in the following WLM definition for the server WPS_SERVERNAME in Figure 2-5 on page 39.
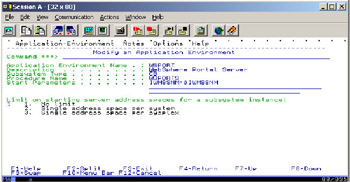
Figure 2-5: Setup WLM Application Environment for Portal Server J2EE server
2.5.6 Step six: Set up RACF
In the TSO environment of the target system, make sure that RACF is set up correctly, as shown in Example 2-8. It shows the RACF security definition, which is used to secure WebSphere Portal Server. The user IDs created must match the user IDs specified in wps.setup.in. Review the RACF settings with your RACF administrator to ensure they meet your system requirements.
Example 2-8: RACF definitions for Portal J2EE server
/* define group cbwsport*/ /* WPS_GROUP CBWSPORT */ ADDGROUP CBWSPORT OMVS(GID(4020)) /* give access to logstream */ PERMIT #LOGSTREAM# CLASS(LOGSTRM) ID(CBWSPORT) ACCESS(UPDATE) /* create and add wsportsu to cbwsport, configure UID to your system */ /* WPS_SRVREGIONID WSPORTSU */ ADDUSER WSPORTSU DFLTGRP(CBWSPORT) OMVS(UID(4021) HOME(/tmp) + PROGRAM(/bin/sh)) NAME('WPS SR') PW USER(WSPORTSU) NOINTERVAL /* create and add wsportcu to cbctl1, configure UID to your system */ /* WPS_CTLREGIONID WSPORTCU */ ADDUSER WSPORTCU DFLTGRP(CBCTL1) OMVS(UID(4022) HOME(/tmp) + PROGRAM(/bin/sh)) NAME('WPS CR') /* WPS_PROCNAME WSPORT */ RDEF CBIND CB.BIND.WSPORT UACC(READ) PERMIT CB.BIND.WSPORT CLASS(CBIND) ID(CBCTL1) ACCESS(CONTROL) RDEF CBIND CB.WSPORT UACC(READ) RDEF SERVER CB.*.WSPORT UACC(NONE) PERMIT CB.*.WSPORT CLASS(SERVER) ID(WSPORTSU) ACC(READ) RDEF STARTED WSPORT.* STDATA(USER(WSPORTCU) GROUP(CBCTL1) + TRACE(NO)) /* Server region procedure WSPORTS */ RDEF STARTED WSPORTS.* STDATA(USER(WSPORTSU) GROUP(CBWSPORT) + TRACE(NO)) CONNECT WSPORTSU GROUP(CBCFG1) CONNECT WSPORTCU GROUP(CBCFG1) /* Add CBSYMSR1 and CBADMIN to group CBWSPORT */ CONNECT CBSYMSR1 GROUP(CBWSPORT) AUTH(USE) CONNECT CBADMIN GROUP(CBWSPORT) AUTH(USE) PERMIT CBS390 CLASS(PTKTDATA) ID(CBWSPORT) ACC(READ) SETROPTS RACLIST(PTKTDATA) REFRESH SETROPTS RACLIST(CBIND) GENERIC(CBIND) REFRESH SETROPTS RACLIST(SERVER) GENERIC(SERVER) REFRESH SETROPTS RACLIST(STARTED) GENERIC(STARTED) REFRESH | Important: | In our case, this was a new Portal installation, so we have changed RALT to RDEF as highlighted in Example 2-8. In the README you will see:
* WPS_PROCNAME WSPORT */ RALT STARTED WSPORT.* STDATA(USER(WSPORTCU) GROUP(CBCTL1) TRACE(NO)) /* Server region procedure WSPORTS */ RALT STARTED WSPORTS.* STDATA(USER(WSPORTSU) GROUP(CBWSPORT) TRACE(NO)) |
2.5.7 Step seven: Configure LDAP server
LDAP can be configured with either RDBM or TDBM backend database systems. For better performance, we recommend that you use a TDBM backend and the TDBM setup is described here. We also recommend that you configure an LDAP server that is separate from the LDAP server used for WebSphere Application Server.
Configuring the LDAP server
To configure the LDAP server, perform the following steps:
-
Start the Customization Dialog of WebSphere Application Server for z/OS by going to TSO and issuing command ex 'bbo.sbboclib(bbowstrt)'.
-
From the Dialog screen choose New customization.
-
Load the customization variables of WebSphere Application Server.
-
Allocate target data sets and name them differently to the target data sets of WebSphere Application Server. The following dataset names are generated as a sample by the configuration dialog of WebSphere Application Server, and will be different on your system:
-
TEST.PORTAL.WPS4.CNTLTEST.PORTAL.WPS4.DATA
Here, instead of TEST as a HLQ we recommend that you use, for instance, the user name with which you are performing the Portal for z/OS installation.
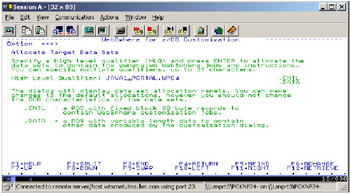
Figure 2-6: WebSphere Application Server installation screens - Allocate new datasets -
-
To define variables, choose LDAP Customization. The database name, IP port, and procedure name must be different to the LDAP configuration of WebSphere Application Server. We also recommended that you use different names for the following variables, for example, we used the following:
-
Procedure name.: BBOLDAT
-
IP Port................: 2389
-
DB2 STOGROUP value.....: BBOLDSTT
-
DB2 database name......: BBOLDAT
-
Authid for DB2 tables.: BBOLDAT
-
Database Type: TDBM
To do this, choose Option 5 'LDAP Customization' in Define Variables as shown in Figure 2-7.
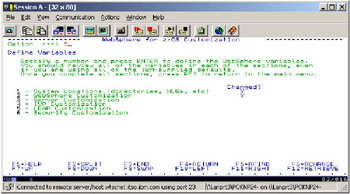
Figure 2-7: WebSphere Application Server installation screens - Define variables for new LDAP server -
You will then have two different screens in which you have to customize the settings of your LDAP Server for Portal z/OS. You can use our choices displayed on Figure 2-8 on page 43 and Figure 2-9 on page 44.
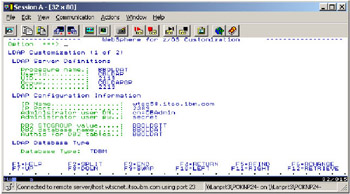
Figure 2-8: WebSphere Application Server installation screen 1- Define variables for new LDAP server
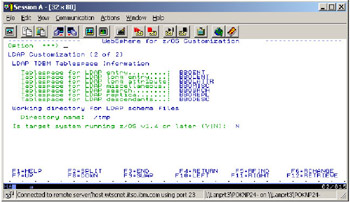
Figure 2-9: WebSphere Application Server installation screen 2- Define variables for new LDAP server
| Note | We are defining and preparing to install a new instance of LDAP server, not using the same LDAP that was defined for use by WebSphere Application Server. This is due to the possibility that the LDAP used by WebSphere Application Server may or may not have been defined as TDBM database type. For the redbook project environment we preferred to have separate LDAPs: BBOLDAP for WebSphere Application Server and BBOLDAT for Portal. IBM recommends that you create a separate LDAP instance for Portal server use. |
Screen two of defining LDAP variables for TDBM is shown in Figure 2-9 on page 44.
-
Generate the customization jobs as shown in Figure 2-10 on page 45.
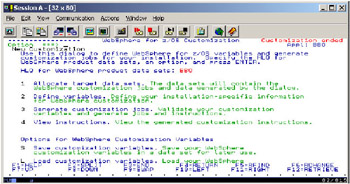
Figure 2-10: Generate jobs and save customization variables for LDAP server for Portal z/OS -
Save the customization variables in a dataset other than where the variables of WebSphere Application Server are kept. For example:
<YOURHLQ>.PORTAL.WPS4.SAVECFG
-
Exit the Customization dialog.
-
Rename member BBOLDAP to BBOLDAT in the <YOURHLQ>.PORTAL.WPS4.CNTL dataset, and change it as shown in Example 2-9. The change is marked in bold type.
Example 2-9: BBOLDAT job customization

//BBOLDAT PROC REGSIZE=0M, // PARMS='', // OUTCLASS='O', // CBCONFIG='/local/WebSphere390/CB390' // SET LPATH='etc/ldap' // SET RELPATH='controlinfo/envfile' // SET LCONF='bboslapd.conf.portal' // SET LH='/usr/lpp/ldap' //BBOLDAT EXEC PGM=GLDSLAPD,REGION=®SIZE,TIME=1440, // PARM=('/&PARMS >DD:SLAPDOUT 2>&1') //STEPLIB DD DISP=SHR,DSN=SYS1.DSN.V710.SDSNLOAD //CONFIG DD PATH='&CBCONFIG/&SYSPLEX/&LPATH/&SYSNAME..&LCONF' //DSNAOINI DD PATH='&CBCONFIG/&SYSPLEX/&LPATH/&SYSNAME..dsnaoini' //ENVVAR DD PATH='&LH/etc/slapd.envvars' //SLAPDOUT DD SYSOUT=&OUTCLASS,FREE=CLOSE,SPIN=UNALLOC //SYSOUT DD SYSOUT=&OUTCLASS,FREE=CLOSE,SPIN=UNALLOC //SYSUDUMP DD SYSOUT=&OUTCLASS,FREE=CLOSE,SPIN=UNALLOC //CEEDUMP DD SYSOUT=&OUTCLASS,FREE=CLOSE,SPIN=UNALLOC -
Store the contents of Example 2-10 as member BBOPOLDF in the <YOURHLQ>.PORTAL.WPS4.DATA dataset using an FTP or ISPF editor. For your convenience the contents of Example 2-10 is provided in the directory <WPS_PATH>/zoinst/jcl.
Example 2-10: Member BBOPOLDF
dn: dc=<YOURDOMAIN>,dc=<YOURDOMAINSUFFIX> o: WPS_ROOT objectclass: top objectclass: domain dc: <YOURDOMAIN>,dc=<YOURDOMAINSUFFIX> dc: <YOURDOMAIN> description: WPS USER REGISTRY userPassword: wpsbind ownersource: dc=<YOURDOMAIN>,dc=<YOURDOMAINSUFFIX> entryowner: access-id:uid=wpsbind,cn=users,dc=<YOURDOMAIN>,dc=<YOURDOMAINSUFFIX> aclpropagate: TRUE ownerpropagate: TRUE aclsource: dc=<YOURDOMAIN>,dc=<YOURDOMAINSUFFIX> aclentry: access-id:uid=wpsbind,cn=users,dc=<YOURDOMAIN>,dc=<YOURDOMAINSUFFIX>:normal:rws c:object:ad aclentry: group:CN=ANYBODY:normal:rsc dn: cn=users,dc=<YOURDOMAIN>,dc=<YOURDOMAINSUFFIX> objectclass: container objectclass: top cn: users dn: cn=groups,dc=<YOURDOMAIN>,dc=<YOURDOMAINSUFFIX> objectclass: top objectclass: container cn: groups dn: uid=wpsadmin,cn=users,dc=<YOURDOMAIN>,dc=<YOURDOMAINSUFFIX> objectclass: organizationalPerson objectclass: person objectclass: top objectclass: inetOrgPerson uid: wpsadmin userpassword: wpsadmin sn: admin givenName: wps cn: wps admin dn: uid=wpsbind,cn=users,dc=<YOURDOMAIN>,dc=<YOURDOMAINSUFFIX> objectclass: top objectclass: person objectclass: organizationalPerson objectclass: inetOrgPerson uid: wpsbind userpassword: wpsbind sn: bind givenName: wps cn: wps bind dn: cn=wpsadmins,cn=groups,dc=<YOURDOMAIN>,dc=<YOURDOMAINSUFFIX> dn: cn=wpsbind,cn=groups,dc=<YOURDOMAIN>,dc=<YOURDOMAINSUFFIX> objectclass: groupOfUniqueNames objectclass: top uniquemember: uid=wpsadmin,cn=users,dc=<YOURDOMAIN>,dc=<YOURDOMAINSUFFIX> cn: wpsadmins
BBOPOLDF member in the TEST.PORTAL.WPS4.DATA dataset: If you have provided a LDAP suffix variable other than the dc=test default value, you will need to edit the BBOPOLDF to locate all occurrences of 'dc=test' and replace them with the variable value of your choice.
In this example you will have to customize two variables: <YOURDOMAIN> and <YOURDOMAINSUFFIX>. In our case we choose dc=ibm,dc=com instead of the default which was dc=test,dc=com.
Customizing the LDAP server startup initialization file
-
Change the member BBOWTMCP in the <YOURHLQ>.PORTAL.WPS4.DATA dataset as shown in Example 2-11. The changes are marked in bold type.
Example 2-11: BBOWTMCP member - parameters for Portal LDAP Server startup
BBOWBOWN '<YOURHLQ>.PORTAL.WPS4.DATA(BBOWSLPT) /local/WebSphere390/CB390/WPSPLEX/etc/ldap/WPS4.bboslapd.conf.portal 2104 2300' BBOWBOWN '<YOURHLQ>.PORTAL.WPS4.DATA(BBOWILDF) /tmp/schema.IBM.ldif 2104 2300' BBOWBOWN '<YOURHLQ>.PORTAL.WPS4.DATA(BBOWULDF) /tmp/schema.user.ldif 2104 2300' BBOWBOWN '<YOURHLQ>.PORTAL.WPS4.DATA(BBOLTDBM) /tmp/bboltdbm.sh 2104 2300' BBOWBOWN '<YOURHLQ>.PORTAL.WPS4.DATA(BBOPOLDF) /tmp/portal.ldif 2104 2300'
Important: You must change the LDAP configuration file name, otherwise the current file, the one used by WebSphere Application Sever for z/OS, will be overwritten! For the last line that you add, use the same UID, GID, and the same working directory; see the WebSphere Application Server Customization dialog for these (in the example shown, this is /tmp).
-
Change the member BBOLTDBM in the <YOURHLQ>.PORTAL.WPS4.DATA dataset as shown in Example 2-12. The changes are marked in bold type.
Example 2-12: TDBM backend customization file - ldapmodify statements
LDAPUSERID=$1 LDAPPWD=$2 ldapmodify -h 127.0.0.1 -p 2389 -D $LDAPUSERID -w $LDAPPWD -f /tmp/schema.user.ldif ldapmodify -h 127.0.0.1 -p 2389 -D $LDAPUSERID -w $LDAPPWD -f /tmp/schema.IBM.ldif ldapmodify -a -h 127.0.0.1 -p 2389 -D $LDAPUSERID -w $LDAPPWD -f /tmp/portal.ldif
Important: Note that there are only five lines in Example 2-12 dataset member BBOLTDBM, such that each of the lines beginning with ldapmodify must be contained wholly within a single line.
-
Customize your LDAP server procedure. Change and add the following lines in member BBOWSLPT in the <YOURHLQ>.PORTAL.WPS4.DATA dataset:
-
Change the value of securePort to 2636
-
Remove all suffixes and add at the bottom the suffix: "dc=<YOURDOMAIN>,dc=<YOURDOMAINSUFFIX>"
-
-
Run the RACF job as shown in Example 2-13.
Example 2-13: Setup RACF security for Portal z/OS LDAP server started procedure
//RDEF EXEC PGM=IKJEFT01,DYNAMNBR=75 //* //SYSTSPRT DD SYSOUT=* //SYSTSIN DD * RDEFINE STARTED BBOLDAT.* STDATA(USER(CBLDAP) GROUP(CBLDAPGP)) SETROPTS RACLIST(STARTED) GENERIC(STARTED) REFRESH SETROPTS RACLIST(FACILITY) GENERIC(FACILITY) REFRESH /*
-
Copy member <YOURHLQ>.PORTAL.WPS4.CNTL(BBOLDAT) to USER.PROCLIB or the proclib dataset where you usually copy WebSphere Application Server jobs or LDAP jobs.
Note For the redbook project environment we copied members to SYS1.PROCLIB instead of USER.PROCLIB.
-
Run the jobs that reside in <YOURHLQ>.PORTAL.WPS4.CNTL, by executing the steps above; the following jobs are generated:
-
BBOTDBMC: Creates LDAP database and table space for TDBM backend.
-
BBOLDGRT: Grants access to the LDAP databases.
-
BBOWMCPT: Copies the bboslapd.conf.portal file into WS_CONFIG_PATH/SYSPLEXNAME/etc/ladp)
-
BBOMTDBM: Primes the LDAP database.
-
Job BBOTDBMC
First you must give your current userid DB2 SYSADM authority.
Upon completion of the job, you should see the following messages in the job log:
-
COMMIT
-
DSNT400I SQLCODE = 000, SUCCESSFUL EXECUTION
Job BBOLDGRT
First you must give your current userid DB2 SYSADM authority.
You may get return code 4 and the message:
-
THE GRANTEE ALREADY HAS THE PRIVILEGE FROM THE GRANTOR
This is OK. Otherwise, you should see messages like the following in the job log:
-
GRANT DBADM ON DATABASE BBOLDAT TO CBLDAP
-
DSNT400I SQLCODE = 000, SUCCESSFUL EXECUTION
Job BBOWMCPT
You must run with user ID root: UID=0
Upon completion, you should see the following message for each of the four files copied in the job log:
-
EXEC has completed with Return Code 0
You can now start your LDAP server for Portal for z/OS by issuing the following TSO command: /S BBOLDAT, or equivalent for the name you chose for your environment.
Look in the SYSPRINT AND SYSLOG for message:
-
GLD0122I Slapd is ready for requests.
You should also look for the information about what LDAP tree the TDBM backend is handling. As shown in Figure 2-11 on page 50, the TDBM backend is handling dc=ibm,dc=com. In your case, you should find something like dc=<YOURDOMAIN>,dc=<YOURDOMAINSUFFIX>.
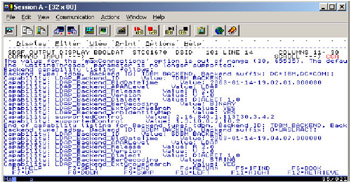
Figure 2-11: Check the TDBM backend suffix handled
Job BBOMTDMB
This job will initialize the LDAP database with the information you gave when customizing member BBOPOLDF.
Submit this job using user CBADMIN in your job card or any WebSphere Application Server administrator if you are not using CBADMIN for that purpose.
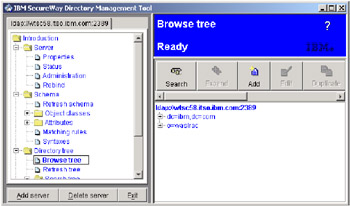
| Tip | If you have an LDAP browser client, for example the IBM LDAP Data Management Tool called DMT, then this is a good time to login and browse the LDAP tree and check that you have added suffix dc=ibm,dc=com as shown in Figure 2-12 on page 51. The IBM LDAP Data Management Tool (DMT) is shipped as part of the WebSphere Portal server distributed package on CD as part of IBM Secureway Directory Server. If you have other non-IBM LDAP browser clients, then they can be used instead. |
2.5.8 Step eight: Configure DB2 for portal
In the TSO environment of the target system, use the JCL procedure createdb to create the database, inittabl to create the database tables, and initdb to fill the database. The JCL procedures are located at <WPS_PATH>/zosinst/jcl.
The JCL procedures must be submitted with a user ID that has sufficient DB2 access rights for setting a current SQLID, usually DB2 SYSADM. Furthermore, the user ID must have an OMVS segment to allow for writing the WebSphere Portal installation log to HFS.
To create and install the DB2 tables follow these steps:
-
Retrieve the jobs from HFS to dataset members by executing the commands shown in Example 2-14.
Example 2-14: Retrieve portal database creation jobs
oget '<WPS_PATH>/zosinst/jcl/createdb.jcl' '<yourhlq>.jobs.cntl(createdb)' TEXT oget '<WPS_PATH>/zosinst/jcl/dropdb.jcl' '<yourhlq>.jobs.cntl(dropdb)' TEXT oget '<WPS_PATH>/zosinst/jcl/initdb.jcl' '<yourhlq>.jobs.cntl(initdb)' TEXT oget '<WPS_PATH>/zosinst/jcl/inittabl.jcl' '<yourhlq>.jobs.cntl(inittabl)' TEXT oget '<WPS_PATH>/zosinst/jcl/wpsPrMsg.clist' '<yourhlq>.jobs.cntl(wpsprmsg)' TEXT
-
Modify the job cards of the JCL procedures to meet your system requirements.
-
Replace all occurrences of the following strings in the JCL procedures:
The DB2 parameters to be replaced in the JCL are not obvious to people without strong DB2 background. To consult a database administrator (DBA) is the best way to find these parameter values. If a DBA is not reachable, you can look up the job BBOCBGRT of WebSphere Customization JCL to find the correct values of #DB2PREFX#, #DB2SUB#, and #PLAN#.
-
Replace #DB2PRFX# with the high level qualifier of the DB2 data sets on your system. The DSN= parameter on DBRMLIB DD card provides the #DB2PREFX#
-
Replace #DB2SUB# with the name of the DB2 Group Attach name for datasharing environments or the DB2 subsystem name for non-datasharing environments. The DSN SYSTEM statement provides #DB2SUB#
-
Replace #PLAN# with the name of the plan for the DSNTIAD program on your system (for example, DSNTIA71 for DB2 release 7.1). You can check the RUN PROGRAM(DSNTIAD) PLAN statement, that provides #PLAN# or issue the following SQL statements in DB2 SPUFI or QMF™:
SELECT NAME, CREATOR from sysibm.sysplan where NAME LIKE 'DSNTI%'
-
Replace #WPS_SRVREGIONID# with the name of server region user ID of the WebSphere Portal. This user ID must have sufficient DB2 access rights for creating databases, table spaces, and tables.
-
Replace #WPS# with the HFS location for the WebSphere Portal installation; the default is /usr/lpp/PortalServer.
-
Replace #YOURHLQ# with the high level qualifier of the JCL procedure dataset of WebSphere Portal on your system.
Make sure the RUNLIB, where the application plan #PLAN# is defined, is specified in the RUN PROGRAM statement:
RUN PROGRAM(DSNTIAD) PLAN(DSNTIA71) - LIB('DB2V710A.RUNLIB.LOAD')You can find the correct RUNLIB from JCL, BBOCBGRT, also. If a proper RUNLIB is not included, you may get a DSNTIAD plan not found in SYS1.LOAD error message when executing these three jobs.
In our example #WPS# matched /usr/lpp/PortalServer. In your installation it has to match <WAS_ROOT>.
-
-
Copy member INITDB to another member, for example INITDC and edit it. Locate the two references to dc=test,dc=com and modify them according to the choices you made for the DN suffix during LDAP configuration. The two references to dc=test,dc=com are two inserts in the Portal for z/OS database that prime the admin user and group information to be used by Portal as shown in Example 2-15.
Example 2-15: Copy and modify the INITDB job
(...) INSERT INTO USER_DESC (OID, NAME, TYPE, CREATED, MODIFIED) VALUES (10, 'uid=wpsadmin,cn=users,dc=<YOURDOMAIN>,dc=<YOURDOMAINSUFFIX>', 1, 1022882400000, 1022882400000); INSERT INTO USER_DESC (OID, NAME, TYPE, CREATED, MODIFIED) VALUES ( 11, 'cn=wpsadmins,dc=<YOURDOMAIN>,dc=<YOURDOMAINSUFFIX>', 2, 1022882400000, 1022882400000); (...)
-
Submit '<yourhlq>.jobs.cntl(createdb)'
Note We ran into a JCL error with missing UNIT=xxx parameter, you may need to provide a UNIT=value to successfully run the job
-
Verify you receive the message ######### Installation job CREATEDC finished successfully in the job log or in the installation log located at <WPS_PATH>/Install.log of WebSphere Portal. If a problem occurs, check the job log or installation log for errors, fix the problem, and restart the job.
Note You can ignore the following error message in DROP DATABASE WPS41 statements:
WCPDLL RC=8 from drop data base WCPDB DSNT408I SQLCODE = -204, ERROR: WPS41 IS AN UNDEFINED NAME
-
Submit '<yourhlq>.jobs.cntl(inittabl)'
-
Verify you receive the message ######### Installation job INITTABL finished successfully in the job log or in the installation log <WPS_PATH>/Install.log of WebSphere Portal. If a problem occurs, check the job log or installation log for errors, fix the problem, and resubmit the job.
-
Submit '<yourhlq>.jobs.cntl(initdb)'
Note If you are not using the default LDAP suffix of dc=test,dc=com, make sure you edit the initdb.jcl. Locate all instances of 'dc=test,dc=com' and provide the LDAP suffix of your choice, before running the initdb job.
-
Verify you receive the message ####### Installation job INITDB finished successfully in the job log or in the installation log <WPS_PATH>/Install.log of WebSphere Portal.
Note You can ignore the following warning message in DELETE FROM... statements:
DSNT404I SQLCODE = 100, NOT FOUND: ROW NOT FOUND FOR FETCH, UPDATE, OR DELETE,....
-
Create JCL procedures for the control and server regions:
To do this, follow the instructions in the "Steps for creating JCL procedures for the control and server regions" in Chapter 8 of WebSphere Application Server for z/OS and OS/390 Version 4.01: Assembling Java(TM) 2 Platform Enterprise Edition (J2EE) Applications, SA22-7836.
Samples created using those guidelines are provided in directory <WPS_PATH>/zosinst/jcl. You can also copy JCL procedures you already created for the J2EE IVP of WebSphere Application Server or any JCL procedure that successfully starts a J2EE application server, and tailor it for that new server as shown in Figure 2-13 on page 55.
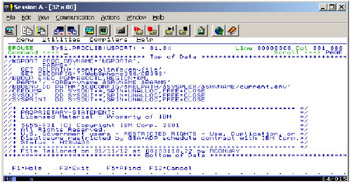
Figure 2-13: WSPORT JCL for Portal z/OS control region started task
2.5.9 Step nine: Install Portal on WebSphere Application Server
On the z/OS and OS/390 operating systems, WebSphere Portal is installed as a J2EE server running on WebSphere Application Server. Three JCL procedures are used to configure the portal on WebSphere Application Server for z/OS and OS/390. The first and last JCL procedures are executed with root authority. The second JCL procedure contains the parameters USER= and PASSWORD= in the job card, and therefore runs under administrative authority for WebSphere Application Server, for example, userID CBADMIN.
To install WebSphere Portal, perform the following:
-
Log on to a TSO session with root authority, UID=0. Execute the commands shown in Example 2-16:
Example 2-16: Retrieve basic Portal for z/OS installation JCL
oget '<WPS_PATH>/zosinst/jcl/wpsPre.jcl' '<yourhlq>.jobs.cntl(wpspre)' TEXT oget '<WPS_PATH>/zosinst/jcl/wpsAdmin.jcl' '<yourhlq>.jobs.cntl(wpsadmin)' TEXT oget '<WPS_PATH>/zosinst/jcl/wpsPost.jcl' '<yourhlq>.jobs.cntl(wpspost)' TEXT oget '<WPS_PATH>/zosinst/jcl/WPAConf.jcl' '<yourhlq>.jobs.cntl(wpaconf)' TEXT oget '<WPS_PATH>/zosinst/jcl/WPAIns.jcl' '<yourhlq>.jobs.cntl(wpains)' TEXT
-
Modify the job cards to meet your system requirements. Set the variable BBOLIB with the HLQ dataset qualifier for the WebSphere Application Server installation. The default value is BBO, however, this might be different on your system.
-
Replace all occurrences of the following strings:
-
Replace #WPS# with the HFS location for the WebSphere Portal installation; the default is /usr/lpp/PortalServer.
-
Replace #INPUTFILE# with the HFS location of the WebSphere Portal input file. Do one of the following:
If you copied WPS_PATH/zosinst/scripts/wps.setup.in in an earlier step and have edited the copy, you need to specify the complete path of your copy here.
If you have directly edited WPS_PATH/zosinst/scripts/wps.setup.in, remove the #INPUTFILE# variable.
-
Replace #WASADMIN# with the user ID of a WebSphere Application Server administrator, for example, CBADMIN. Do this only for the wpsAdmin.jcl and WPAConf.jcl jobs.
-
Replace #WASADMPW# with the password of the user ID added for #WASADMIN#.
-
#JOBCOUNT#: Remove this string to make sure that all available jobs are processed. Do this only for WPAConf.jcl.
-
-
Submit: <yourhlq>.jobs.cntl(wpspre)
-
Submit: <yourhlq>.jobs.cntl(wpsadmin)
-
Submit: <yourhlq>.jobs.cntl(wpspost)
| Tip | The 'wpsadmin' job may take up to 15 minutes to run. Therefore, ensure the TIME=value parameter on the JOB card is set accordingly, otherwise the job will time-out with ABEND522. |
Update Portal to use the defined LDAP suffix
You now need to update files: um.properties, VaultService.properties and authtable_wcp.xml of Portal Server, to configure the LDAP suffix you defined in "Step seven: Configure LDAP server" on page 40.
The files listed above are located in <WPS_PATH>/libapp/config directory and are stored in ASCII, so you may need to FTP them to a workstation and edit them there. Modify the files to make the DN suffix match the DN suffix of your choice, as shown in our example (Example 2-17 on page 57).
Example 2-17: Update um.properties file
(...) # default templates for user/group lookup if no DN is given # WES: #user.template=uid={0},cn=users,ou=IBM,dc=ibm,dc=com user.template=uid={0},cn=users,dc=ibm,dc=com user.template.attribute=uid group.template=cn={0},cn=groups,dc=ibm,dc=com group.template.attribute=cn # lookup parameters for looking up groups for users group.lookup.context=cn=groups,dc=ibm,dc=com group.lookup.filter=(&(objectclass=groupOfUniqueNames)(uniqueMember={0})) group.lookup.attributes=dn,cn group.member.attribute=uniqueMember user.lookup.context=cn=users,dc=ibm,dc=com # To support multiple LDAP implementations all keys starting with "java.naming." # are automatically inserted into the LDAP context. java.naming.factory.initial=com.sun.jndi.ldap.LdapCtxFactory #java.naming.factory.initial=com.ibm.jndi.LDAPCtxFactory #java.naming.factory.url.pkgs=com.ibm.jndi java.naming.provider.url=ldap://wtsc58.itso.ibm.com:2389 java.naming.security.principal=uid=wpsbind,cn=users,dc=ibm,dc=com java.naming.security.credentials=wpsbind (...)
2.5.10 Step ten: Set up multiple location names (optional)
This step is optional and we did not set up multiple location names when writing the redbook.
2.5.11 Step eleven: Start WebSphere Portal
The base installation is complete after the successful configuration of WebSphere Portal on WebSphere Application Server for z/OS or OS/390, performed in steps nine and ten. Next, you need to perform a verification of the installation.
To start WebSphere Portal for verification of the base portal functionality, use the following command from the z/OS or OS/390 system:
S WPS_PROCNAME.WPS_SERVERNAMEA,
For example, we used:
S WSPORT.WSPORTA
During the first startup of Portal Server it will perform the naming registration for the portlets and display console messages about starting and completing the registration. Wait until the naming registration has completed, and view the empty home page from a browser at:
http://WPS_HOST:WPS_PORT/wps/WPS_PUBLIC_HOME
For example, we viewed the home page at:
http://wtsc58.itso.ibm.com:8082/wps/portal
You should receive a Web page with a message stating that the portal contains no page groups. This is expected at this stage and you can still login to the Portal Server by clicking on the key icon in the banner of the portal's Web page.
Log in to WebSphere Portal with user wpsadmin password wpsadmin and verify that the login was successful.
| Note | If all previous steps were completed successfully, you should receive the messages from the Portal server console and log file, open for business. If not, use the error code and message from the console and log file to determine the cause of the error. |
2.5.12 Step twelve: Deploy the base portlets
Deploying the base portlets requires two steps that submit a job at each step.
The first step requires that Portal is running, and a job is used to execute an internal deployment tool that deploys the base portlets into the portal configuration, and create description files for the second step.
During the second step of deployment a script called WPAConfig reads the description files created in Step 1, calls the 390fy tool to transform the portlet war files to ear files, and calls SM API to define the portlets as J2EE applications on WebSphere Application Server.
Deploy Step 1
To execute the first step of deploying the base portlets on WebSphere Portal, perform the following steps. First, make sure your Portal server is still up and running from the previous step.
-
Log on to a TSO session with a user ID that has root authority, UID=0.
-
Submit job: <yourhlq>.jobs.cntl(wpains)
On completion verify the success of the job by viewing the portal welcome page again from a browser.
http://WPS_HOST:WPS_PORT/wps/WPS_PUBLIC_HOME
For example, we viewed the page at:
http://wtsc58.itso.ibm.com:8082/wps/portal
-
You should see the frames of four portlets with message Error 404 as shown in Figure 2-14.
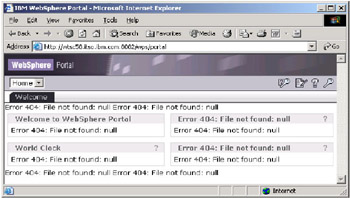
Figure 2-14: Base portlets deployment (Step 1)
Deploy step 2
To execute the second step to deploy the base portlets on WebSphere Portal, perform the following:
-
From the z/OS or OS/390 system, stop WebSphere Portal via the command:
P WPS_PROCNAME.WPS_SERVERNAMEA
For example we used: PWSPORT.WSPORTA
Before submitting the next job, WPACONF, check your jobcard to see if you have a TIME parameter. Either set to a generous value or leave it at the default value of 1440, because this job will take several minutes to run to completion.
-
Submit job: <yourhlq>.jobs.cntl(wpaconf)
-
Check the job log for successful completion. If a problem occurred, do a search on "Verify the deployment" in the Portal InfoCenter and follow the instructions there.
-
Restart WebSphere Portal for verification of portlet deployment by using the following command on the z/OS or OS/390 system:
S WPS_PROCNAME.WPS_SERVERNAMEA
For example, we used: S WSPORT.WSPORTA
This startup performs naming registration for the base portlets and displays console messages about starting and completing the registration.
-
Wait until the naming registration has completed, then again use a browser to view the portal home page at:
http://WPS_HOST:WPS_PORT/wps/WPS_PUBLIC_HOME
For example we used:
http://wtsc58.itso.ibm.com:8082/wps/portal
You should now be able to see the complete portal welcome page as shown in Figure 2-15 on page 61, following successful deployment of the base portlets.
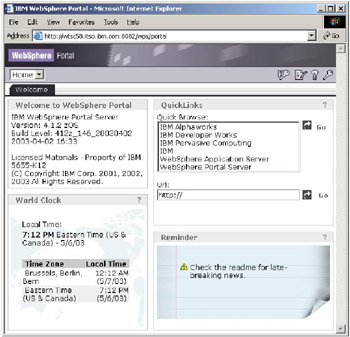
Figure 2-15: Base portlets deployment (Step 2) completed
That completes post-installation of the Portal Server.
Portal migration from PTF2 to PTF3
During the post-processing of this redbook, PTF3 became available for WebSphere Portal. Here we give you a summary of what needs to be done regarding PTF3. The migration from PTF2 to PTF3 has been done in the Sysplex configuration as described in 5.1, "Configuring WebSphere Portal in a Sysplex" on page 148. Therefore, here we talk about "shared HFS" and multiple server instances.
The following description is based on the steps described in the PTF3 Readme "Migrating to WebSphere Portal for z/OS and OS/390 Version 4.1 PTF 3". Where no action was taken for a step, "No action" is stated next to the step.
-
Step one: Read about package content.
-
Step two: Unpack PTF3 files.
The SMP/E deliverable was installed on the shared HFS and the tar command was executed on one of systems in the sysplex:
tar -xvf ejppsrv.4.1.2.412z_150_20030716.tar
-
Step three: Save the log files.
-
Step four: Install PTF 3 files.
The JCL procedure ejppiPTF.jcl was copied to the z/OS data set, modified, and the job submitted.
-
Step five: Migrate the DB2 database (only if migrating from PTF1).
Our test migration is from PTF2.
-
Step six: Migrate WebSphere Portal on WebSphere Application Server.
The JCL procedures ejppmre.jcl, ejppredp.jcl, ejppupdp.jcl, WPAConf.jcl, and wpsPre.jcl were copied to the appropriate z/OS data set and the job files modified.
All portal instances were stopped (using the command stop WPS_PROCNAME.$WPS_SERVERNAMEA, and so on).
The jobs wpspre, ejppredp, and ejppmre were submitted.
Note If manual modifications have been made in the property files (such as, the port number in ConfigService.properties), these modifications have to be done again in the new files. Note that to check if modifications have been done, compare the saved files in …/PTF/PortalServer/ejppsrv.undo.<driver number>.tar with the new property files after migration.
The portal instance was restarted:
S WPS_PROCNAME.$WPS_SERVERNAMEA,srvname='$WPS_SERVERNAMEA'
-
Step seven: Migrate portlets on WebSphere Portal.
The job ejppupdp was submitted to migrate the portlets.
The running portal instance was stopped:
stop WPS_PROCNAME.$WPS_SERVERNAMEA
The job wpaconf was submitted.
All portal instances were restarted:
s WPS_PROCNAME.$WPS_SERVERNAMEA,srvname='$WPS_SERVERNAMEA'
|
| < Day Day Up > |
|