Installing the Microsoft Office System
Before you run the Microsoft Office system setup program, be sure that no other applications are running on your computer.
If you’re installing from the Office Professional 2007 or Office Ultimate 2007 CD-ROM or DVD-ROM, insert the first disc. On most systems, the Microsoft Office system setup program starts automatically. If the setup program does not start automatically, click the Run command on the Windows Start menu. In the Run dialog box, type x:\setup.exe (where x is the drive letter of your CD-ROM drive), and click OK. If you see the User Account Control dialog box and you’re logged on as a nonadministrative user, specify the user name and password for an administrative account, and click Continue. If you’re logged on as an administrator, click Continue.
To install from a network drive, use Windows Explorer to connect to the folder in which your system manager has placed the Microsoft Office system setup files. Run Setup.exe in that folder by double-clicking it. If you’re installing the Microsoft Office system from a Master License Pack, click Run on the Start menu, and include a PIDKEY= parameter and the 25-character volume-license key in the open box, as in:
x:\setup.exe PIDKEY=1234567890123456789012345
Note that the setup program might take several minutes after it displays its opening screen to examine your computer and determine what programs you currently have installed-be patient! If you didn’t supply a license key on the command line, the setup program first asks for a valid product key. If you’re installing from a CD or DVD, you can find the product key in the materials included with the 2007 Office release installation package. Enter a valid key, and click Continue to go to the next page. The setup program asks you to confirm that you accept the license agreement. Select the “I Accept The Terms Of This Agreement check box, and then click Continue. The setup program asks whether you want to install now or to customize your installation.
Choosing Options When You Have No Previous Version of Microsoft Office
When you install the 2007 Office release on your computer, you can choose between two options-Install Now or Customize, as shown in Figure A-1. If you click Install Now, the setup program installs all the programs and components that Microsoft considers most useful to the majority of users. The fastest way to complete an install is to click Install Now. If you don’t want to tailor the installation to your specific needs by clicking Customize, click Install Now in order to include Access 2007 so that you can work through the examples in this book.
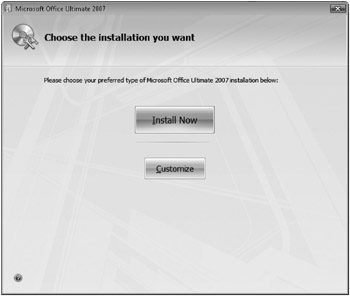
Figure A-1: Click Install Now to install the default Office Ultimate 2007 programs.
We like to click Customize to pick the options we need. The Customize install option allows you to choose only some of the applications or include additional features that Microsoft considers optional. When you click Customize, the setup program displays a window with three tabs-Installation Options, File Location, and User Information, as shown in Figure A-2.
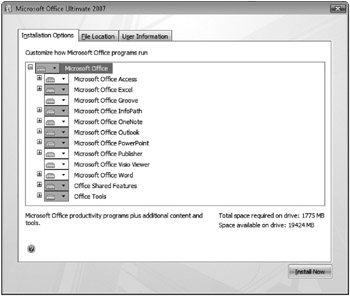
Figure A-2: The Installation Options tab allows you to choose which programs and options to install
The setup program shows you the available options for the Microsoft Office system and each program in a hierarchical view. By default, the setup program selects all programs, but it selects only some of the features for several of the programs. Click the plus sign next to any category to expand it and see the options in subcategories. When you see a category that interests you, click the arrow next to the disk drive icon to choose options for all items in that category and its subcategories. To work through all the examples in this book, you should select the Run All From My Computer option for Microsoft Office Access, as shown in Figure A-3. Choosing this option selects the Run From My Computer option for all subcategories. When you select Installed On First Use, the installation program creates a shortcut for the program on your Start menu, but you’ll be prompted to install the application when you select the shortcut the first time. Choosing Not Available causes the installation program to neither install the program nor provide a shortcut.
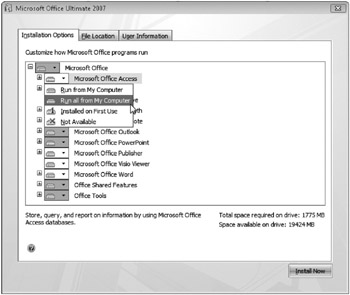
Figure A-3: Choose Run All From My Computer to install Access 2007 components.
We personally like to begin by selecting the Run All From My Computer option for the top-level item, Microsoft Office. We then go through each of the major categories and selectively choose Installed On First Use or Not Available for options that we do not want. For example, you might want to go to the Office Shared Features category and remove some of the extra fonts under International Support. Under Office Tools, you might want to remove the Microsoft Script Editor (HTML Source Editing) options if you plan to also install Microsoft Expression Web. If you’re unsure about any option, you can click the title of the option to see a brief description in the lower part of the window.
On the File Location tab, you see a box with a default location chosen, as shown in Figure A-4. You can enter a different program file location or click the Browse button to select a location on your hard drive. We recommend that you keep the default location. You’ll see summary information on how much space is required and available on your hard drive in the middle of the window.
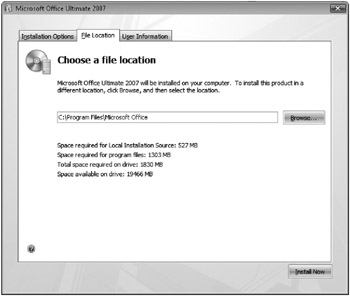
Figure A-4: Select an installation folder on the File Location tab.
On the User Information tab, you can enter personal information about yourself and your company, as shown in Figure A-5. Type your name in the Full Name text box, your initials in the Initials text box, and your organization or company name in the Organization text box. (Note, if you do not fill in these boxes here, the first Microsoft Office system program you open after installation prompts you for your full name and initials.)
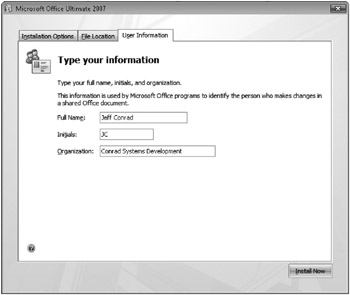
Figure A-5: Enter your personal information on the User Information tab.
After you have finished making your selections, click Install Now to proceed. If you’re not sure, you can click any of the three tabs to verify the options you selected. When the setup program finishes, it shows you a setup completed window, as shown in Figure A-6. In this final window, you can select options to open your Web browser to check for additional updates. You can click the Help icon in the lower-left corner of the window to display information about registering your copy of the 2007 Office release. Click Close to close the setup program window.
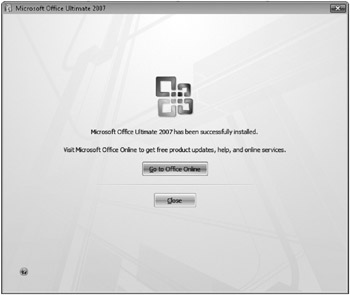
Figure A-6: The setup program displays this message when the installation process completes.
Choosing Options to Upgrade a Previous Version of Microsoft Office
When you have a previous version of any of the Microsoft Office programs installed on your computer, the setup program shows you different options after you accept the license agreement, as shown in Figure A-7. If you click Upgrade, the setup program installs all the programs and components that Microsoft considers most useful to the majority of users and removes any previous versions of Microsoft Office programs. The fastest way to complete an install is to click Upgrade.
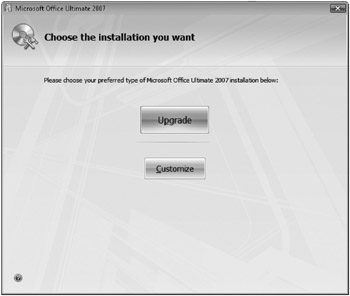
Figure A-7: When you have previous versions of Microsoft Office programs installed, you can choose either Upgrade or Customize.
We like to click Customize to pick the options we need. The Customize install option allows you to choose only some of the applications to install and to not remove previous versions. When you click Customize, the setup program displays a window with four tabs-Upgrade, Installation Options, File Location, and User Information, as shown in Figure A-8.
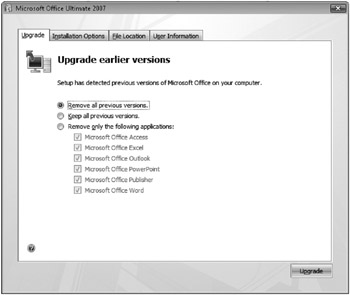
Figure A-8: You can choose to keep or remove existing Microsoft Office programs on the Upgrade tab.
The Installation Options, File Location, and User Information tabs display the same options you learned about in the previous section. The setup program displays the Upgrade tab only when you have previous versions of Microsoft Office programs installed on your computer. If you select Remove All Previous Versions, the setup program removes any existing Microsoft Office programs before installing the 2007 Office release programs. If you select the Keep All Previous Versions option, the setup program does not remove any existing Microsoft Office programs before installing the 2007 Office release programs. Notice that you cannot choose to keep a previous version of Microsoft Office Outlook if you have chosen to install Office Outlook 2007. If you select Remove Only The Following Applications, you can choose which existing Microsoft Office programs to keep.
As professional Microsoft Access developers, we keep several versions of Access installed on our primary development computers so that we can continue to support older applications that we wrote. (We actually have Access 97, 2000, 2002, 2003, and 2007 installed!) You might also want to keep an older version of Excel, Microsoft Office PowerPoint, or Microsoft Office Word. To keep an older version, you must clear the appropriate check box for the application under Remove Only The Following Applications.
As you learned in the previous section, you can change which of the 2007 Office release components are installed on the Installation Options tab, change the installation folder on the File Location tab, and specify your user name information on the User Information tab. After clicking Upgrade, the setup program proceeds and displays the setup completed window in Figure A-6 when it is finished. You can click the Help icon in the lower-left corner of the window to display information about registering your copy of the 2007 Office release. Click Close to close the setup program window.
EAN: 2147483647
Pages: 234