Section 7.1. Setting Up a Slideshow
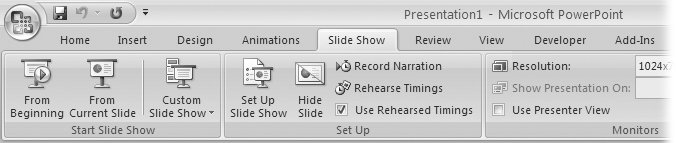
7.1. Setting Up a SlideshowAfter you've put together your slideshowcreated slides, added text and graphics, and so onyou have to give PowerPoint a few instructions on how it should display the slideshow when it's show time. Say you're creating a slideshow that you want to run continuously on a kiosk, with no human intervention. You might want to tell to linger a few seconds longer on certain slides than on others. Or imagine that you have two monitors hooked up to your computer: one set into the wall of a conference room, and one on a laptop placed strategically where only you can see it. You can have PowerPoint display the slideshow on the wall monitor, and the speaker notes on the laptop. Using the Slide Show tab (Figure 7-1), you can set these options and more. The following sections show you how.
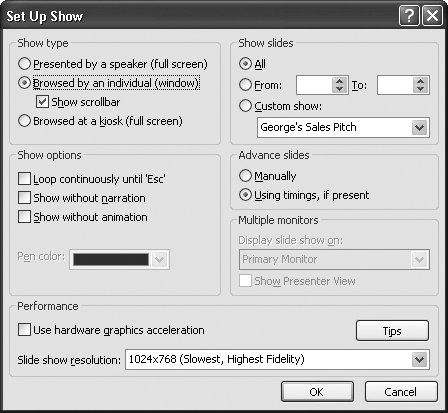
7.1.1. Choosing a Slideshow ModeThe first thing to do when you're setting up your slideshow is to decide which mode you want your slideshow to run in: full-screen, browser, or kiosk. Your choice affects the way folks can interact with your slideshow while it's running, as well as which other options you can set. 7.1.1.1. Full-screen modeFull-screen mode (Figure 7-2) is the way to go if you'll be the one giving your presentation. As the name implies, in full-screen mode slideshows take up the entire screen. Depending on the PowerPoint options you've set, ghosted controls appear in the lower-left corner of a full-screen slideshow. Other ways you can interact with a full-screen slideshow running include keyboard shortcuts and a right-click menu (Section 7.3). The program assumes you want full-screen mode unless you tell it different. But if you (or a coworker) has set your slideshow to another mode and you want to set it back, here's how:
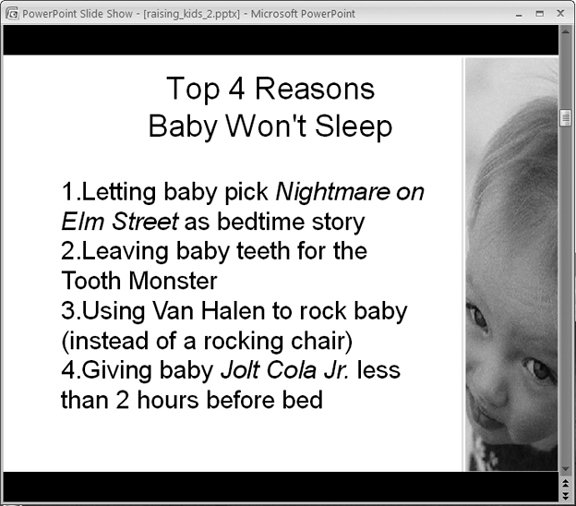
7.1.1.2. Browser modeWhen you set up a slideshow to run in browser mode, your slides don't take over the entire screen; instead, they appear in a self-contained window (see Figure 7-4). A specialized right-click menu appears (Section 7.3), offering choices that folks running your presentation might find handyprinting your slides, for example. Designed to be relatively easy for non-PowerPoint folks to figure out how to run, browser mode is an option for slideshows you're planning to distribute by CD or email.
To set up your slideshow to run in browser mode:
7.1.1.3. Kiosk modeIf you're planning to let your slideshow run unattended, kiosk mode is what you want. In kiosk mode, there are no ghosted controls or right-click menuswhich means there's nothing built-in that your audience can click to start your slideshow, stop it, hop from one slide to the next, or otherwise interact with your slides. After all, since there won't be a presenter, you don't want to include presenter controls and risk someone wandering by and fiddling with them. But what no presenter controls also means is that if you set up your slideshow to run in kiosk mode, you must set automatic timings (Section 7.1.4) so your slideshow plays automatically all the way through before looping around again. To set up your slideshow to run in kiosk mode:
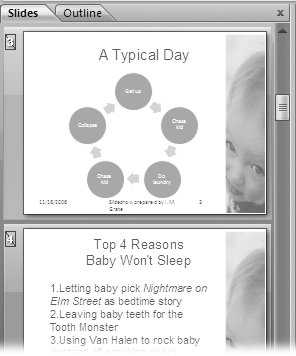
Tip: Pressing Esc stops a slideshow running in kiosk mode, so if you're setting up a kiosk slideshow to run automatically and want to prevent folks from inadvertently stopping it in its tracks the second you turn your back, make sure you hide the keyboard. 7.1.2. Hiding Individual SlidesFirst, make sure your slideshow includes all the slides you want to showand none that you don't. To eliminate a slide from a particular slideshow, you don't have to delete it from the presentationyou can choose to hide it temporarily. That way, you can always take it out of hiding when you want to use it again. Say you're giving a presentation to management. One of your slides is quite hightecha complicated chart and some head-busting equations. Since this level of detail may confuse your audience, you can hide that slide. If someone in your audience happens to ask a pertinent question during the presentation, you can display the slide manually, as described in the table in Section 7.3. The same slide may be appropriate for the engineers you're giving the same presentation to later in the week, so you can bring it out of hiding for that show. Note: Because hiding a slide doesn't delete it, don't rely on hiding to conceal sensitive or proprietary information. There's always a chance that you (or someone else running your slideshow) could unhide it accidentally . Instead, either delete the slide or create a custom slideshow (Section 7.2.1). To hide a slide:
7.1.3. Setting Up a Speaker Notes ScreenPros use teleprompters for a reason: they work. When your brain goes blank and you forget an important point, having an electronic cheat sheet that only you can see can save your presentation (and your reputation as a confident, extemporaneous speaker). PowerPoint offers the next best thing to a teleprompter : It lets you run your slideshow on one monitor, and your speaker notes on another. While your audience is looking at your slides or at you, you can sneak a peek at your notes. And because you're not fumbling with 3 x 5 cards, no one will be the wiser.
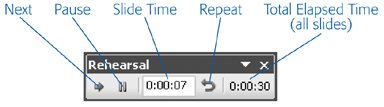
To set up a presenter view, first connect two different monitors to the computer you intend to run your presentation on. (A laptop computer counts as one monitor.) Once the monitors are plugged in, open the presentation you want to set up as a presenter view. Then go to Slide Show Click the down-arrow next to Show Presentation On (which has now become available), and then, from the list that appears, choose the monitor on which you want your slideshow to appear. Your speaker notes appear on the monitor you're using to follow these steps. 7.1.4. Setting Up Automatic TimingYou've got two choices when it comes to clicking through your slides at showtime: you can click through each slide manually, or you can set up an automatic slideshow by telling PowerPoint when to go from one slide to the next. An automatic slideshow is useful if, for example, you're delivering your presentation on a kiosk, or if you have exactly 40 minutes to give your presentation and need PowerPoint to keep you on track. Also, if you've done a presentation many times, you may be able to give your spiel and let PowerPoint change the slides automatically, at just the right moment. The key to setting up an automatic slideshow is to rehearse your presentation. You run through it just as you would in front of a live audience, while PowerPoint's virtual stopwatch keeps track of how many seconds you spend on each slide. Then, if you're satisfied with the pacing, you tell PowerPoint to keep those timings. Tip: Instead of painstakingly rehearsing your presentation, you can assign each slide, say, a minute and a half (or any amount of time you choose). In the Slides pane, select a slide. Then select Animations  Transition to This Slide, turn on the "Automatically after checkbox, and type the amount of time you want the currently selected slide to remain onscreen. (Make sure you turn off On Mouse Click.) Repeat for the remaining slides in your slideshow. Alternatively, for each slide you can type the amount of slide time you want in the Rehearsal dialog box (Figure 7-6). Transition to This Slide, turn on the "Automatically after checkbox, and type the amount of time you want the currently selected slide to remain onscreen. (Make sure you turn off On Mouse Click.) Repeat for the remaining slides in your slideshow. Alternatively, for each slide you can type the amount of slide time you want in the Rehearsal dialog box (Figure 7-6). To rehearse your presentation and set timings:
7.1.5. Looping Continuously Whether you choose to click through each slide yourself or use automatic timings (Section 7.1.4) to tell PowerPoint how fast to move through each slide, you usually want to stop the slideshow after the last slide. But for those times when you do want your slideshow to loop continuously (to begin the slideshow over again the instant it finishes), you can do that by clicking Slide Show Note: If you set up your slideshow to run in kiosk mode (Section 7.1.1.3), you don't have to tell PowerPoint to loop continuouslyit assumes that's what you want. In fact, PowerPoint deactivates the "Loop continuously until 'Esc'" option. |


EAN: 2147483647
Pages: 96