| In the metaphor of the Timeline's being the table of contents for the "book" of your movie, scenes are the equivalent of chapters. Scenes help you organize the contents of a long movie. So far, you've worked with 5-, 10-, and 20-frame movies, but in real life, your movie may run to hundreds of frames . You can get pretty tired of scrolling around the Timeline, trying to keep track of where you are, if the movie has hundreds of frames. But you can break the animation into reasonable chunks and deal with each set of frames separately by creating scenes. In your final published movie, Flash plays through the scenes in order unless you use the interactivity features to provide instructions for moving through the scenes in a different order. (To learn more about interactivity in Flash movies, see Chapters 12 and 13.) Flash's Scene panel makes it easy to see what scenes exist in your movie, create new scenes, delete scenes, and reorganize them. To access the Scene panel: -
If the Scene panel is not open , from the Window menu, choose Scene (Figure 11.1). Figure 11.1. Choose Window > Scene to access the Scene panel. 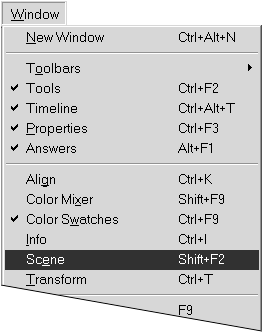 The Scene panel appears. In a new Flash document, the Scene panel lists only the default Scene 1. When you add scenes to a movie, the Scene panel lists all the movie's scenes in order (Figure 11.2). Figure 11.2. The Scene panel lists all the scenes in a movie. It also provides buttons for adding, duplicating, and deleting scenes. 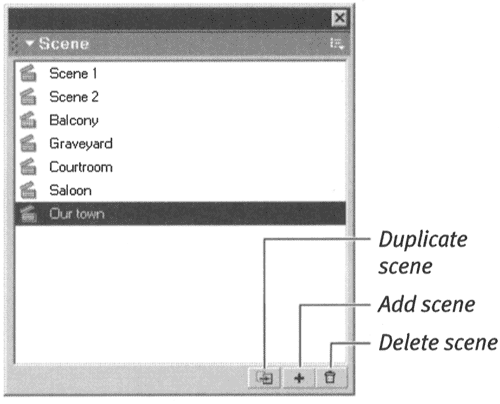 To add a scene: Do one of the following: -
From the Insert menu, choose Scene (Figure 11.3). Figure 11.3. To add a new scene to your Flash document, choose Insert > Scene (top) or, in the Scene panel, click the Add Scene button (bottom). 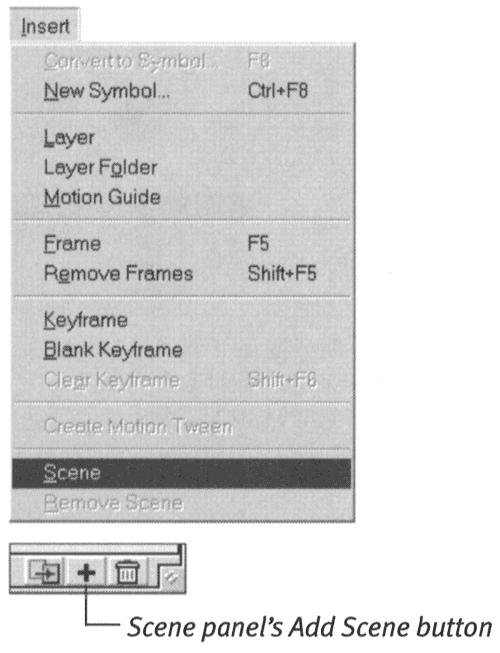 -
In the Scene panel, click the Add Scene button. Flash adds another scene, giving it the default name Scene 2.  Tip Tip -
Flash bases default scene names on the number of scenes you have ever added, not on the number of scenes currently in the movie. If you add Scenes 2 and 3 and then delete Scene 2, Flash names the next scene that you add Scene 4 .
To select a scene to edit: Do one of the following: -
From the Edit Scene pop-up menu in the info bar at the top of the Stage, choose the scene that you want to edit. -
From the scrolling list in the Scene panel, select the scene that you want to edit. Flash displays the selected scene on the Stage, putting its name in the current-scene box in the middle of the info bar and placing a check next to that scene's name in the Edit Scene pop-up menu (Figure 11.4). Figure 11.4. The info bar displays the name of the current scene. Choose a scene from the Edit Scene pop-up menu to switch scenes quickly. 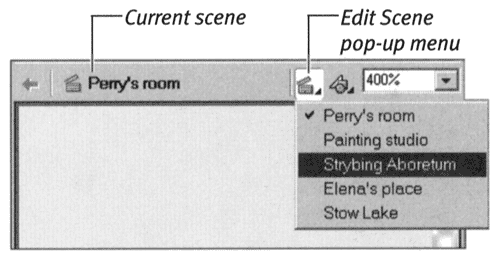 To delete a selected scene: -
Do one of the following: -
From the Insert menu, choose Remove Scene (Figure 11.5). Figure 11.5. To delete a scene, choose Insert > Remove Scene (top) or click the Scene panel's Delete Scene button (bottom). 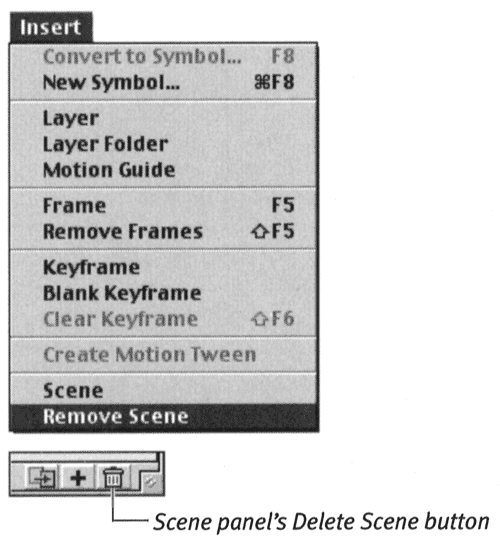 -
In the Scene panel, click the Delete button. A dialog box appears, warning you that you can't undo this operation. -
Click OK. Flash deletes the scene, removing it from the Edit Scene pop-up menu in the Timeline as well as from the scrolling list in the Scene panel.  Tip Tip
The Pitfalls of Using Scenes In Flash, each scene is like a self-contained movie. The fact that each scene is, in a sense, a new beginning can make it difficult to keep the continuity of actions between scenes. For some types of movies ones with interactivity that requires variables or preloadingscenes are inappropriate. In such cases, you may need to stick to a single long movie or use separate movies to organize your animation, stringing them together with interactivity features such as the loadMovie action. (See Chapter 15 to learn about this ActionScript item.) | To change scene order: -
In the Scene panel, drag a selected scene name up or down in the list. Flash moves the clapper icon and scene name and previews the new location for the scene with a highlighted line (Figure 11.6). Figure 11.6. As you drag a selected scene, the clapper icon and scene name come along for the ride. In addition, a highlighted bar previews the new location for the scene. When the bar is between the scenes where you want to place the selected scene, release the mouse button. 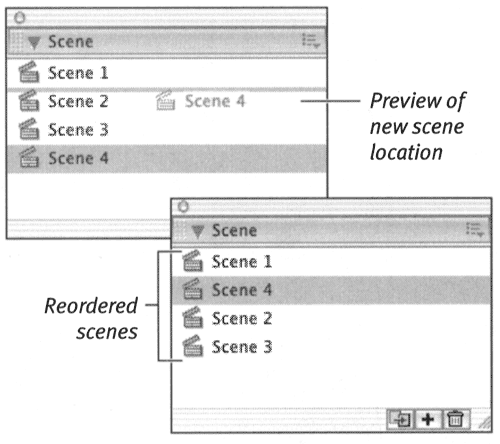 To rename a scene: -
In the Scene panel, double-click the name of the scene that you want to rename. -
Type the new name in the Name field.  |


