Subreport Development
|
To get an idea of how subreports work, open the CustSales-Region.rpt that you created in the last chapter. You'll utilize that report as a main report to which you'll eventually add a subreport. You can also pull up a copy of this report from the companion files (www.wordware.com/files/crystal).
Once you've opened this report, select Insert, Subreport from the menu bar. The Insert Subreport dialog box displays, as shown in Figure 13-2. This is where you define your subreport functionality.
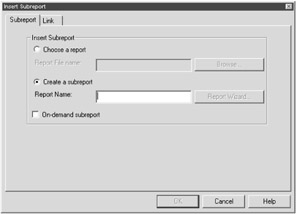
Figure 13-2: The Insert Subreport dialog box
From this dialog box, you have two options: You can choose a previously created report to embed within your primary report (CustSalesRegion.rpt), or you can create a new subreport from scratch.
Inserting an Unlinked Subreport
To get an idea of how subreports can resolve a number of report development challenges, let's consider the following scenario. Say that someone in upper management would like to see the following changes in the Customer Sales by Region report:
-
Remove the geographical map from the report.
-
Move the bar chart to the last page of the report.
-
Add a pie chart that summarizes Xtreme's top five selling products.
At first glance, these may seem easy tasks — until you get to the third request. In this example, upper management wants two reports in one. Sounds like a complicated task, huh? It would be complex (if not impossible) without Crystal Reports' subreport functionality.
Let's walk through this example to get an idea of how subreports allow you to create seemingly impossible reports. Perform the following steps:
-
Within the CustSalesRegion.rpt, select the Design tab.
The Design view displays.
-
Right-click in the gray portion of the Report Header a section.
An options menu displays.
-
From this options menu, select the Delete Section option.
If you have any drill-down tabs within this report, you may receive a message stating that your drill-down tabs will be closed. Press the OK button in this dialog box to continue.
The Report Header a section with the geographical map is deleted. The bar chart now displays in a new Report Header a section.
-
Right-click on the bar chart (located in Report Header a).
An options menu displays.
-
Select the Cut option from the options menu.
The bar chart is cut from the Report Header a section.
-
Right-click in the gray portion of the Report Header a section.
Again, an options menu displays.
-
From this options menu, select the Delete Section option.
Your title text object now displays within the Report Header a section.
-
Move your cursor into the white portion of the Report Footer section and right-click.
An options menu displays.
-
Select the Paste option from the options menu.
You'll see the outline of your subreport connected to your cursor.
-
Move your cursor (with the outline of your chart) to the top of the Report Footer section.
Left-click once to place the chart within the Report Footer section. Then, stretch the bottom border of this section. You'll need the extra room in a moment.
Notice that you've accomplished the first two requests from upper management: You've removed the geographical map from your report, and you've moved the bar chart to the last page of your report. Figure 13-3 displays what your report should look like within the Design view.
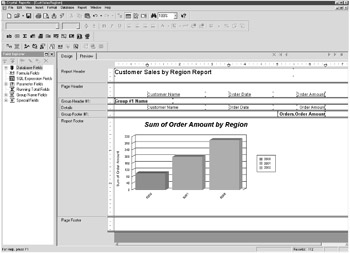
Figure 13-3: Modifying the Customer Sales by Region report
Now all that's left is to add that pie chart that summarizes Xtreme's top-selling products. A subreport is the perfect solution for that challenge. Make sure that you're still in the CustSalesRegion.rpt, and perform the following steps:
-
Select Insert, Subreport from the menu bar.
The Insert Subreport dialog box displays.
-
Select the Create a subreport option button.
If you have created a report previously and would like to use it as a subreport, you can select the Choose a report option and then use the Browse button to select the location of that report within your computer or network.
For this example, there is not a report you've created in this book that displays the top five products. Thus, you'll need to create that subreport now.
-
In the Report Name field, type the following: TopFiveProducts.
Your screen should look like Figure 13-4.
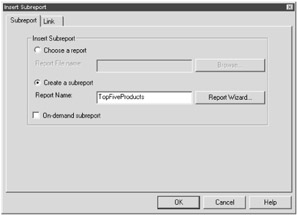
Figure 13-4: Creating a new report as your subreport -
Press the Report Wizard... button.
The Standard Report Creation Wizard dialog box displays (as you learned about in Chapter 4).
Refer to the following table for the information to define within the Standard Report Creation Wizard.
| Screen | What to Define |
|---|---|
| Data Screen | Select the Orders, Order Details, and Product tables. |
| Links Screen |
|
| Fields Screen | Select the Product.Product Name and Orders.Order Amount fields. |
| Groupings Screen | Create a group with the Product.Product Name field. |
| Summaries Screen | Make sure the Order Amount field is summarized (it should already be by default). |
| Group Sorting Screen |
|
| Chart Screen |
|
| Record Selection Screen | Do not define any settings. |
| Template Screen | Do not define any settings. |
Once you've done these steps, press the Finish button in the Standard Report Creation Wizard. You're returned to the Insert Subreport dialog box. Press the OK button in the Subreport dialog box. You'll notice the outline of a subreport object attached to your cursor.
Left-click the subreport outline in the Report Footer section (place this subreport underneath the original bar chart). Once you've done this, you'll see the name of the report display as a report object, as shown in Figure 13-5.
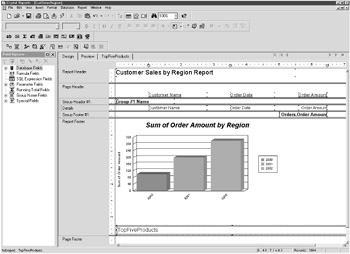
Figure 13-5: The TopFiveProducts.rpt as a subreport of the CustSalesRegion.rpt
When you add a subreport to another report, a new tab displays. This new tab contains the name of the subreport. You can select this tab and edit the subreport just as you would any other regular report.
You can also access a subreport by double-clicking the subreport object. When you perform either of these tasks, you're taken to the subreport's tab. Go ahead and select the TopFiveProducts tab now.
| Tip | The subreport tab always displays details in the Design view. If you wish to view the subreport in the Preview view, select the Preview button while in the subreport tab. |
Once you're in the TopFiveProducts tab, suppress every section except the Report Header a section. Remember, you can suppress by right-clicking in the gray area of each section. Once you right-click, an options menu displays. From this options menu, select the Suppress (No Drill Down) option.
Once you've suppressed these sections, select the Preview tab.
If you go to the last page of your report, you'll see two charts — one created by the primary report and the second created by the TopFiveProducts subreport, as shown in Figure 13-6. Save this report as CustSalesRegion2.rpt.
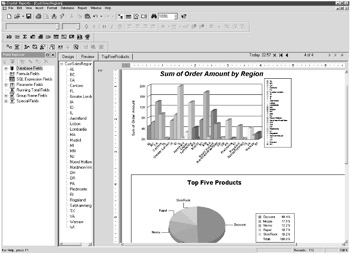
Figure 13-6: A primary report using an unlinked subreport
Inserting a Linked Subreport
You've learned that in unlinked subreports, the primary report does not have any specific data links to its related subreport. As a result, an unlinked subreport is independent from the primary report. Unlinked subreports are useful when you wish to display different views of either the same or different data within a single report. However, sometimes you'll need to match up (link) the data in the primary report and in the subreport in order for your report to make sense. These types of matched up subreports are known as linked subreports.
Creating a linked subreport is nearly identical to creating an unlinked subreport. The only difference is that you'll need to utilize the Link tab in the Insert Subreport dialog box.
-
Open the EmplOrders.rpt you updated in Chapter 11.
You can also access this file from the companion files.
-
Select Insert subreport from the main menu.
The Insert Subreport dialog box displays.
-
Select the Create a subreport option.
In the Report Name field, type: EmplOrdersDetails. Also, check the On-demand subreport check box. Your screen should look like Figure 13-7.
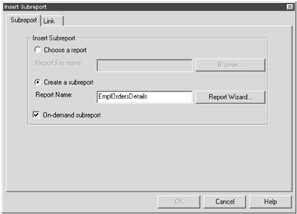
Figure 13-7: Creating a linked subreportTip The On-demand subreport check box allows the subreport to appear as a hyperlink within your report. The actual data is not read from the database until the report user drills down on this hyperlink.
On-demand subreports are a useful way to handle sections that might contain a large number of records.
-
Press the Report Wizard... button.
The Standard Report Creation Wizard dialog box displays (as you learned about in Chapter 4).
Refer to the following table for the information to define within the Standard Report Creation Wizard:
| Screen | What to Define |
|---|---|
| Data Screen | Select the Customer, Employee, Orders, Order_Details, and Product tables. |
| Links Screen |
|
| Fields Screen | Select the following fields:
|
| Groupings Screen | Create a group with the Employee.Last Name field. |
| Summaries Screen | Make sure the Order_Details.Unit Price and Order_Details. Quantity fields are summaried (they should already be by default). |
| Group Sorting Screen |
|
| Chart Screen | Select the No Chart option button. |
| Record Selection Screen | Do not define any settings. |
| Template Screen | Do not define any settings. |
Press the Finish button in the Standard Report Creation Wizard. You're returned to the Insert Subreport dialog box. Select the Link tab. This tab allows you to match the subreport to your primary report.
The Link tab contains an Available Fields list box, which contains the fields from the main report to which your subreport may link. You can select one or more fields for linking. For the purposes of this example, press the Add button (>) to move the Orders.Order Date field from the Available Fields list box to the Field(s) to link to list box.
Your screen should look like Figure 13-8.
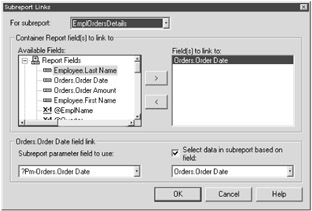
Figure 13-8: Linking a subreport to a primary report
| Note | For each linked field, Crystal Reports automatically creates a parameter field in your subreport. These parameter fields are listed at the bottom of the Link tab screen and contain the prefix "?Pm-". You won't need to worry about these parameter fields; they're just the mechanism for how Crystal Reports links data between subreports and primary reports. |
Once you've defined these two links, press the OK button. You'll notice the outline of a subreport object attached to your cursor. Left-click the subreport outline in the Group Header #1 section. You can set this object at the 2" mark. Your screen should look like Figure 13-9.
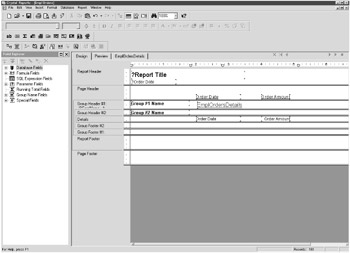
Figure 13-9: Adding a linked on-demand subreport
Try previewing your report. The primary report should display with your on-demand hyperlink, as shown in Figure 13-10. If you select the hyperlink, a drill-down detail report displays. This drill-down report is the EmplOrdersDetails report you just created, as shown in Figure 13-11.
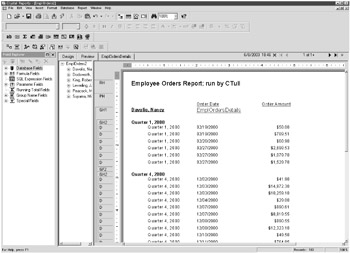
Figure 13-10: The primary report with a link to the on-demand subreport
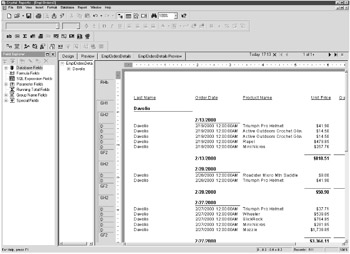
Figure 13-11: The on-demand subreport
|
EAN: 2147483647
Pages: 177