Configuring Virtual Office Parameters

 <  Day Day Up  >  

Test Objective Covered:

3. Configure Virtual Office.

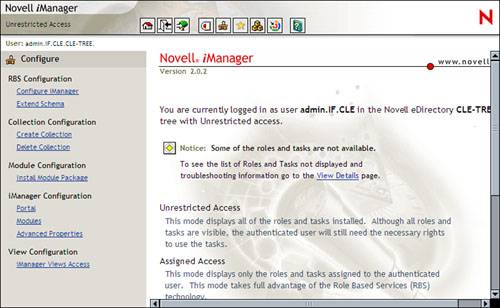
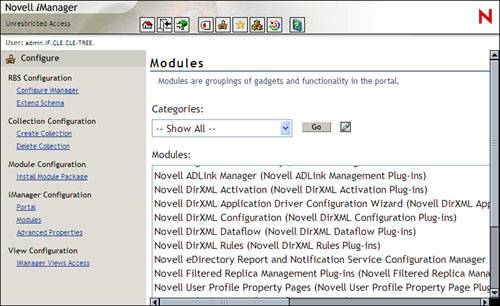
As you will see as we work through this part of the chapter, Virtual Office has many configuration parameters. Some are configured in iManager; others are configured from within the Virtual Office interface itself.

Before doing so, you need to understand how to load the Virtual Office modules into iManager. I have had several occasions where the iManager modules for Virtual Office aren't installed when I installed Virtual Office after the initial NNLS installation.

Tip

If you installed Virtual Office during the initial NNLS installation, you probably won't need to do this. I've never had any problems with the Virtual Office iManager modules in this situation.


For whatever reason, the modules just aren't registered. If you install Virtual Office at some point after the initial NNLS installation, you'll know this has happened to you because the Virtual Office administration tasks in iManager will be displayed, as shown in Figure 11.4, but will generate exception errors when you try to use them.

Figure 11.4. The Virtual Office iManager tasks.

graphics/11fig04.jpg


If you experience this problem, complete the following steps to rectify it:

  1. Open a browser window and navigate to https :// your_server_IP_address /nps/iManager.html.

  2. Authenticate as your admin user .

  3. Select the Configure icon. The screen in Figure 11.5 is displayed.

    Figure 11.5. The iManager Configuration page.

    graphics/11fig05.jpg


  4. Under iManager Configuration , select Modules . The screen in Figure 11.6 is displayed.

    Figure 11.6. The iManager Modules page.

    graphics/11fig06.jpg


  5. Scroll to the far right side of the page and click the Install button.

  6. When prompted, browse to and select the /var/opt/novell/iManager/nps/packages/VirtualOffice.npm module.

  7. Click Install .

  8. Repeat this process and install the /var/opt/novell/iManager/nps/packages/VirtualOfficeAdmin.npm module.

  9. When the module has been installed, close iManager.

  10. Open a terminal session.

  11. Change to your root user account using the su - command.

  12. At the shell prompt, enter /etc/init.d/novell-tomcat4 stop; then enter /etc/init.d/novell-tomcat4 start .

If you complete these steps, you should now be able to manage your Virtual Office implementation using iManager. To configure Virtual Office, you need to configure the following settings:

  • The Virtual Office Services Administration settings in iManager

  • The Virtual Office Environment Administration settings in iManager

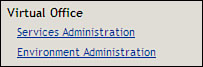
Let's first look at how you configure the Virtual Office Services Administration settings.

Configuring Services Administration Settings

The Services Administration settings are the most important Virtual Office configuration parameters. These settings are responsible for integrating the various NNLS components , such as iPrint, iFolder, NetMail, and NetStorage, with Virtual Office. We're going to discuss how to configure the following Virtual Office parameters:

  • Company Info

  • NetStorage

  • iPrint

  • eGuide

  • Bookmarks

  • eMail

  • Public Webpage

  • Change Password

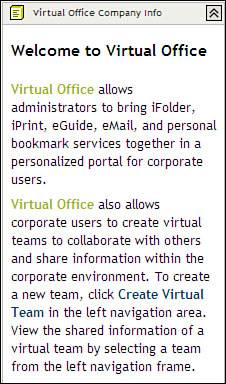
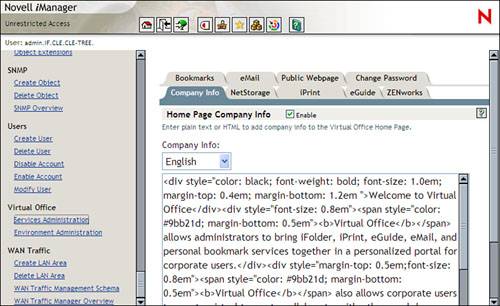
Let's first discuss how to configure the Company Info area of the Virtual Office home page.

Configuring Company Info

In the Virtual Office home page, a Company Info area is displayed on the right side of the page. This is shown in Figure 11.7.

Figure 11.7. The Company Info box.

graphics/11fig07.jpg


The text shown in Figure 11.7 is the default text in the field. You will probably want to edit this text to reflect information about your organization. To do this, complete the following steps:

  1. Open a web browser and navigate to https:// your_server_IP_address /nps/iManager.html.

  2. Authenticate as your admin user.

  3. Scroll down to the Virtual Office role and select the Services Administration task. The screen in Figure 11.8 is displayed.

    Figure 11.8. The Company Info configuration tab.

    graphics/11fig08.jpg


  4. In the Language drop-down list, select your language.

  5. In the Company Info field, enter your desired text to describe your organization. You can enter the information in plain text, or, if you have HTML experience, you can mark up the text using HTML tags.

  6. Click OK .

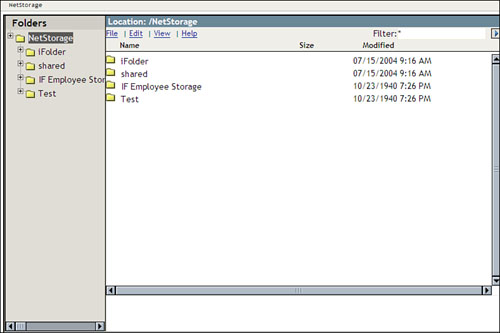
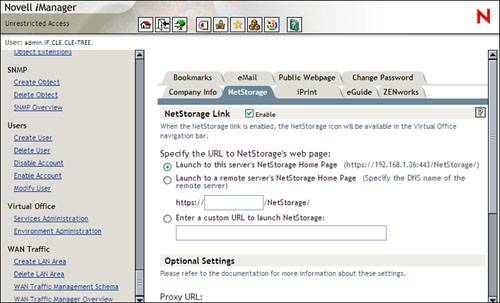
You can also integrate Virtual Office with the NetStorage service installed on your NNLS server. Let's look at how to do this next .

Integrating Virtual Office with NetStorage

As we discussed way back in Chapter 7, "Synchronizing User Identities with DirXML," Virtual Office is heavily dependent on NetStorage. Using this service on your NNLS server, Virtual Office can provide virtual teams with a team file share, as shown in Figure 11.9.

Figure 11.9. Team file share.

graphics/11fig09.jpg


Virtual Office also provides each user with access to his or her NetStorage home page through the Virtual Office interface. This is done using an icon at the top of the Virtual Office screen (see Figure 11.10).

Figure 11.10. NetStorage icon in Virtual Office.

graphics/11fig10.jpg


When you click this icon, Virtual Office opens the NetStorage home page for the currently logged-in user. This is shown in Figure 11.11.

Figure 11.11. Accessing NetStorage from within Virtual Office.

graphics/11fig11.jpg


To configure your Virtual Office deployment to use a NetStorage service, you need to do the following:

  1. From within iManager, select the Services Administration task.

  2. Select the NetStorage tab. The screen in Figure 11.12 is displayed.

    Figure 11.12. Integrating Virtual Office and NetStorage.

    graphics/11fig12.jpg


  3. By default, the Enable check box should be marked . If not, turn NetStorage integration on by clicking Enable .

  4. By default, the Launch to this Server's NetStorage Home Page option should be marked. This configures Virtual Office to connect to the NetStorage service on the same server where Virtual Office is installed. If you want to connect to the NetStorage service on a different server, mark the Launch to a Remote Server's NetStorage Home Page button and enter the IP address or DNS name of the NetStorage server.

  5. Click OK .

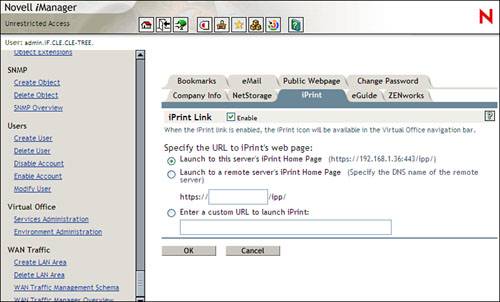
With your NetStorage settings configured, you next need to integrate your Virtual Office deployment with iPrint.

Integrating Virtual Office with iPrint

As with NetStorage, Virtual Office provides users with easy access to the iPrint service on your NNLS server. This is done by providing the user an iPrint icon from within the user's Virtual Office page. This icon is shown in Figure 11.13.

Figure 11.13. iPrint icon in Virtual Office.

graphics/11fig13.jpg


In order to provide this access, you must configure your Virtual Office service with the address of the iPrint server. To do this, you need to complete the following steps:

  1. From within iManager, select the Services Administration task.

  2. Select the iPrint tab. The screen in Figure 11.14 is displayed.

    Figure 11.14. Integrating iPrint within Virtual Office.

    graphics/11fig14.jpg


  3. By default, the Enable check box should be marked. If not, turn iPrint integration on by clicking Enable .

  4. By default, the Launch to this Server's iPrint Home Page option should be marked. This configures Virtual Office to connect to the iPrint service on the same server where Virtual Office is installed. If you want to connect to the iPrint service on a different server, mark the Launch to a Remote Server's iPrint Home Page button and enter the IP address or DNS name of the iPrint server.

  5. Click OK .

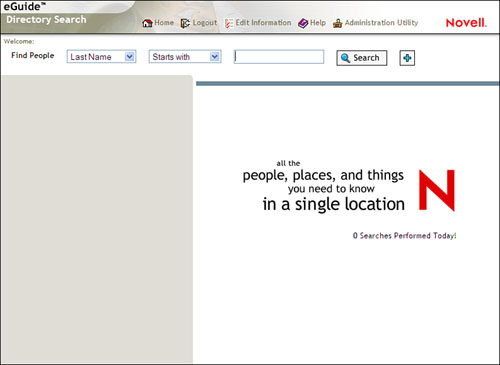
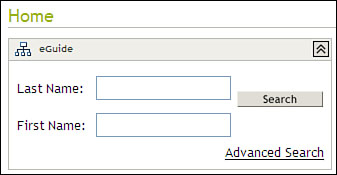
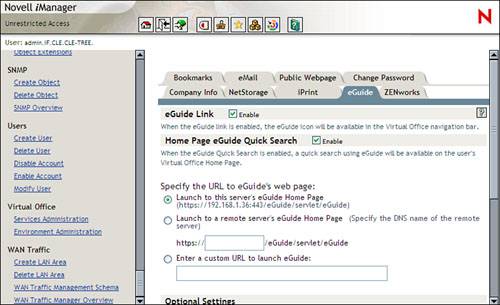
With your NetStorage and iPrint services integrated within Virtual Office, your next task is to integrate your NNLS server's eGuide service.

Integrating eGuide with Virtual Office

As with NetStorage and iPrint, Virtual Office also provides end users with simplified access to the eGuide service on your server. In the Virtual Office home page, each user has an eGuide icon, as shown in Figure 11.15.

Figure 11.15. eGuide icon in Virtual Office.

graphics/11fig15.jpg


When the end user clicks this icon, Virtual Office launches the eGuide home page from the eGuide server it has been configured to use, as shown in Figure 11.16.

Figure 11.16. Launching eGuide from within Virtual Office.

graphics/11fig16.jpg


Virtual Office can also be configured to provide a quick search feature on the end user's Virtual Office home page. This is shown in Figure 11.17.

Figure 11.17. The eGuide Quick Search field in Virtual Office.

graphics/11fig17.jpg


To integrate eGuide with your Virtual Office deployment, you need to complete the following steps:

  1. From within iManager, select the Services Administration task.

  2. Select the eGuide tab. The screen in Figure 11.18 is displayed.

    Figure 11.18. Integrating eGuide within Virtual Office.

    graphics/11fig18.jpg


  3. By default, the Enable check box on the eGuide Link line should be marked. If not, turn eGuide integration on by selecting Enable .

  4. If you want the eGuide Quick Search field displayed on users' Virtual Office home page, mark Enable on the Home Page eGuide Quick Search line.

  5. By default, the Launch to this Server's eGuide Home Page option should be marked. This configures Virtual Office to connect to the eGuide service on the same server where Virtual Office is installed. If you want to connect to an eGuide service on a different server, mark the Launch to a Remote Server's eGuide Home Page button and enter the IP address or DNS name of the eGuide server.

  6. Click OK .

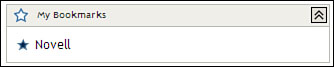
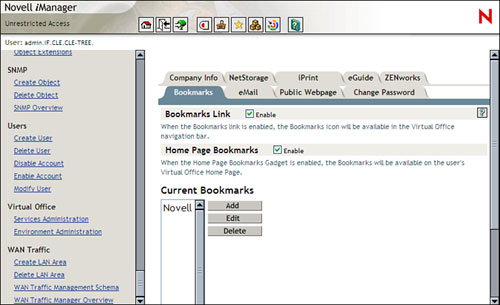
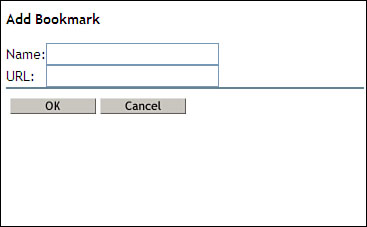
Let's now look at how you can configure Virtual Office's Bookmarks service.

Configuring Virtual Office Bookmarks

Virtual Office provides users with the ability to save important bookmarks. These are accessible in two places. First, Virtual Office provides an icon at the top of the users' home page where they can maintain a list of bookmarks. This icon is shown in Figure 11.19.

Figure 11.19. Bookmarks icon in the Virtual Office home page.

graphics/11fig19.jpg


You can also configure Virtual Office to display users' bookmarks in a field on their home page. This is shown in Figure 11.20.

Figure 11.20. Bookmarks field in the Virtual Office home page.

graphics/11fig20.jpg


To configure the Bookmarks service in your Virtual Office deployment, you need to do the following:

  1. From within iManager, select the Services Administration task.

  2. Select the Bookmarks tab. The screen in Figure 11.21 is displayed.

    Figure 11.21. Configuring the Virtual Office Bookmark service.

    graphics/11fig21.jpg


  3. By default, the Enable check box on the Bookmarks Link line should be marked. If not, display the Bookmarks icon in the Virtual Office interface by selecting Enable .

  4. If you want the Bookmarks field displayed on users' Virtual Office home page, mark Enable on the Home Page Bookmarks line.

  5. By default, a bookmark for the Novell website is defined. Any bookmarks defined in the Current Bookmarks field are displayed in all Virtual Office users' bookmark lists. You can configure additional bookmarks that will be displayed for all Virtual Office users by completing the following steps:

    1. Under Current Bookmarks , click Add . The screen in Figure 11.22 is displayed.

      Figure 11.22. Adding a bookmark.

      graphics/11fig22.jpg


    2. In the Name field, enter a name for the bookmark.

    3. In the URL field, enter the URL to the web page you want to bookmark.

    4. Click OK . The new bookmark appears in the Current Bookmarks field.

  6. Click OK .

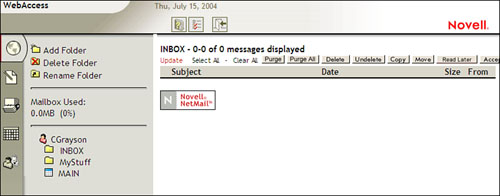
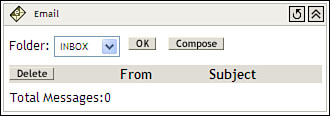
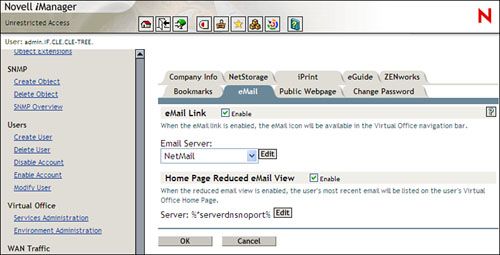
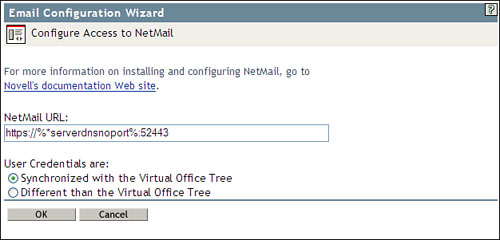
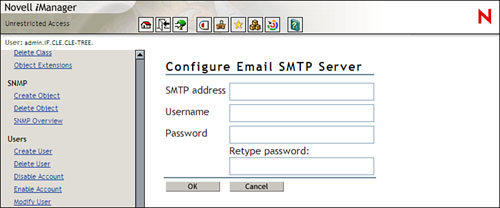
With your Bookmarks service configured, the next thing you need to do is to integrate Virtual Office with the NetMail service on your NNLS server.

Integrating NetMail with Virtual Office

As with eGuide, NetStorage, and iPrint, you can also integrate your NetMail email service on your NNLS server with Virtual Office. At the top of the Virtual Office home page, you can configure a NetMail icon to be displayed. This icon is shown in Figure 11.23.

Figure 11.23. NetMail icon in the Virtual Office home page.

graphics/11fig23.jpg


When the end user clicks this icon, Virtual Office launches a new window and displays the user's inbox using NetMail's Modular Web Agent, as shown in Figure 11.24.

Figure 11.24. Accessing NetMail from within Virtual Office.

graphics/11fig24.jpg


In addition, Virtual Office can be configured to display the user's most recent email messages within his or her home page. This is referred to as the Reduced eMail View . The Reduced eMail View is displayed in Figure 11.25.

Figure 11.25. Reduced eMail View within Virtual Office.

graphics/11fig25.jpg


To integrate NetMail within Virtual Office, you need to complete the following steps:

  1. From within iManager, select the Services Administration task.

  2. Select the eMail tab. The screen in Figure 11.26 is displayed.

    Figure 11.26. Integrating NetMail and Virtual Office.

    graphics/11fig26.jpg


  3. By default, the Enable check box on the eMail Link line is marked. If not, display the eMail icon in the Virtual Office interface by clicking Enable .

  4. In the Email Server drop-down list, select NetMail .

    Tip

    Virtual Office can also be integrated with a GroupWise, Lotus Notes, or Microsoft Exchange email server. It can also be integrated with any other email server that supports the IMAP or POP3 protocol. The steps for doing this are almost identical to the steps required to integrate NetMail.

  5. Click Edit . The screen in Figure 11.27 is displayed.

    Figure 11.27. Configuring the NetMail URL.

    graphics/11fig27.jpg


  6. In the NetMail URL field, the default URL of https://%*serverdnsnoport%: 52443 is displayed. The text %*serverdnsnoport% is a variable that is replaced with the address of the same server where Virtual Office is running. If your NetMail service is running on a different server, enter its IP address or DNS name in the URL in this field, including the port number used by your NetMail server.

  7. If the NetMail service is configured to use the same eDirectory tree as your Virtual Office server (which generally is the case), then mark Synchronized with the Virtual Office Tree . When a user selects the eMail link in Virtual Office, he or she will be automatically authenticated to NetMail using the user name and password supplied to authenticate to Virtual Office.

  8. If the NetMail Service is configured to use a different eDirectory tree than your Virtual Office server, then mark Different than the Virtual Office Tree . This will require users to provide a user name and password to authenticate to NetMail when they select the eMail link in the Virtual Office home page.

  9. Click OK .

  10. If you want the Reduced eMail field displayed on users' Virtual Office home page, complete the following:

Note

The Reduced eMail View gadget doesn't use NetMail's Modular Web Agent the way the eMail link (configured previously) does. Instead, it uses either the POP3 or IMAP protocol to access your NetMail server. To use this, then you need to make sure you have configured a POP or IMAP Agent for your NetMail server.


  1. Mark Enable on the Home Page Reduced eMail View line.

  2. Click Edit . The screen in Figure 11.28 is displayed.

    Figure 11.28. Configuring the Reduced eMail View.

    graphics/11fig28.jpg


  3. Under Mail Server Type , select the protocol that will be used to access your NetMail server. Your choice will depend on the NetMail agents you've deployed.

  4. In the Incoming Mail Server DNS Name field, the default address of %*serverdnsnoport% is displayed. As mentioned earlier, the text %*serverdnsnoport% is a variable that is replaced with the address of the same server where Virtual Office is running. If your NetMail service is running on a different server, enter its IP address or DNS name in this field.

  5. In the SMTP Server DNS Name field, the default address of %*serverdnsnoport% is displayed. If NetMail is running on the same server as Virtual Office, leave this parameter as it is. If your NetMail service is running on a different server, enter its IP address or DNS name in this field.

  6. If the NetMail service is configured to use the same eDirectory tree as your Virtual Office server, mark Synchronized with the Virtual Office Tree . If the NetMail service is configured to use a different eDirectory tree than your Virtual Office server, mark Different than the Virtual Office Tree .

  7. Click OK .

  8. Implement the changes by clicking OK .

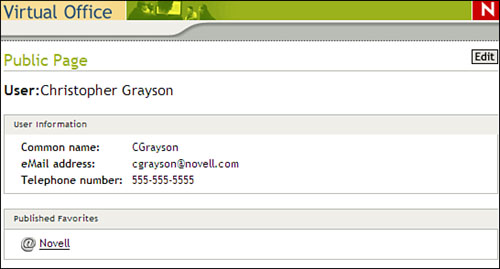
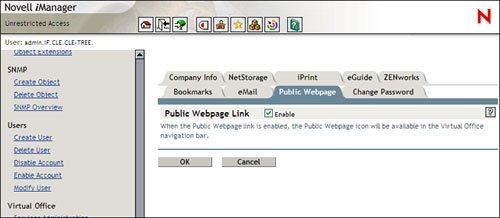
With your NetMail server integrated, you next need to configure the Virtual Office Public Web Page link.

Configuring the Public Web Page Link

Virtual Office provides users with the ability to publish a web page in the Virtual Office interface. This allows users to convey such things as personal contact information, team membership information, bookmarks, or collaboration files. To provide this functionality, Virtual Office provides the Edit My Web Page icon at the top of the interface, as shown in Figure 11.29.

Figure 11.29. The Edit My Web Page icon in Virtual Office.

graphics/11fig29.jpg


When the user clicks this icon, the user's public web page is displayed. A sample page is shown in Figure 11.30.

Figure 11.30. Virtual Office user web page.

graphics/11fig30.jpg


To enable this functionality in Virtual Office, you need to do the following:

  1. From within iManager, select the Services Administration task.

  2. Select the Public Web Page tab. The screen in Figure 11.31 is displayed.

    Figure 11.31. Enabling the Virtual Office public web page.

    graphics/11fig31.jpg


  3. If you want the Public Web Page link to be displayed for users in Virtual Office, mark Enable .

  4. Click OK .

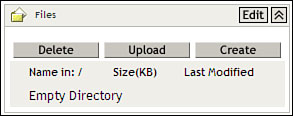
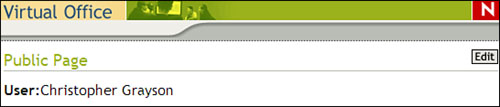
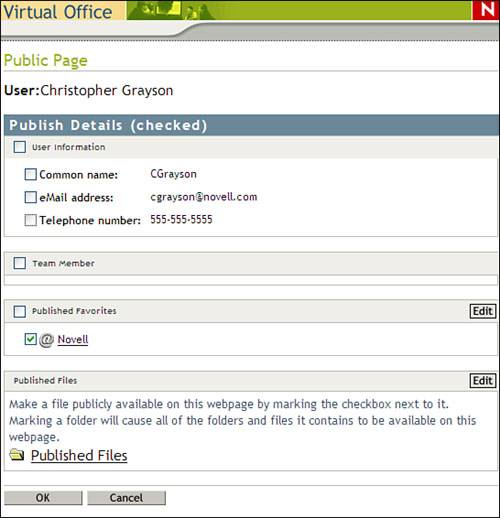
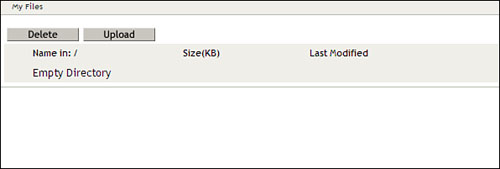
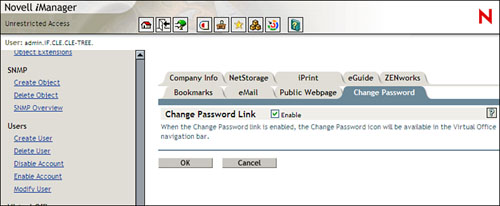
Users can now select the View and Edit My Webpage icon in the Virtual Office interface to edit their web pages. This is done by clicking the Edit button located on the right side of the screen, as shown in Figure 11.32.

Figure 11.32. Editing a user's public web page.

graphics/11fig32.jpg


When the Edit button has been clicked, the interface shown in Figure 11.33 is displayed.

Figure 11.33. Public web page configuration parameters.

graphics/11fig33.jpg


If the user wants a particular parameter displayed, such as User Information, he or she can simply mark it and then click OK . The user can also upload files to be shared through the web pages. This is done by clicking the Edit button on the Published Files line. The screen in Figure 11.34 is then displayed.

Figure 11.34. Uploading published files.

graphics/11fig34.jpg


The user then clicks Upload and browses to and selects the files he or she wants uploaded. Then the user clicks Upload . The files will then be available for other Virtual Office users to download.

When you have configured your Public Web Page settings, the last Service Administration task you need to take care of is configuring the Change Password service.

Configuring the Change Password Service

Using Virtual Office, you can provide your users with the ability to manage the password for their user object in the eDirectory tree. This is provided in the Virtual Office interface using the Change My Password icon, shown in Figure 11.35.

Figure 11.35. The Change My Password icon.

graphics/11fig35.jpg


To enable this service in your Virtual Office deployment, you need to do the following:

  1. From within iManager, select the Services Administration task.

  2. Select the Change Password tab. The screen in Figure 11.36 is displayed.

    Figure 11.36. Enabling the Change Password service.

    graphics/11fig36.jpg


  3. If you want the Change Password link to be displayed for users in Virtual Office, mark Enable .

  4. Click OK .

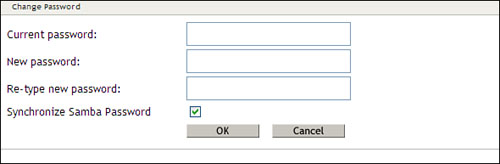
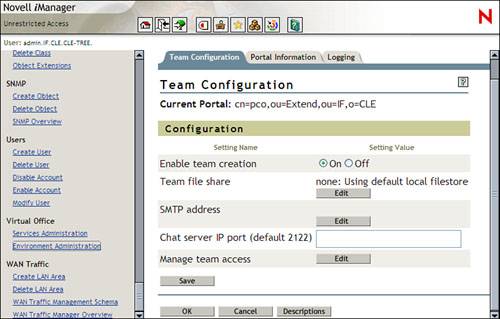
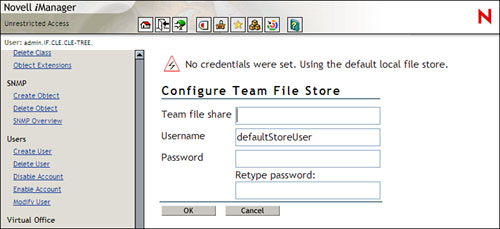
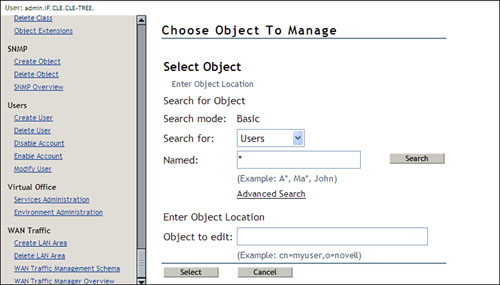
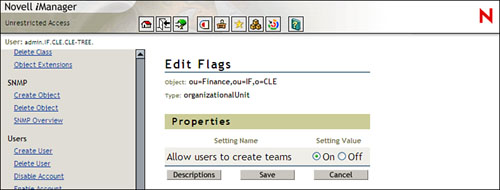
When you enable this service, users can select the Change My Password icon in the Virtual Office home page. When they do, the screen in Figure 11.37 is displayed.

Figure 11.37. Changing user passwords.

graphics/11fig37.jpg


To change his or her password, the user must first supply his or her current eDirectory password in the Current password field. If the correct password is supplied, the user can then enter a new password in the New password fields. As well, the user can have his or her Samba password changed to match his or her new eDirectory password by marking Synchronize Samba Password . To save the change, the user should then click OK .

At this point, your Virtual Office Services Administration tasks are complete. Now you need to use iManager to configure the Virtual Office environment.

Configuring the Virtual Office Environment

The Services Administration tasks you just learned about are primarily focused on integrating the various NNLS components and configuring the user interface. The Virtual Office Environment Administration tasks covered here are used to configure the behavior of the Virtual Office service itself.

The Environment Administration task is located beneath the Virtual Office role in iManager. Using this task, you can configure virtual team parameters as well as set logging levels. Let's look at each of these functions.

Warning

You'll notice as we go through this section that a third function is available in the Environment Administration screen: configuring portal information. We're not going to cover these parameters here. The Virtual Office software engineers at Novell have indicated that the average user shouldn't touch these settings unless a Novell Support Engineer has directed him or her to do so.


Setting Team Configuration Parameters

Before talking about how to configure team parameters, we need to discuss exactly what a team is. Virtual Office allows users to create virtual teams . These teams allow employees in an organization to collaborate through email, real-time chat, file sharing, and calendaring.

An end user can create a virtual team from within his or her Virtual Office home page. When this happens, the user who created the team becomes the owner of the team and the first team member. The team owner can then invite other users to join the team as members . The invitees will be sent notification and given the opportunity to accept or decline the invitation to join.

You can control, to an extent, the way teams are handled by Virtual Office by configuring team parameters in iManager. To do this, you need to complete the following steps:

  1. Open iManager and scroll down to the Virtual Office role.

  2. Select the Environment Administration task. The screen in Figure 11.38 is displayed.

    Figure 11.38. Configuring team parameters.

    graphics/11fig38.jpg


  3. If you want to allow end users to create teams, set Enable Team Creation setting to On . (This parameter is turned on by default.)

  4. The team file share is used to store uploaded files. Configure the team file share by doing the following:

    1. On the Team File Share line, click Edit . The screen in Figure 11.39 is displayed.

      Figure 11.39. Configuring the team file store.

      graphics/11fig39.jpg


    2. In the Team file share field, enter the URL to the team file share. Recall from the NetStorage chapter that this URL must point to a Samba share. The URL format is cifs:// server_IP_address/share_name . For example, we created a Samba share named IFEmployees earlier in this book. If your server's IP address were 192.168.1.36, you would enter cifs://192.168.1.36/IFEmployees in this field.

      Tip

      Of course, you can also use DNS names instead of IP addresses.

    3. In the Username field, enter a LUM username that has read and write permissions to the directory the Samba share points to.

    4. In the Password fields, enter the LUM user's password.

    5. Click OK .

  5. Virtual Office can be configured to send notification messages to the network administrator. To do this, you must configure Virtual Office with the address of your NetMail server. Completing the following:

    1. Click the Edit button the SMTP Address line. The screen is shown in Figure 11.40.

      Figure 11.40. Configuring the email server.

      graphics/11fig40.jpg


    2. In the SMTP address field, enter the IP address of your NetMail server.

    3. In the Username field, enter the username of a NetMail user to whom you want Virtual Office email notifications sent to (this is probably yourself).

    4. In the Password fields, enter the user's password.

    5. Click OK .

  6. By default, the Virtual Office chat applet runs on IP port 2122. If you want to change this to a different port, enter the desired port number in the Chat server IP port field.

  7. Virtual Office also allows you to specify which users can and which users can't create virtual teams. By default, anyone in your eDirectory tree can create a team. If you want to restrict this access, do the following:

    1. On the Manage Team Access line, click the Edit button. The screen in Figure 11.41 is displayed.

      Figure 11.41. Configuring team owner access.

      graphics/11fig41.jpg


    2. In the Search for drop-down list, select Users or Containers .

      Tip

      Virtual Office allows you to restrict team ownership for individual users or for entire containers.

    3. Click Search .

    4. Select the user or container you want to manage access for, then click Select . The screen in Figure 11.42 is displayed.

      Figure 11.42. Configuring team owner access flags.

      graphics/11fig42.jpg


    5. To deny a user or a container the ability to create a virtual team, change the value of the Allow users to create teams setting to Off .

    6. Click Save .

  8. Save your changes to the Virtual Office team configuration by clicking Save and then clicking OK .

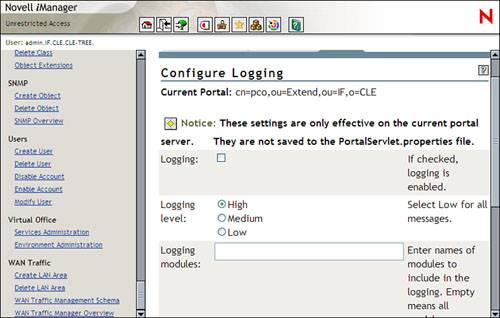
Now let's talk about how you can configure Virtual Office logging levels.

Configuring Virtual Office Logging

From time to time, you may need to enable logging to troubleshoot Virtual Office problems. Virtual Office provides you the ability to log Virtual Office events to a file in your Linux server's file system. To do this, complete the following steps:

  1. In iManager, select the Environment Administration task under the Virtual Office role. The screen in Figure 11.43 is displayed.

    Figure 11.43. Configuring Virtual Office logging.

    graphics/11fig43.jpg


  2. To enable logging, mark the Logging check box.

  3. Configure your logging level by selecting High , Medium , or Low .

  4. In the Logging modules field, enter the names of the Virtual Office modules you want to log. If you leave the field blank, all Virtual Office modules will be logged.

  5. Click OK .

With your Virtual Office service configured, your users can now create virtual teams. Let's talk about how this is done.

 <  Day Day Up  >  


Novell Certified Linux Engineer (CLE) Study Guide
Novell Certified Linux Engineer (Novell CLE) Study Guide (Novell Press)
ISBN: 0789732033
EAN: 2147483647
Year: 2004
Pages: 128
Authors: Robb H. Tracy

flylib.com © 2008-2017.
If you may any questions please contact us: flylib@qtcs.net