Lobby Application Overview
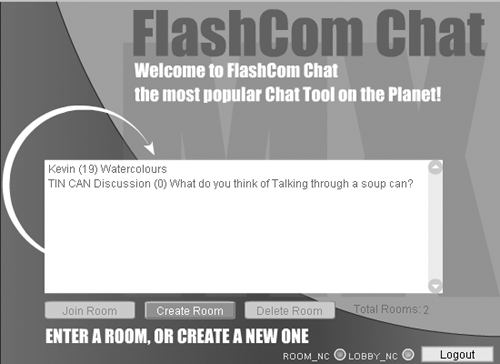
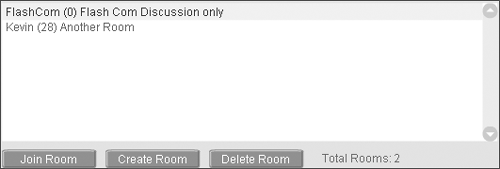
| Lobby applications, like the Subscriber application introduced in Chapter 9, "STEP 9: Controller and Subscriber Applications," also maintain multiple user interfaces. The principle difference is that all user interfaces are public. A typical implementation is the chat room that contains multiple "rooms" for users to interact. You could also use instances to provide additional collaborative experiences such as multiple classrooms, meeting rooms, or other "creative" endeavors. Network gaming is an excellent example to illustrate the concept. Let's say you build a game that can handle four players. A Lobby interface (shown in Figure 10.1) allows users to invite other users to join a game. Game play does not interact with other game plays concurrently running. Figure 10.1. The Lobby interface. Games are a great analogy because you would not want to code a game or set up an environment manually for each game being played . Lobby applications are the best way to illustrate application instances. You could have thousands of instances of the same application running concurrently, each maintaining unique data and streams. In the game example, each game independently maintains its own resources such as score, users, and game state. The application instance maintains unique SharedObject, Client, and Stream resources while sharing the same code base. The RoomList UI ComponentThe RoomList UI component (shown in Figure 10.2) offers the basic functionality of a Lobby application. It also provides a great SharedObject model you can use as a foundation to extend the component. Figure 10.2. RoomList Communication component. Let's take a look at its basic features:
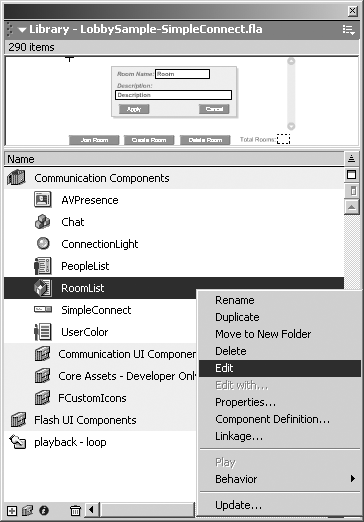
The RoomList component is the most complex in the Communication UI component set. The example provided in the manual is a must-read before you go too far with this chapter. The exercise in this chapter will take a different approach to implementing the RoomList UI component. It will involve extending the RoomList prototype with some new and different actions. Extending the RoomList ComponentExtending or overwriting the base functionality of the UI components is an important technique to master, if you plan to use any UI component as a starting point for your applications. This process is called overwriting an object's class (or prototype). You don't need to extend; however, it is required to apply additional features or to modify existing features. Overwriting is an advanced process and should be done only if you are comfortable with ActionScript and prototyping. There is no harm in practicing it. You will not modify the original source code; you will overwrite it from outside the component. Let's take a quick look at overwriting an object's class. We'll change the operation of the MovieClip object's play() function. When you overwrite an object's method prototype, you change the operation across all instances of the object. For example, Phillip Kerman demonstrated this example in his book, ActionScripting in Flash MX ( New Riders, 2002 ). Overwriting the MovieClip's play function: MovieClip.prototype.play = function() {this.stop();} There is no logical reason why you would want to do this, but it is a good illustration of how to overwrite an object's global prototype. The first step with modifying any component is to assess what functionality you need it to do. For example, you might want to add a Click Handler to the PeopleList component, or add a log out feature for the SimpleConnect component. In the case of the RoomList component, you might want to add some internal security or change the data structure used in its SharedObject. After your assessment, start by exploring the object's class library. Follow these simple steps to access any component's object prototype:
Warning DO NOT CHANGE ANY ACTIONSCRIPT HERE! What you see is an ActionScript that describes the object's class (or prototype). A class is a collection of methods that can be assigned to instances. The methods available in an object are not available until you instantiate them. For example, you cannot access the .connect() method of a NetConnection object until you have instantiated it like this: nc = new NetConnection(); If you are familiar with Java or JavaScript, this should be very familiar to you. Locate the method joinRoom . This method is used internally and is not exposed in the documentation, but you can still change it. When invoked, this function uses the getURL method to open a new web browser passing the username as a variable: FCRoomListClass.prototype.joinRoom = function(){ getURL(this.roomPath+"?appInstance="+this.rooms_lb.getSelectedItem() .data+"&username="+this.username, "_blank"); }; In the next exercise, you will overwrite this function to move the playhead using a gotoAndStop() function versus launch a new web browser using the getURL function. Don't modify this code; it should stay as is. You will overwrite it later in the exercise. When you are finished looking through the class, click Scene 1 below the Timeline layers to return to your main movie. |
EAN: 2147483647
Pages: 200


