Menu Commands
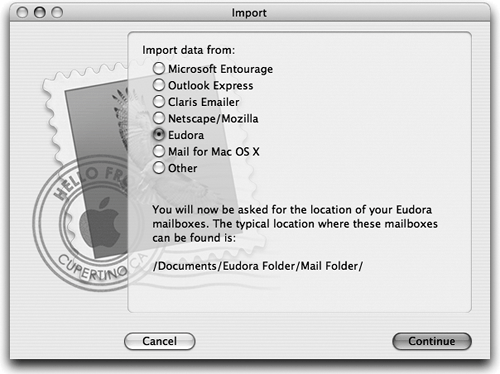
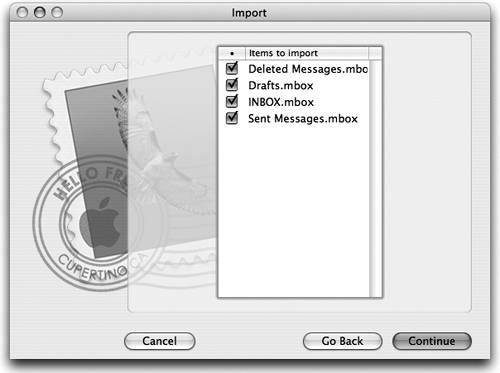
| Following are some of the items in the menus that aren't explained elsewhere. File menuNew Viewer Window: If you've closed the main Viewer window and realize that you need it back, use this command, or press Command Option N. Save Attachment: Open any message that has attachments included. Choose "Save Attachment…" and you can choose where you want the files saved. Import Mailboxes: Mail can import the mailboxes of many popular email applications. If you have custom mailboxes already set up in another email application, from the File menu, choose "Import Mailboxes…." Select one of the email clients in the list, then click the right arrow button for instructions. Mail will open a directory window so you can navigate to the appropriate mailbox file and import it. You might also want to try using the AppleScript "Import Addresses"; see page 460.
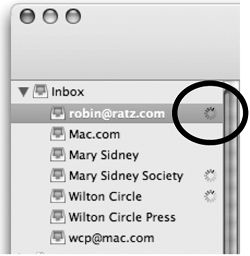
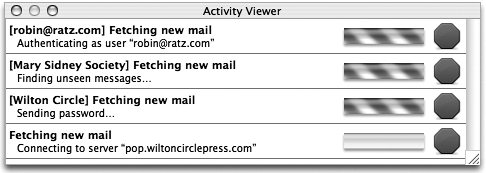
To print an email message: Double-click a message to open it. Click the "Print" icon in the open message's toolbar to open the Print dialog box. Or select a message in the Message List pane, go to the File menu and choose "Print…." Make the appropriate selections and click "Print." To print multiple email messages: From the Message List, select multiple messages. From the File menu, choose "Print…." All selected messages, including header information, will print out in continuous fashionit will not print a separate page for each message. Edit menuPaste As Quotation: Use this command when you want to paste text copied from another document into an email message as a quotation. In Mail, a quotation is styled with indentation, a vertical bar, and a user-specified color, as explained on page 459. 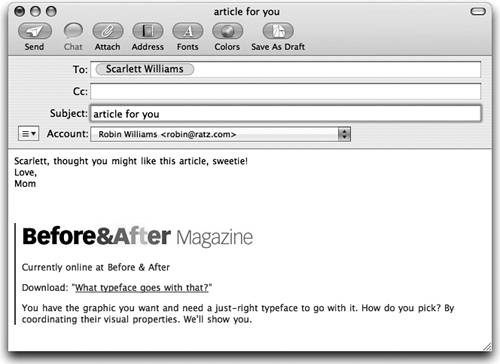 Paste and Match Style: This is a great feature. When you copy and paste text from another message or another document, it drops in with its own font and size which usually doesn't match your chosen font in the message you're writing. But if you copy text and then choose this command, the text pastes in using the font and size that is already in your message. Paste as HTML: If you copy text from, say, a web page, you might want to paste it in with its formatting attached, which is built into the HTML code. Copy the text from a web page, then use this command. The font, color, size, alignment, and even active links will appear in your email message. Append Selected Messages: This adds an entire email message you have received onto the end of a new message you compose. Compose your message, then go to the Viewer window, select the email message you want to append, and choose this command from the Edit menu. Attachments: The option to Include Original Attachments in Reply does just what it sayswhen you reply, any photos or other files that came to you will be sent back to that person. Only do this if you have a reason to do so. Always Send Windows Friendly Attachments tries to make sure your attachments can be read by people using Windows machines. However, this can mess up files for Mac users, so only use it if you need it for every file you send. You can always choose to make individual files Windows friendly: Use the Attach button so you get the Open dialog box. At the bottom of that dialog box is a checkbox to "Send Windows Friendly Attachments." This will apply only to the attachment you select. View menuDisplay Selected Messages Only: Select messages (Command-click to select more than one), then choose this option so only those messages will be visible in the Message List. To show all of the messages again, go back to the View menu and choose "Display All Messages." Mailbox menuGo Online, Go Offline, Online Status: If you have a dial-up account that ties up your phone line while you're connected to the Internet, you can "Go Offline." This disconnects you from the Internet, but leaves Mail open. Before you go offline, transfer any messages you want to read to another folder (just drag them over and drop them in). Then go offline, read your mail, compose messages, print them, etc. Messages you compose while offline are stored in the Outbox in the Mailbox Sidebar, where you can open and edit them. When you're ready to send mail, from the Mailbox menu, choose "Online Status" and then select either an individual account to take online, or "Go Online" in general. Get New Mail: If you have more than one account in Mail, go to this menu to selectively check the mail in just a single account. Rebuild: If messages come in garbled or with some strange font, try using the Rebuild command. If your hard disk is really full, clear some room before you try this because it needs hard disk space to do its rebuilding. Window menuActivity Viewer: To the right of the Inbox icons you might see revolving wheels when connecting to a remote server to send or receive mail. If you want to see the actual activity represented by the wheels, go to the Window menu and choose Activity Viewer. The window shown below appears and you can see what's going on as Mail connects.
Click any "stop sign" to stop that particular activity. Format menuIn the Format menu, under "Style," there is a command to make the selected text Bigger. The menu says the keyboard shortcut is Command +, but that doesn't workuse Shift Command +. Make Plain Text changes messages from "Rich Text" format to "Plain Text" format, which will strip out all of the formatting, different fonts, colors, etc. If the message is already in Plain Text, this command appears as "Make Rich Text." This will not restore any formatting that was removed. Quote Level: To format text as a Mail-style quote or to increase the existing quote level, click within a line of text, choose "Quote Level," and then choose "Increase." Choose the command again to further increase the quote level, as shown below. Of course, choose "Decrease" to take the text back towards normal. The operation is much easier and faster if you learn the keyboard shortcuts: Click within the appropriate text, then type Command ' (that's the typewriter apostrophe, just to the left of the Return key) to increase the quote level, or type Option Command ' to decrease the quote level.
Each of these quoted sections has been increased one more level than the one above it. 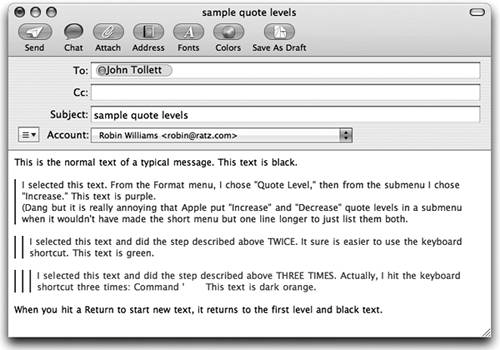 Scripts menuAn AppleScript is a small piece of code that makes something happen. If you know how to write scripts or how to use Automator, you can do all kinds of great things. Mail provides you with a list of several useful and useless scripts in the Scripts menu (which doesn't actually say "Scripts" in the menu bar but has a little icon that looks like a parchment scroll). If you are accustomed to using the script and noticed that the Scripts menu is no longer in the menu bar, don't worryyou can add it. Open the Applications folder, then open the AppleScripts folder, then double-click on the AppleScript Utility to open it. In the window, check the box to "Show Script Menu in menu bar." Quit the utility. 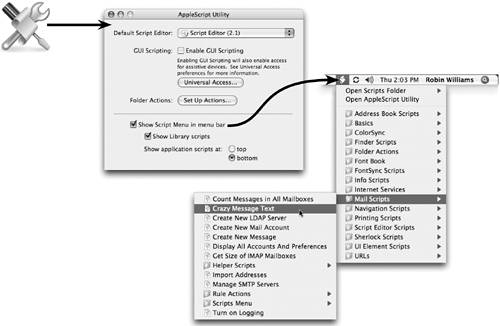 Feel free to experiment with these scriptsjust choose one and let it run. Check out the "Crazy Message Text" script. For full details about AppleScript, go to the website at www.apple.com/applescript. |
EAN: N/A
Pages: 277
- Chapter IV How Consumers Think About Interactive Aspects of Web Advertising
- Chapter IX Extrinsic Plus Intrinsic Human Factors Influencing the Web Usage
- Chapter X Converting Browsers to Buyers: Key Considerations in Designing Business-to-Consumer Web Sites
- Chapter XII Web Design and E-Commerce
- Chapter XVII Internet Markets and E-Loyalty
