Section 4.2. Integrating Your Applications with MapPoint 2004
4.2. Integrating Your Applications with MapPoint 2004Like any other Microsoft Office application (and also like Visual Studio .NET), MapPoint 2004 supports extensibility architecture, which means that you can develop applications that can plug right into the MapPoint 2004 application. In this section, I will show how to develop Add-Ins for MapPoint 2004. Before getting into the details of writing Add-Ins, there are two reasons why you need Add-Ins:
Developing a MapPoint Add-In is no different from developing an Add-In for any other Microsoft Office application. Visual Studio .NET provides you with a project type to develop Add-In applications. The steps below show how to develop a MapPoint Add-In using Visual Studio .NET.
Figure 4-2. Creating an Add-In project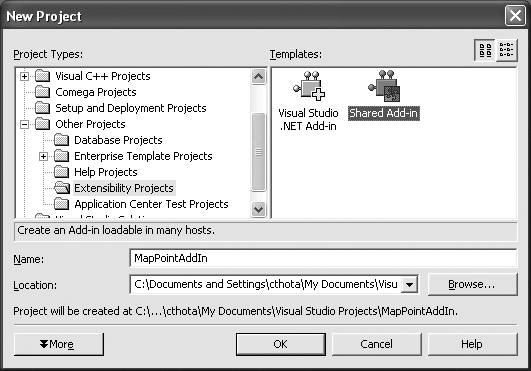 Figure 4-3. Selecting programming language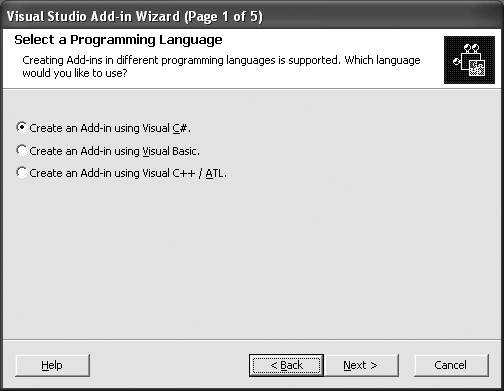 Figure 4-4. Selecting an application host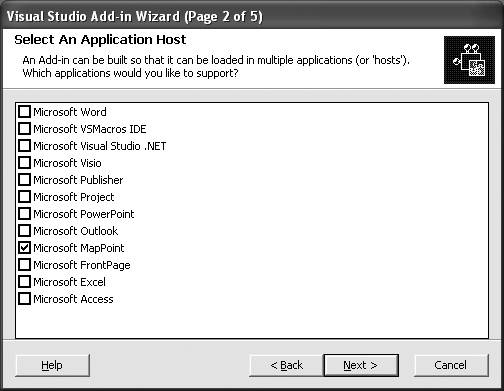 Figure 4-5. Name and description for your Add-In Figure 4-6. Add-In options page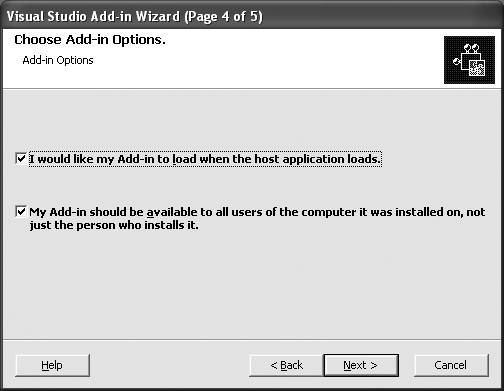 I will leave choosing the installation options to your discretion, but there are a few things to consider about Add-In load options. How do you decide whether you want your Add-In to be loaded at the time of loading the host application? If your Add-In takes a long time to load (because it's waiting for a resource, for example), do not load the Add-In at the time of the host load. Doing so will slow down the entire application load. When this is an issue, you should load the Add-In explicitly, either manually or programmatically, before using it. If your Add-In initialization process is quick, you can choose to load your Add-In when the host application is loaded. Once you set the Add-In options, the next wizard page presents the summary of your Add-In. When you click Finish, the wizard creates Add-In and setup projects for your Add-In application. If you take a close look at the Add-In setup project, it includes the file MPNA82.tlb (or MPEU82.tlb in the European version of MapPoint 2004). This happens to be the type library installed with MapPoint 2004. You must exclude this file from the setup files by right-clicking on it, as shown in Figure 4-7. Figure 4-7. Exclude MapPoint type library from setup files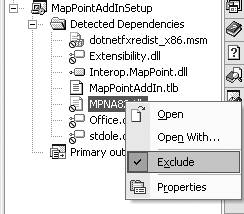
4.2.1. Developing the Add-InNow we are ready to develop an Add-In. The application logic for your Add-In must go into a Connect.cs (or Connect.vb if you are working with VB.NET) file. Before you start implementing specifics of your Add-In, add the MapPoint type library to your project as a reference. This way, you can use any of the MapPoint 2004 APIs in your Add-In if you want to. If you take a close look at the Connect class, it implements the IDTExtensibility2 interface requiring you to implement the extensibility event handler methods, such as OnConnection, OnDisconnection, and so on. However, only implement these methods if you really need them, with one exception: the OnConnection method required to wire up the Add-In with the MapPoint 2004 UI. For example, to add a command button to the MapPoint 2004 application UI, add the following code in the OnConnection event handler method: public void OnConnection(object application, Extensibility.ext_ConnectMode connectMode, object addInInst, ref System.Array custom) { MapPoint.Application app = application as MapPoint.Application; if(app == null) return; //Add the command app.AddCommand("Import NorthWind Customers", "ImportNorthWindCustomers", this); } The ApplicationClass.AddCommand method takes the UI display name, the method name, and the type that declares the method name. In the previous code, the AddCommand method takes the UI name of Import NorthWind Customers and the method name ImportNorthWindCustomers that is implemented in the Connect class itself. If you have the specific initialization code needed for your Add-In, use the OnStartupComplete event handler method to implement it. Using this method does not slow down the host application load time due to the Add-In initialization process. You can also implement other methods in your Add-In as you would do in any other .NET class. If you need a reference to the host MapPoint.ApplicationClass to perform any MapPoint related tasks, declare a local field in the Connect class that can be assigned to the MapPoint.ApplicationClass instance in the OnConnection event handler method: //Declare a local field to hold application //class reference private object applicationObject; Assign it to the current MapPoint instance using the OnConnection method: public void OnConnection(object application, Extensibility.ext_ConnectMode connectMode, object addInInst, ref System.Array custom) { applicationObject = application; . . . Since you have a reference to the host application class (MapPoint 2004 in our case), you can perform any MapPoint 2004-related task in your Add-In using that class instance. To implement SQL data import Add-In, simply add a method to the Connect class that makes use of the applicationObject reference: public void ImportNorthWindCustomers( ) { //Get a reference to the MapPoint Application MapPoint.Application app = applicationObject as MapPoint.Application; if(app == null) return; //Get the current map MapPoint.Map map = app.ActiveMap; //This sample uses System.Data namespace and standard //NorthWind sample database that comes with SQL server //See whether there is an existing dataset with the same name object datasetName = "NorthWind Orders"; if(map.DataSets.Count > 0 && map.DataSets.get_Item(ref datasetName) != null) { //If so, delete it map.DataSets.get_Item(ref datasetName).Delete( ); } //Now create a new dataset MapPoint.DataSet dataset = map.DataSets.AddPushpinSet("NorthWind Orders"); . . . }That's it! Once this Add-In is built and installed on a machine, you can invoke the method from the MapPoint UI using the command we added earlier using the ApplicationClass.AddCommand method in the OnConnection method. Sometimes, however, you may want to invoke the previous method from another application, especially when you build Add-Ins to improve the application performance. In that case, you can access an Add-In from the MapPoint.ApplicationClass.AddIns collection. 4.2.2. Invoking Add-In Methods from an External ApplicationSuppose you are building a Windows application to import data from the SQL Server North Wind database. Since we have already built the appropriate Add-In, simply create a reference to this Add-In and invoke the ImportNorthWindCustomers method. First, create a new MapPoint.Application instance: //Get a reference to the MapPoint Application MapPoint.Application app = new MapPoint.ApplicationClass( ); Next, connect to the SQL data import Add-In that we built earlier in this chapter, if you chose not to load the Add-In when the host application is loaded: //GUID: "E33E751B-0BA4-49D7-B5C8-ED2A539F9803" app.AddIns.Connect("E33E751B-0BA4-49D7-B5C8-ED2A539F9803");The AddIns collection exposes the Connect method, allowing you to connect to the Add-In that we built earlier. You can either use the GUID or Program ID (also called ProgId) to connect to the Add-In. How do you get this information? When you created the Add-In, the Connect class was created with a GUID and a ProgId: [GuidAttribute("E33E751B-0BA4-49D7-B5C8-ED2A539F9803"), ProgId("MapPointAddIn.Connect")] public class Connect : Object, Extensibility.IDTExtensibility2 . . .So, in this case, you can use either the GUID or the ProgId to connect to the Add-In. Once the Add-In is connected to the application host, get the instance of the Connect class from the Add-In collection: //Get the Add-In instance object addin = app.AddIns.get_Item(ref index); Now that you have the Add-In instance, invoke the Add-In method using the .NET Framework reflection APIs, which allow you to access and invoke a type's methods at runtime dynamically: //Get the Add-In type Type t = addin.GetType( ); //Invoke the ImportNorthWindCustomers method t.InvokeMember("ImportNorthWindCustomers", System.Reflection.BindingFlags.InvokeMethod, null, addin, null); } The Type.InvokeMember method call invokes the ImportNorthWindCustomers method on the Add-In instance. Now you know how to invoke a method on a MapPoint 2004 Add-In from your application. |
EAN: 2147483647
Pages: 136