Flylib.com

Books Software


Creating the Publisher

team lib

Creating the Publisher

The publisher is the entity that fires an event. It can be an application, as in this example, or it can be a component. COM+ doesnt limit your options in this area. The only thing the publisher must do is invoke the method required to fire the event contained within the event object. The sample application fires an event that broadcasts messages to all subscribers. Figure 10-4 shows the simple interface for this portion of the example.

click to expand
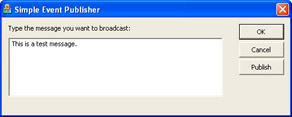
Figure 10-4: The publisher relies on a simple interface to fire an event that broadcasts a message to the subscribers.

As you can see, all you need to do is type a message and click Publish to publish the event. The code for this example looks remarkably similar to the code in Listing 8-6. However, instead of accepting input from the component, this example pushes data to the component in a manner similar to the example in Listing 8-2. You still need to add a reference to the type library for the event object type library, as shown here:

//Importthetypelibraryandusetheassociatednamespace.
#import "SimpleEventObject.TLB" named_guids
usingnamespaceSimpleEventObject;

The publishernot the subscribersmust reference the event object. Some developers get confused on this issue, and the result is that the publish/ subscribe sequence doesnt work as anticipated. Listing 10-2 shows the code to implement the Publish button for this example. You can find the complete listing for this example in the Chapter10\Publisher folder of the books companion content.

Listing 10-2: Simple event publisher

start example
voidCPublisherDlg::OnBnClickedPublish()
{
ISendMsg*pSendMsg;//PointertoConstStringobject.
_bstr_tOutput;//Temporarydatastring.
CStringData;//Datafromthemessagebox.

//InitializetheCOMenvironment.
CoInitialize(NULL);

//Createtheobject.
CoCreateInstance(CLSID_SendMsg,
NULL,
CLSCTX_ALL,
IID_ISendMsg,
(void**)&pSendMsg);
//Sendthemessage.
MsgText.GetWindowText(Data);
Output=Data;
pSendMsg->FireBroadcastMsg(Output);

//UninitializetheCOMenvironment.
CoUninitialize();
}
end example
 

As you can see, the code begins by creating an instance of the object. As usual, the CLSID_SendMsg and IID_ISendMsg values come from the TLH and TLI files created from SimpleEventObject.TLB during compilation.

Once the code has an instance of the object to use, it obtains the string typed by the user and places it in a _bstr_t value, Output . The publisher fires the event by calling on the FireBroadcastMsg() method with Output as an argument. As you can see, the publisher can exit at this point without knowing where the event information has gone (if it goes anywhere at all). If you tried the application now, it would succeed because COM+ doesnt require the presence of a subscriber. The publish/subscribe model allows zero, one, or multiple subscribers.


team lib

team lib

Creating a Component Subscriber

The easiest type of subscriber to create for this example is a component. Using a component lets you place the subscriber on the server for immediate response. The component will output a message box in this case, which is definitely the incorrect thing to do because no one is usually at the server to see the message box. The example uses this simple approach so that you can obtain instant feedback on the usability of the subscriber. The following sections show you how to design, install, and test this type of subscriber.

Designing the Subscriber Component

Remember that the publisher is firing the event and that the event object manages the event. So far, we dont have anything that actually implements the event. How an application handles an event, even under COM+, is unique for every application. When a user clicks a button on a form, the event handler for that button performs some actionthe button component doesnt care what that action is or even that the code has handled it. The same holds true for subscribers. Each subscriber is unique and will handle the event in a unique way. Listing 10-3 shows the code for this subscriber. Youll find the complete listing in the Chapter 10\SubscriberComponent folder of the source code.

Listing 10-3: Component style subscriber

start example
namespaceSubscriberComponent
{
///<summary>
///Thisclasssubscribestotheeventobjectthatholds
///themessagecreatedbythepublisher.
///</summary>
[Guid("3162ED10-C74D-4967-BA51-C8EBD10A8D03"),
ClassInterface(ClassInterfaceType.None)]
publicclassSendMsg:ServicedComponent,ISendMsg
{
publicSendMsg()
{
}

///<summary>
///Thismethodactsasatemplatefortheactual
///eventobject.
///</summary>
///<paramname="strMsg">Thedatawewanttosend
///asabroadcastmessage.</param>
publicvoidFireBroadcastMsg(StringstrMsg)
{
MessageBox.Show(strMsg,
 "PublisherMessage",
MessageBoxButtons.OK,
MessageBoxIcon.Information);
}
}
}
end example
 

You should notice something almost immediately about the subscriberit contains no interface description. When you look at the project, youll notice a reference to the event object, SimpleEventObject . The event object provides the interface in this case. Using the interface in this way ensures that the subscriber matches the event object so that the two are compatible.

Note that the namespace for this subscriber is different than the event object. This isnt required, but using a different namespace does make it easier to identify the subscriber. The use of a different GUID for the SendMsg class is required. The event object class is different than the subscriber class. In fact, you dont have to use the same names the only requirement is that the two support the same interface.

The FireBroadcastMsg() method contains a simple implementation. The only thing that happens, in this case, is that the event handler displays a message box containing the string passed from the publisher. Obviously, you could set this up to do anything that any other event handler would do.

Installing and Testing the Subscriber Component

Youll create an application and register the subscriber just as you always do when working with COM+. Chapter 2 contains complete instructions for this process. The example uses an application name of SimpleSubscriber. However, when working with a subscriber component, you must create the subscription. The following steps show how:

  1. In Component Services, create a COM+ component named SimpleSubscriber and install the SubscriberComponent.

  2. Right click the SimpleSubscriber\ Components \SubscriberComponent.SndMessage\Subscriptions folder, and choose New and then Subscription from the context menu. Youll see a Welcome To The COM+ New Subscription Wizard dialog box.

  3. Click Next. Youll see a Select Subscription Method(s) page like the one shown in Figure 10-5. This is where you choose the methods that you want to use to accept events from a publisher. Notice that all the interfaces and methods the component supports appear in the list. This differs from unmanaged components, where you often see just the interface supported by the component itself.

    click to expand
    Figure 10-5: The first step is to select the methods you want to receive events.

  4. Select just the FireBroadcastMsg() method, as shown in Figure 10-5, and then click Next. Windows will search the COM+ catalog for components that publish events that might fulfill your components needs. Once this search process is complete, youll see a Select Event Class page like the one shown in Figure 10-6. Notice that the event object we created appears in this dialog box. If you dont see the event object, you need to stop the procedure now and check the previous steps to create the SimpleEventApp application listed earlier in this chapter. Make sure you see the correct event object listed here; otherwise , the example wont work (and neither will your application in real life).

    click to expand
    Figure 10-6: Make sure the event object appears in the dialog.

  5. Select the SimpleEventObject.SendMsg class, and then click Next. Youll see the Subscription Options page shown in Figure 10-7. This is where youll provide a name for your subscription and enable it. Always enable the subscription unless you dont want to receive events right away.

    click to expand
    Figure 10-7: Always enable the subscription as part of the configuration process.

  6. Type a subscription name (the example uses My Subscription), select the Enable This Subscription Immediately option, and then click Next. Youll see a success message.

  7. Click Finish. At this point, you should see a new subscription added to the Subscriptions folder. Figure 10-8 shows a typical example of a subscription.

    click to expand
    Figure 10-8: The subscription should appear in the Subscription folder once you create it successfully.

Youll need to export the application from the server and install it as a proxy application on the client as normal. At this point, everything is in place to test the first publish/subscribe setup. Start the Publisher application, type a message, and then click Publish. After a few seconds, the server should display a message box containing the text that you typed in the publisher. If you dont see the message box, make sure you enabled the subscriber. Also, verify that both the event object and the subscriber applications are active.


team lib