| Although drop-down menus and collapsible menus are commonly used to help visitors navigate Web sites, another commonly used metaphor is the tabbed list. Tabbed lists present a set of top-level options, which when clicked reveal the second-level links. This lets you place a large amount of links into a small area, which are easily and consistently available (see the sidebar "Preventing Navigation Noise"). Preventing Navigation Noise One of my chief gripes about most Web sites is the overabundance of unorganized links. You've probably seen sites with long lists of links that stretch off the window. These links add visual noise to the design and waste precious screen space without assisting navigation. Web surfers rarely take the time to read an entire Web page. Instead, they scan for relevant information. But human beings can process only so much information at a time. If a Web page is cluttered, visitors must wade through dozens or hundreds of links to find the one path to the information they desire. Anything designers can do to aid visitors' abilities to scan a page, such as organizing links in lists and hiding sub-links until they're needed, will improve the Web site's usability. Drop-down, sliding, and collapsible menus are a great way to organize your page to prevent navigation noise. |
In this example (Figures 23.8 and 23.9), a tabbed menu has been set up in an <iframe> on the left side of the page, which is used to control the content in the <iframe> to its right. As a bonus for this section, I've also added some JavaScript code that will keep the heights of both iframes just a few pixels shorter than the window's height, and the width of the content frame a little shorter than the width of the window. Figure 23.8. The tabs are presented in the iframe on the left side of the page. 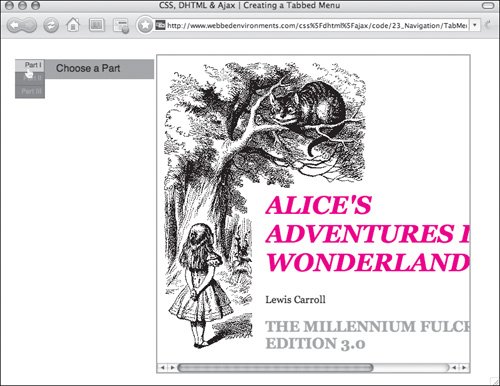
Figure 23.9. After clicking Part I, its submenu is presented, and the tab and submenu are highlighted. 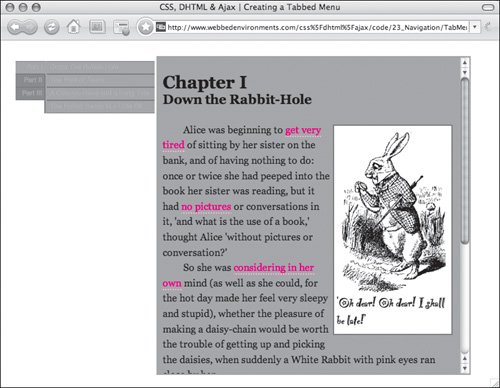
To set up a tabbed menu: 1. | index.html
Create a new HTML document with the XHTML Transitional doctype that will be used to hold the menu and content <iframes> (Code 23.4) Steps 2 through 6 apply to this file.
Code 23.4. index.html: This page is used to create the interface with a menu and content display. It will resize the iframes to fit the available screen dimensions.| [View full width] <!DOCTYPE html PUBLIC "-//W3C//DTD XHTML 1.0 Transitional//EN" "http://www.w3.org/TR/xhtml1/DTD/xhtml1-transitional.dtd"> <html xmlns="http://www.w3.org/1999/xhtml"> <head> <meta http-equiv="Content-Type" content="text/html; charset=utf-8" /> <title>CSS, DHTML & Ajax | Creating a Tabbed Menu</title> <script type="text/javascript"> function initPage() { if (window.innerHeight) var resizeHeight = window.innerHeight - 50; if (window.innerHeight) var resizeWidth = window.innerWidth - 300; resizeObject(null,resizeHeight,'menuDisplay'); resizeObject(resizeWidth,resizeHeight,'contentDisplay'); } function resizeObject(newWidth,newHeight,objectName) { var object = document.getElementById(objectName); if (newWidth != null) object.style.width = newWidth + 'px'; if (newHeight != null) object.style.height = newHeight + 'px'; } window.onload=initPage; window.onresize=initPage; </script> <style type="text/css" media="screen"> body { font-family: Helvetica, Arial, sans-serif; font-size: 1em; background-color: #fff; color: #fff; } #menuDisplay { position: absolute; top: 25px; left: 10px; width: 300px; height: 480px; overflow: auto; background-color: #666; } #contentDisplay { position: absolute; top: 25px; left: 250px; border: 2px solid #999; background-color: white; } </style> </head> <body> <iframe src="/books/3/292/1/html/2/menu.html" title="menuDisplay" name="menuDisplay"  width="240" height="480" frameborder= "0"></iframe> <iframe src="/books/3/292/1/html/2/introduction.html" id= "contentDisplay" title="contentDisplay" name="contentDisplay" width="756" height="800"></iframe> </body></html> width="240" height="480" frameborder= "0"></iframe> <iframe src="/books/3/292/1/html/2/introduction.html" id= "contentDisplay" title="contentDisplay" name="contentDisplay" width="756" height="800"></iframe> </body></html>
|
| 2. | function initPage() {…}
Add the initPage() function to your JavaScript.
This function determines the width and height of the window and then runs the resizeObject() function to set the dimensions of the menu and content iframes.
| 3. | function resizeObject(newWidth, newHeight, objectName) {…}
Add the resizeObject() function to your JavaScript. This function takes width and height values and applies them to the specified object.
| | | 4. | window.onload=initPage; window.onresize=initPage;
Add onload and onresize event handlers in the <body> element to trigger the initPage() function, which will resize the iframes to fit the window.
| 5. | #menuDisplay {…}
Add CSS rules to specify styles for your menu and content iframes. You will need to specify the absolute position for these frames, based on how wide you need the menu to be.
| 6. | [View full width] <iframe src="/books/3/292/1/html/2/menu.html" name="menuDisplay" width="240" height="480" frameborder="0"></iframe>
Set up the menu and content iframes, specifying the ID and name, as well as the initial width and height. You will also set the source for both iframes with menu.html (Step 7) for menuDisplay and the initial page for contentDisplay.
| | | 7. | menu.html
Create a new HTML document with the XHTML Transitional doctype that will hold the menu (Code 23.5). Steps 8 through 17 apply to this file.
Code 23.5. menu.html: The menu is made up of two columns, one side with the tabs for top level navigation, and the other side for the second level navigation. | | | 8. | var oldObject=null;
Initialize the variables:
| 9. | function openChapter(sectionNum) {…}
Add the function openChapter() to your JavaScript.
This function takes the number of the menu to be shown and converts it into the right ID. It then checks to see if there is a menu currently selected (oldObject), hides it and unhighlights its tab (oldObjectHi). Finally, it shows the selected menu (object) and highlights its tab (objectHi).
| 10. | .col-A, .col-B{…}
In your CSS, set up two columns using the float property. These will be used to place the tabs and menus next to each other.
| | | 11. | #menuIndex a {…}
Set the general style for links in the menu.
| 12. | #menuIndex .col-A a, #menuIndex .col-A a.sectionDim {…}
Set the style for the menu tabs, which are located in column A, including the various states. Also use these same styles to create a class called .sectionDim that will be used to dynamically unhighlight the tab in the openChapter() function.
| 13. | #menuIndex .col-A a.sectionHi {…}
Set the style for the highlighted state of menu tabs, which will be dynamically assigned in the openChapter() function.
| 14. | .sIndex {…}
Set a class used to style the sections, setting display: none to hide all menus when the page first loads.
| 15. | #s00Index {…}
Set the style for the default content to be displayed when the page first loads. In this example, I'm adding a brief instructional message.
| 16. | onclick="openChapter(1);"
In the <body>, set up the tab controls by adding an onclick event handler to an elementin this example a link element. The onclick triggers the openChapter() function, passing it the number of the menu to be shown.
| 17. | <div class= "sIndex">…</div>
Set up the menu objects that will be switched on and off.
|
 Tips Tips
|