Understanding the Data Management Process
| < Day Day Up > |
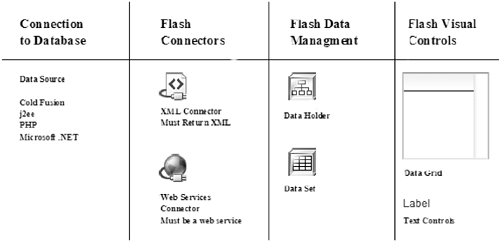
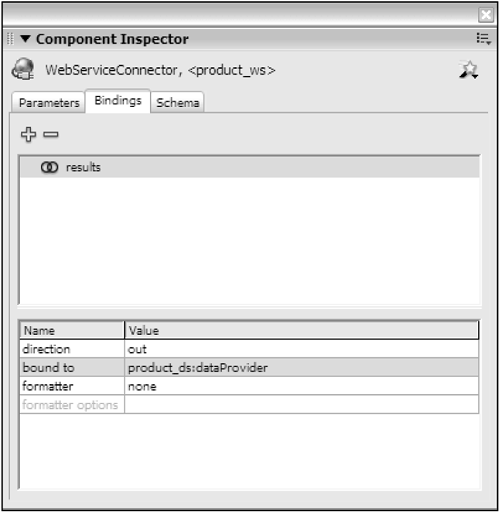
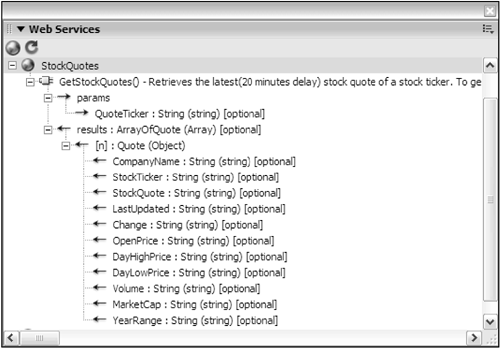
| The first step in creating a dynamic application is to define and build the external datasource. Flash MX Professional 2004 can currently connect to Web Services or extensible markup language (XML) files by using the connector components or by using the XML or Web Services classes directly. Macromedia is planning the release of a remoting connector component; currently the only way to use Flash Remoting is to use the remoting classes directly. Remember that Flash is a client-side technology and it cannot build Web Services on the server (or return XML from the server). We use the connector components to connect to the server. Creating server-side logic that returns the appropriate data structure to Flash is the job of the ColdFusion, J2EE, or .NET developer. The entire structure of the data integration process in Flash looks as shown in Figure 14.1. Figure 14.1. The connector components connect to a server, and that data can be managed in the Flash client using the dataset. In terms of application architecture, the connector components enable Flash to actually connect to a server, regardless of whether we use Web Services or XML. This can also be done completely in ActionScript 2.0 using the Web Services or XML classes. If Flash Remoting is used, you must connect to the server using the NetServices class. After the data has been loaded into the Flash Player, it is possible to link this data directly to user interface (UI) controls. However, in most applications, we have to manipulate the data before the user sees it. This is done through the data management components. You will need to make a choice in the development of your application: do you use code or the visual data binding? The process described in Figure 14.2 can be performed with the Visual Component Inspector, using data binding, or directly with ActionScript 2.0 code. For example, assume that a connector needs to reference a data management component to transfer the data structures. This can be done with ActionScript 2.0 code or this can be done with the Visual Component Inspector using the Bindings tab. Using ActionScript will ultimately give us more flexibility, but using visual data bindings is useful for quickly getting an application developed. Figure 14.2. Linking a connector to a data management layer using the Visual Component Inspector. The data management components, such as the dataset, have an underlying array with the names of items that are used to handle the data. A Web Services Connector component can retrieve an array from the server; this array can be referenced through the results property. Linking a dataset and a connector in code is as simple as pointing the array returned from the web service to the array used by the connector, as shown in the following samples: var myResult :Object = new Object(); myResult.result = function () { product_ds.items = product_ws.results; } product_ws.addEventListener ("result", myResult); In this chapter, we focus on using Flash Remoting to return data from a server. Flash Remoting enables calling a server-side method directly from ColdFusion, .NET, or J2EE, and will result in the consumption of less bandwidth than Web Services or XML because it uses the ActionScript Messaging Format (AMF) protocol. This protocol is more efficient than XML or Simple Object Access Protocol (SOAP). AMF is a binary protocol; SOAP and XML are both basically just plain text. Connector ComponentsThe connector components are used to translate the results of method calls to server-side datasources. The connector components provide a more visual and user-friendly way to deal with the XML and Web Services classes. For example, if a ColdFusion web service returns an array of objects, the Web Services Connector component will translate that data into an array of objects that Flash can use. Unlike Flash Remoting, this translation actually happens in the Flash Player at runtime. After you have your connector in place, you can link the results of connectors directly to visual UI controls, such as a list or a data grid. Even better, you can link the results to a data management component, which allows manipulation of the data. Connectors are used not only to retrieve the results from the server, but also to send the results back to the server. A Flash application can have different instances of connector components: one to retrieve the data and one to save the data. You can call multiple Web Services in one Flash document, so this means that you can have many instances of connectors on the Stage. This is one advantage of not using the connector components and using the intrinsic Web Services or XML classes; we can make multiple calls to Web Services or XML documents without having multiple instances of the connectors on the Stage. The visual display for the connectors is used only in the authoring environment and isn't included with the published SWF. In addition, the connector components add more file size to your application if you are not using the component framework. It is possible to link a connector directly to a UI control and bypass the data management layer where the dataset and DataHolder are used. However, this means that if you need to manage any changes, you will be responsible for handling them yourself. This might involve creating many loops , conditional logic sequence, additional arrays, and data structuresdepending on the complexity of the application. The dataset and DataHolder make handling this data much easier because the data is presented in an intuitive way. For applications of any complexity, it is recommended to use the Flash data components to manage the data rather than linking a component directly to a UI control. After all, Macromedia has already built this sophisticated architecture for us; there is no reason why we should have to build it again. The XML and Web Services Connector components have both parameters and results. The parameters are required by the server to execute. Examine Figure 14.3. Figure 14.3. Viewing a web service in the Web Services panel. The web service requires a stock symbol as a parameter and will return an Array of Objects as the result. The Web Services panel tells us all this and more. In Flash MX Professional 2004, you have the option of binding connector objects to visual controls (or other data management components) using either the Visual Property Inspectors or ActionScript 2.0 code. Using Connector Components with Visual Data BindingIn a simple application, it can make sense to use visual data binding to link connector components directly to UI controls, bypassing the data management layer. Visual data binding is simply one way of connecting components to each other. In many cases, visual data binding can be combined with ActionScript 2.0 code. In some cases, it is much easier to use the Component Inspector rather than ActionScript 2.0. For example, it is much easier to use the XML connector with data binding and a schema to convert XML objects into arrays. The ActionScript 2.0 code required to do this is long and complex. However, in some cases, data binding can fall short. For example, it is usually much more flexible to specify a label field through ActionScript 2.0 code instead of through a formatter on visual data binding. The formatters are available in the Bindings tab of the Component Inspector and are designed for people who would not code any ActionScript 2.0 code at all. Components can be bound together without using any connector objects at all. For example, if you wanted to create a master detail view, which populates text fields when an item in a list box is selected, text components could display the details of the selected item on the list box using data binding. Visual data binding can be used only with version 2 components. Actually using visual data binding will give you a better idea of the process.
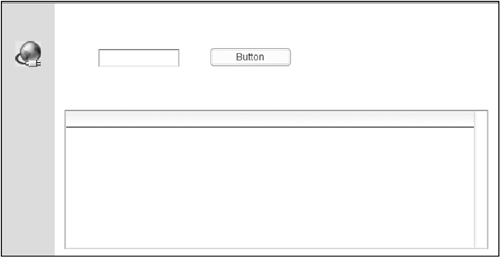
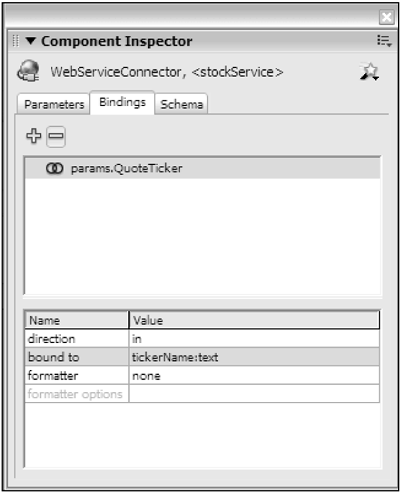
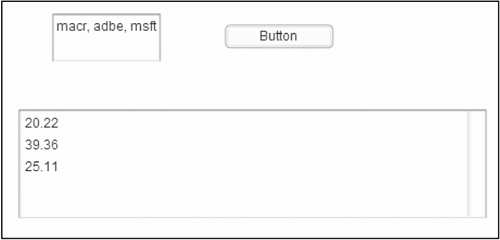
The following exercise builds an interface to a stock quote web service. The end user will pass parameters (stock quotes) to the web service. The components will also display the results of the web service in a list component.
Using ActionScript 2.0 with Connector ComponentsThe ActionScript 2.0 code for the same application as presented previously would follow the same process, but it would not use any of the visual inspectors at all. Ultimately, by using ActionScript 2.0 code, however, we will have more control over the application.
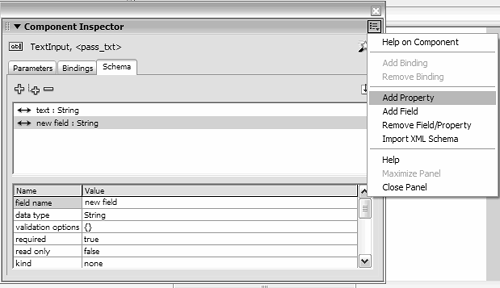
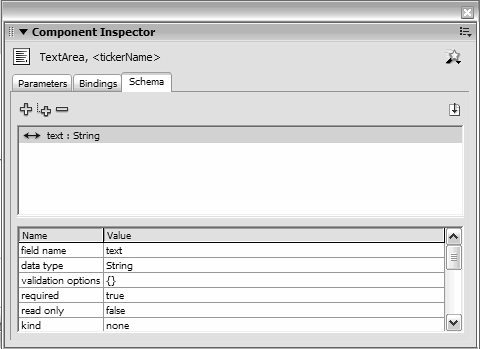
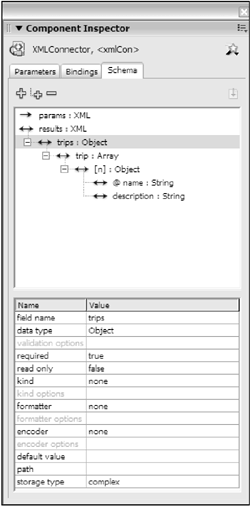
var stockListener :Object = new Object(); stockListener.result = function () :Void{ stockResults.dataProvider = stockListener.results; stockResults.labelField = "StockQuote"; } stockService.addEventListener ("result", stockListener); Using SchemasA schema is simply a graphical representation of a data structure. It could represent an array of objects, XML data, or even the properties of a UI component. As you may have noticed, all version 2 components have a tab called Schema on the Component Inspector. The Schema tab shows only those properties of the component that commonly contain data, such as the results and parameters of a web service. Schemas are similar to document type definitions (DTDs) in XML. Just as a DTD defines the legal structure of an XML document, a schema defines the underlying data structure of a Flash component. In many cases, the schema is automatically defined, such as when a web service is interpreted by the built-in Web Services Description Language (WSDL) parser; in such a situation, Flash MX Professional 2004 pulls out the appropriate data structures for the schema. With other components, the schema is predefined within the component. For example, with a text area component, the only bindable property by default is the text property. If, for example, you wanted to give the user the ability to turn a password field on or off, you could add the password property to the schema of the component object instance. Examine Figure 14.7.
Figure 14.7. Content of the Schema tab. In other cases, you need to define the schema for the component instance; it is not predefined in the class of component as with a text component. A good example of this is when using the XML Connector component. The schema can be loaded in from an external XML file, and it shows the Flash data structures to which the XML translates . The XML elements are interpreted into ActionScript data structures using the schema. Each child element of the XML is examined and the type of data of its contents is also documented. The schema is in addition to the loaded XML itself. The XML in Figure 14.9 has attributes of name, which translate to a string, and individual nodes indicating description, which also translate to a string. These are stored as objects within an array and are perfect for binding to UI components. The DataBinding class, using the schema you define, is responsible for actually performing the translation of the XML to ActionScript data structures. Figure 14.9. Viewing the attributes. Even though the datatype of the results property is XML, the DataBinding class will perform the translation for us into ActionScript objects and arrays as long as the schema is defined. |
| < Day Day Up > |
EAN: 2147483647
Pages: 162
