| So far, you have been taking advantage of enhanced functionality in list-based components when it concerns drag and drop. Now it is time to learn how to implement drag and drop on non-enhanced components. In this particular task, the use case is very simple: you want to drag a Label to a List. Because the Label does not have enhanced drag-and-drop functionality, there is more of a burden on you as the developer in implementation. Understanding what the list-based components did for you is a good place to start when having to write all the implementation yourself. Here is a list of mechanisms, hidden from you when using the list-based components, which you will need to do when implementing drag and drop without the help of the enhanced components: Assign the data to the DragSource object. Check to see whether the formats allow dropping into the drop target. Use the data in the drop target (although in the second task you did some of this manually). Permit the component to be dragged. Actually accept the drop.
Although you have been using the DragSource class up to now in this lesson, you will need to dig deeper into the class when implementing all the functionality yourself. In this task, you use the following methods of the DragSource class: Method of DragSource Class | Description |
|---|
addData(data:*,format:String):void | Adds data to the associated format in the DragSource object; the * denotes the data can be of any data type. | hasFormat(format:String):Boolean | Returns true if the DataSource object contains a matching format of the drop target; otherwise, it returns false. | dataForFormat(format:String):Array of* | Retrieves the data for the specified format added by the addData() method; returns an Array of objects containing the data in the requested format; a single item is returned in a one item Array. |
These methods allow you to implement the first three hidden mechanisms. To accomplish the last two, you need to use methods of the DragManager class: Method of DragManager Class | Description |
|---|
doDrag(initiator:Component, dragSource:DragSource, mouseEvent:MouseEvent):void | Enables the initiator component to be initially dragged; often in an event handler for mouseDown or mouseMove. | acceptDragDrop(target:Component):void | Call this method in your dragEnter handler; often used in an if statement where the condition uses the hasFormat() method. |
Tip  | The doDrag() method has a number of optional parameters to control the look of the drag proxy. |
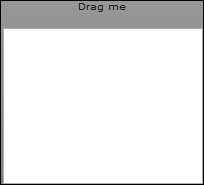
Now you're ready to start coding this task. 1. | Examine the code in the Task3_Label_to_List.mxml file and then run it.
You see you have a Label with the text "Drag me" in it and an empty List below it. At this point, there is no drag-and-drop functionality working.
| 2. | Import the four classes shown here that you will need in the application:
import mx.core.DragSource; import mx.managers.DragManager; import mx.events.DragEvent; import mx.core.IUIComponent;
You could have also just used these classes as data types, and Flex Builder would have imported them for you automatically.
| | | 3. | In the Label, add a mouseDown event and have the event call a function named dragIt(). The function call should pass four parameters; the first is the drag initiator, which in this case is the instance name of the Label: myLabel. The second parameter is the data you will later place in the DragSource object. In this case, just pass a String of "My data here". The third parameter is the event, which of course is just event. The last parameter is the format that will be associated with this data. In this task, use myFormat.
mouseDown="dragIt(myLabel,'My data here',event,'myFormat')"
This is the function that will be called to initiate the drag-and-drop operation. You need to pass the parameters because they are all needed in the function to allow:
| 4. | At the bottom of the <mx:Script> block, create a private function named dragIt(), data typed as void. The function should accept four parameters that, of course, correspond to the data passed to the function. Use the names and data types shown here:
initiator:Label dsData:String event:MouseEvent format:String
Of these parameters, the initiator could be any kind of component, and the dsData could be nearly any kind of data you want to be dragged from one component to another. The event will often be the mouseDown MouseEvent or the mouseMove event, but that would not change either the event parameter name nor the data type used here. The format will always be a String.
| 5. | As the first line of code in the function, create a variable local to the function named ds data typed as DragSource and set it equal to a new DragSource object.
var ds:DragSource=new DragSource();
This creates the DragSource object that will have data added to it.
| | | 6. | Next in the function, use the addData() method of the ds DragSource object to add the data passed in the dsData parameter to the ds object. Associate it with the format passed in the format parameter.
ds.addData(dsData,format);
An important point here is that you can store data associated with multiple formats, which means you can use multiple addData() methods on the same DragSource object.
You might want to do this if you have multiple drop targets and want to drop different data in each drop target. The different drop targets would use different arguments in the dataForFormat() method to get the appropriate data.
| 7. | As the last line of code in the function, permit the Label to be dragged by calling the static doDrag() method of the DragManager class. You pass it the three parameters initiator, ds, and event. Check to make sure that your completed function appears as shown here:
private function dragIt(initiator:Label,dsData:String,event:MouseEvent, format:String):void{ var ds:DragSource=new DragSource(); ds.addData(dsData,format); DragManager.doDrag(initiator,ds,event); }
Remember that a static method is one you can invoke directly from the class without first instantiating it.
| 8. | Run the application and drag the Label. At this point there is no drop target that will accept the Label.
You now move on to coding the List to accept the drop of the Label and displaying the data passed in the DragSource in the List.
| 9. | In the List, add a dragEnter event and have it call a function named doDragEnter().
The function should pass two parameters. The first is the event, and the second is the formatwhich in this case should match the format used earlier: myFormat.
dragEnter="doDragEnter(event,'myFormat')"
You are passing data to the function that allows the initiator, the Label, to be dropped on the drop target, the List.
| 10. | At the bottom of the <mx:Script> block, create a private function named doDragEnter(), data typed as void. The function should accept two parameters. Name the first parameter event, data typed as DragEvent, and the second parameter format, data typed as String.
Both these parameter values are needed to allow the dropping of the initiator.
| | | 11. | Insert into the function an if statement that checks to see whether the formats of the two objects match. Use the hasFormat() method of the dragSource object, which is contained in the event object. The argument of the hasFormat() method should be the format parameter passed to the function.
if(event.dragSource.hasFormat(format)){ }
What is occurring is that the List is looking in the DragSource object and seeing whether a format exists that matches the formats it is allowed to accept. The hasFormat() function will return either true or false.
| 12. | If the hasFormat() function returns true, use the DragManager's static function acceptDragDrop() method to allow the dropping. The argument of the function should be the List itself, which is best referred to in this case as event.target.
DragManager.acceptDragDrop(event.target);
You could have actually replaced event.target with the instance name of the List, myList, and the function would have had the same result. The advantage of using the more generic event.target is that it makes this function more reusable. You can use the function for any dragEnter result handlerit will work correctly.
| 13. | The acceptDragDrop() method is defined to accept an object of type IUIComponent. For this reason you need to cast event.target as an IUIComponent to satisfy the compiler.
The IUIComponent class defines the basic set of APIs that must implemented to be a child of a Flex container or list.
| 14. | Be sure that the new function appears as follows and then run the application.
private function doDragEnter(event:DragEvent,format:String):void{ if(event.dragSource.hasFormat(format)){ DragManager.acceptDragDrop(IUIComponent(event.target)); } }
You should now be able to drag the Label. When it moves over the List, the red X disappears, and you can drop the drag proxy. At this point, nothing happens when you do the drop.
| 15. | In the List, add a dragDrop event and have it call a function named doDragDrop(). The function should pass two parameters, the event and the format, which in this case should match the format used earlier: myFormat.
dragDrop="doDragDrop(event,'myFormat')"
You are passing the data needed to have the data retrieved from the DragSource and have it displayed in the List.
| | | 16. | At the bottom of the <mx:Script> block, create a private function named doDragDrop(), data typed as void. The function should accept two parameters. Name the first parameter event, data typed as DragEvent, and the second parameter format, data typed as String.
You need the event object in this function because it contains the DragSource object, and that is where the data is stored. Remember that you stored the String "My data here" in the DragSource object in steps 36 of this task. The format is needed because that is how you pull data from the DragSource object using the dataForFormat() method.
| 17. | As the first line of code in the new function, create a variable local to the function named myLabelData, data typed as Object, and set it equal to a new Object.
var myLabelData:Object=new Object();
This is a temporary variable to hold the data when extracted form the DragSource object.
| 18. | Use the dataForFormat() function to retrieve the data from the dragSource property of the event object. The argument of the function should be the format parameter passed to the function.
myLabelData=event.dragSource.dataForFormat(format);
Remember that you can store data associated with multiple formats, so you must specify which format's data to retrieve when retrieving data.
| 19. | Display the data just retrieved in the List. You need to use the addItem() method on the List's dataProvider property to do this.
myList.dataProvider.addItem(myLabelData);
You have achieved your goal of moving the Label's data into the List.
| | | 20. | Be sure that the new function appears as follows and then run the application.
private function doDragDrop(event:DragEvent,format:String):void{ var myLabelData:Object=new Object(); myLabelData=event.dragSource.dataForFormat(format); myList.dataProvider.addItem(myLabelData); }
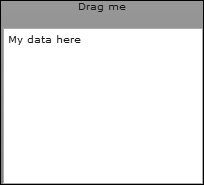
Now when you drag and drop the Label onto the List, you will see that the data from the Label, the String "My data here", is displayed in the List. The following example shows the List after successfully dropping the Label data.
Now that you have a solid background in drag and drop, you will implement drag-and-drop functionality in the e-commerce application of FlexGrocer.
|
|