When you add a product, it is possible that the image you want to represent the product in the cart is not on the server. You will then need to use the File Upload capabilities in Flex to upload the file to the server. Because you have two types of management screens, new and existing products, it makes sense for you to make a file upload component for reuse.
1. | Right-click the view/dataEntry folder and select New > MXML Component. In the New MXML Component dialog box, set the filename to be FileUpload.mxml, set the base component to a Canvas, clear the Height and Width boxes, and then click Finish.
The component will be very basic. You will simply put in a button and the logic for uploading the file.
|
| |
2. | At the top of the file, place an <mx:Script> block to hold variables and functions.
<mx:Script> <![CDATA[ ]]> </mx:Script>
|
3. | Inside of the script block, add an import for flash.net.filereference.
import flash.net.filereference;
The filereference class is used to both browse for a specific file as well as upload a file to a specified location.
|
4. | Create a private variable called fileref, of type FileReference.
private var fileref:FileReference;
|
5. | Create a private function called fileBrowse() and have it return void.
private function fileBrowse():void{ }
|
6. | Inside the function, set the fileref variable to a new FileReference instance.
private function fileBrowse():void{ this.fileref = new FileReference(); }
|
7. | Add an event listener on the fileref object that listens for the Event.Select event. Have it assigned to the selectHandler function.
private function fileBrowse():void{ this.fileref = new FileReference(); fileref.addEventListener(Event.SELECT, selectHandler); }
The filereference class contains many different events pertaining to choosing and uploading files. The Event.Select event fires after the user has selected the file in the dialog box and chooses OK. When working with built-in Flex components, it is a standard practice to use the event names stored as variables within the event class instead of a string value, when you assign your event listeners through addEventListener. In this case, instead of passing in the string value of 'select' you use the variable Event.SELECT to listen to the selection of the file from the file picker. While they both evaluate to the same thing, by using the variable you don't have to worry about any change to the underlining event name affecting your code and the Flex compiler can throw an error at compile time if the event you are trying to access does not exist in the class.
|
| |
8. | Call the browse() method on the fileref object, which will open up the dialog box to select the file to upload.
private function fileBrowse():void{ this.fileref = new FileReference(); fileref.addEventListener(Event.SELECT, selectHandler); fileref.browse(); }
|
9. | Create a private function called selectHandler() that accepts one argument called event of type Event. Have it return void.
private function selectHandler(event:Event):void { }
You will use this function to initiate the uploading of the file to the server.
|
10. | Inside the function, create a local variable called request of type URLRequest. URLRequest accepts a valid URL as its argument in its constructor. Set it to http://localhost:8300/flexGrocer/cfcs/fileUpload.cfm.
[View full width] private function selectHandler(event:Event):void { var request:URLRequest = new URLRequest ("http://localhost:8300/flexGrocer/cfcs/  fileUpload.cfm"); } fileUpload.cfm"); }
This location holds the location to the ColdFusion page that will upload the file.
Note  | When you upload a file via Flex, the file is uploaded as a form value with the name of Filedata. |
|
11. | Call the upload() method of the fileref object, passing in the local request object as its only argument.
[View full width] private function selectHandler(event:Event):void { var request:URLRequest = new URLRequest ("http://localhost:8300/flexGrocer/cfcs /fileUpload.cfm"); fileref.upload(request); }
|
12. | Create a Button to enable the user to start the upload process. Set the label to Browse and on the click event handler, have it call the fileBrowse() function.
<mx:Button click="fileBrowse()" label="Browse"/>
|
13. | Save FileUpload.mxml.
|
| |
14. | Open AddProduct.mxml from your views/dataEntry directory.
The file is located in the flexGrocer\view\dataEntry\ directory.
|
15. | In the base VBox that wraps the file, create namespace v and point it to views.dataEntry.*.
<mx:VBox xmlns:mx= "http://www.adobe.com/2006/mxml" xmlns:v="views.dataEntry.*" >
You now have a namespace to reference the FileUpload component.
|
16. | Toward the bottom of the page, replace the button labeled Browse with your new FileUpload component. Prefix the component name with v.
<v:FileUpload />
You removed the old button and are calling your component instead.
|
17. | Remove the import statement for flash.net.filereference and the fileBrowse() function.
Because this code has been moved to the FileUpload component, it is a good practice to remove it from this file, even though leaving it here would not affect anything.
|
18. | Save AddProduct.mxml.
|
19. | Open UpdateDeleteProd.mxml from your views/dataEntry directory.
The file is located in the flexGrocer\view\dataEntry\ directory.
|
20. | In the base HBox that wraps the file, create namespace v and point it to views.dataEntry.*.
<mx:HBox xmlns:mx= "http://www.adobe.com/2006/mxml" xmlns:v="views.dataEntry.*">
|
21. | Toward the bottom of the page, replace the button labeled Browse with your new FileUpload component. Prefix the component name with v.
<v:FileUpload />
You removed the old button and are calling your component instead.
|
22. | Remove the import statement for flash.net.filereference and the fileBrowse() function.
Because this code has been moved to the FileUpload component, it is a good practice to remove it from this file even though leaving it here would not affect anything.
|
23. | Save UpdateDeleteProduct.mxml.
|
| |
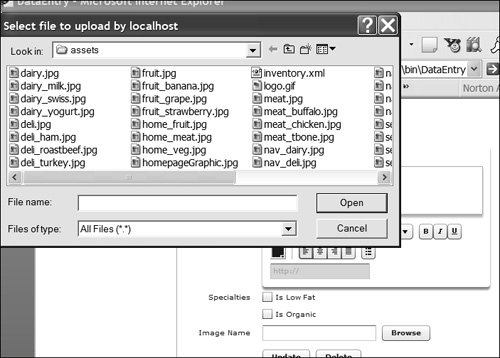
24. | Open and run the DataEntry.mxml file. On either the Add or Update tab, click the Browse button. Select a file and go to the file system to see the image uploaded.
When you click the Browse button, you should see a dialog box similar to the following pop-up window. The uploaded file should be in your flexGrocer/assets directory.
|