In this task, you will implement history management in the CategoryView.mxml component so that users can navigate between categories using the back and forward buttons on the browser.
1. | Open CategoryView.mxml from the views/ecomm directory.
You will implement history management inside of this component. When users click a category, they can return to the previous category by clicking the back button or move to the next category by clicking the forward button.
|
| |
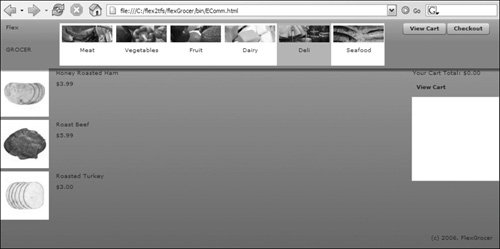
2. | Run the application from EComm.mxml and click on the HorizontalList that contains the categories of food.
Notice that neither the back nor forward buttons are enabled. You will enable these buttons in the next steps.
|
3. | Return to CategoryView.mxml; inside the <mx:Script> block, import the mx.managers.IHistoryManagerClient interface and the mx.managers.HistoryManager class.
import mx.managers.IHistoryManagerClient; import mx.managers.HistoryManager;
These classes are needed to use history management in Flex. These classes interpret the information sent from the history.swf file, which decodes the URL parameters that have been saved in an invisible frame of the HTML document. When the user moves back and forth using the browser buttons, the HistoryManager will also save this information to the invisible frame.
|
4. | On the <mx:HorizontalList> tag at the top of the file, add an implements attribute that references the mx.managers.IHistoryManagerClient interface.
<mx:HorizontalList xmlns:mx="http://www.adobe.com/2006/mxml" dataProvider="{cats}" itemRenderer="views.ecomm.TextAndPic" horizontalScrollPolicy="off" click="categorySelect()" implements="mx.managers.IHistoryManagerClient">
Implementing the IHistoryManagerClient interface specifies that you will create two methods in this component, with the names loadState() and saveState().
If you tried to compile the application at this point, you would receive an error because neither the loadState() method nor the saveState() method have been implemented. You will implement them in the next steps.
|
5. | Call a new new method with the name of registerWithHistoryManager(), on the creationComplete event of the HorizontalList control.
<mx:HorizontalList xmlns:mx="http://www.adobe.com/2006/mxml" dataProvider="{cats}" itemRenderer="views.ecomm.TextAndPic" horizontalScrollPolicy="off" click="categorySelect()" implements="mx.managers.IHistoryManagerClient" creationComplete="registerWithHistoryManager()">
You need to register this component with the HistoryManager to receive notice when the user clicks the back or forward buttons on the browser. Encapsulating the work to register the component into a separate method, registerWithHistoryManager(), is a good design practice.
|
| |
6. | In the <mx:Script> block, create a new private method with the name of registerWithHistoryManager() that returns void. Inside the method, call the static register method of the HistoryManager and pass it a reference to the component, as shown.
private function registerWithHistoryManager():void{ HistoryManager.register(this); }
This code will register the CategoryView component with the HistoryManager, and enable the forward and back buttons in the browser. The CategoryView component is referenced from the this keyword.
|
7. | Remaining in the registerWithHistoryManager() method, save the current state in the HistoryManager using the static save() method. The final registerWithHistoryManager() method should look like this:
private function registerWithHistoryManager():void{ HistoryManager.register(this); HistoryManager.save(); }
The save() method of the HistoryManager saves the current state of the component. When you first register a component, you must explicitly call this save() method.
|
8. | Change the name of the categorySelect() method to broadcastCategoryEvent(). The new broadcastCategoryEvent() method should look as follows:
private function broadcastCategoryEvent():void{ var e:CategoryEvent = new CategoryEvent(this.selectedItem as Category, "categorySelect"); this.dispatchEvent(e); }
Remember that the categorySelect event is called when the user clicks a category in the HorizontalList control. You are moving the functionality of broadcasting an event into a separate method.
|
| |
9. | Create a new private method with the name of categorySelect() that returns void. On the first line of the method, call the static save() method of the HistoryManager class. On the second line, call the broadCastCategoryEvent() method you created in the last step to dispatch the event.
private function categorySelect():void{ HistoryManager.save(); broadcastCategoryEvent(); }
When the user clicks a category, this method saves the current state in the HistoryManager and broadcasts the event.
|
10. | Remaining in the <mx:Script> block, create a new public method with the name of saveState() that returns an Object. Inside the method, create a new local object with the name of state. Create a selectedIndex item property of the state object and set this property to the selectedIndex property of the component. Return the state object from the method. The method should look as follows:
public function saveState():Object{ var state:Object = new Object(); state.selectedIndex = this.selectedIndex; return state; }
The HistoryManager class's save() method collects the state object returned by the saveState() method for each registered component. This method is required and saves the current selectedIndex of the HorizontalList control so you can easily come back to it later.
Note  | In previous lessons you were told that selectedItem is preferable to selectedIndex when working with controls. The selectedChild refers to the actual item selected while the selectedIndex refers to the order of that item in the list, which can change if you reorder the elements. However, when working with history management, you can only store a limited amount of data. Storing a single number that indicates the position takes less storage space than the name of the selected child. Storing the index is a common practice in this scenario. |
|
| |
11. | Remaining in the <mx:Script> block, create a new public method with the name of loadState(). The method should accept a parameter of state data typed as Object. Be sure that the method returns a type of void. On the first line of the method, declare a new variable named newIndex data typed as an int. Next, add conditional logic that checks for the existence of the state object. If it exists, set the value of the newIndex variable to the selectedIndex of the state object, cast as an int. Remember, the state object is the object that you created in the saveState() method.
public function loadState(state:Object):void{ var newIndex:int; if (state) { newIndex = int( state.selectedIndex ); } }
This code resets the selectedIndex of the HorizontalList to the index that was saved earlier. The loadState() method is automatically called by the HistoryManager when the back and forward buttons on the browser are selected. The categorySelect event will fire when the previous state is selected.
|
12. | Remaining in the loadState() method, add an else statement that will set the value of newIndex to -1. After the closing brace of the previous conditional logic, use another if statement to check whether the value of the newIndex variable is different than the selectedIndex variable. If so, set the value of the selectedIndex variable to the value of the newIndex variable and call broadcastCategoryEvent(). Your final loadState() method should appear as follows:
public function loadState(state:Object):void{ var newIndex:int; if (state) { newIndex = int( state.selectedIndex ); }else{ newIndex = -1; } if(newIndex != selectedIndex){ selectedIndex = newIndex; broadcastCategoryEvent(); } }
The if statement, which checks if the state object is null, catches the case where you have selected only one category and then clicked the back button. In this case, you have set the newIndex variable equal to -1, which removes any selection from the HorizontalList. If the newIndex variable is not equal to the current selectedIndex, you set the HorizontalList control to display the previous category the user selected. You then call the broadcastCategoryEvent() method to inform other areas of the application that the category has changed. Remember, the loadState() method is called only when the back or forward buttons on the browser are selected.
|
13. | Open ecomm.as from the as directory.
You need to make a change in ecomm.as to support the case when a category is not selected.
|
| |
14. | Find the displayProdByCategory() method. Add conditional logic around the existing contents of the method to check if event.cat is not equal to null. Add an else clause to the condition logic, and set the prodByCategory variable equal to a new ArrayCollection. Your displayProdByCategory() method should look as follows:
private function displayProdByCategory(event:CategoryEvent):void{ if (event.cat != null){ var prodArray:Array= catProds.getProdsForCat(event.cat.catID); prodByCategory=new ArrayCollection(prodArray); }else{ prodByCategory=new ArrayCollection(); } }
If the category information passed to this method is not valid, the prodByCategory variable will be set to an empty ArrayCollection, which will cause the FoodList component to not display any items. If a user selects only one category, and then clicks the back button, we will now also have correct behavior.
|
15. | Save and run the application. Click on different categories and navigate throughout the application using the back and forward buttons on the browser.
 You should see that the back and forward buttons are enabled as you move through the application using the history management functionality. You should see that the back and forward buttons are enabled as you move through the application using the history management functionality.
|