Setting Up E-Mail Workgroup Messaging
If you used e-mail workgroup messaging in previous versions of Microsoft Project and need a little time to transition to another workgroup collaboration method, you can download the files that install the workgroup files. You can do this with either Microsoft Office Project Standard 2003 or Project Professional 2003.
Understanding System Requirements
System requirements for installing and enabling workgroup e-mail messaging are as follows :
-
The project manager must have Project Standard 2003 or Project Professional 2003 installed on his or her computer.
-
A network, typically a local area network (LAN), must be in place to transmit e-mail messages.
-
The e-mail system must be compliant with the Messaging Application Programming Interface (MAPI) and it must be a 32-bit system. Microsoft Outlook is an example of a MAPI-compliant system. Other examples include Microsoft Exchange Server, Microsoft Mail, Lotus cc:Mail, and Lotus Notes.
Downloading and Installing the Workgroup Message Handler
Files and information for installing and enabling workgroup e-mail messaging are available on the Web. To download and install the workgroup message handler, follow these steps:
-
Open your Web browser and go to the Microsoft Download Center at www.microsoft.com/downloads .
-
Under Search For A Download in the Product/Technology box, click Microsoft Project.
-
In the Keywords box, type workgroup message handler .
A list of related downloads appear. Click the download link related to Project 2003.
-
Follow the steps provided to download and install the files for the workgroup message handler on your computer.
After you have installed the workgroup message handler, you need information about specific registry settings that enable the message handler in Microsoft Project. To find the Knowledge Base article and set your registry, follow these steps:
-
Using your Web browser, go to the Microsoft Product Support Services Web site at
support.microsoft.com . -
In the Search The Knowledge Base box, type the article ID 818337 or the keywords project workgroup message handler .
-
Under Search Results, find and click the article titled "Configuring Workgroup Message Handler for Microsoft Office Project 2003."
-
Follow the instructions provided to configure and enable the workgroup e-mail messaging features in Project 2003. These instructions include registry setting updates.
Note Because the workgroup message handler is being phased out, and the downloadable files and instructions are only an interim solution, be aware that technical support is not available for e-mail workgroup messaging.
Preparing Your Project Plan for E-Mail Collaboration
After you set up the workgroup message handler, be sure that the e-mail addresses for all team members are added in the project plan. To add team member e-mail addresses, follow these steps:
-
In Microsoft Project, click Collaborate, Collaboration Options.
The Options dialog box appears with the Collaborate tab displayed.
-
In the Collaborate Using list, select E-Mail Only. If you get a warning message, close it. Click OK to close the Options dialog box.
The E-Mail Only option becomes available only after you install the workgroup message handler and set the registry to enable the message handler in Microsoft Project.
-
Display the Resource Sheet.
-
Select the column to the right of where you want the Email Address column to be inserted.
-
Click Insert, Column.
The Column Definition dialog box appears.
-
In the Field Name box, click Email Address (see Figure 19-1). Click OK.
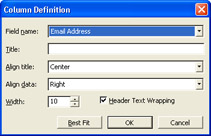
Figure 19-1: Click the Email Address field in the Column Definition dialog box. -
In the Resource Sheet, enter the resources' e-mail addresses in their corresponding Email Address fields (see Figure 19-2).
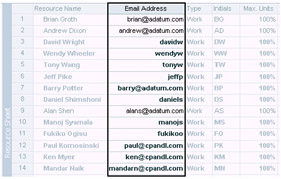
Figure 19-2: Enter e-mail addresses in the Resource Sheet. -
Click File, Save.
| |
If you haven't added resource names or other information yet, you can add resource names along with their e-mail addresses automatically. If you use Microsoft Outlook, you can add resource names and e-mail addresses through the Outlook Address Book. The same is true if you use Active Directory.
Use your Outlook Address Book to enter resource names and e-mail addresses as follows:
-
Display the Resource Sheet.
-
Click Insert, New Resource From, Address Book.
Your Outlook Address Book opens.
-
Select the names of the resources you want to add to your project plan and then click the Add button. When done, click OK.
If you use Active Directory, enter resource names and their e-mail addresses as follows:
-
Display the Resource Sheet.
-
Click Insert, New Resource From, Active Directory.
-
Select the names of the resource(s) you want to add to your project and then click the Add button. When done, click OK.
The names and e-mail addresses of the selected resources are added to your project plan.
| |
EAN: 2147483647
Pages: 268